Every crochet enthusiasts will be delighted to learn two simple and easy ways on how to work the Magic Ring, or also referred to as the Magic Loop, Magic Circle or Adjustable Ring.
These two methods that I will be sharing are far simpler than you might imagine and offers easy-to-remember approaches to your next crochet project. It is also ideal for beginner crocheters.
What’s the purpose of The Magic Ring you might ask? This technique serves as a foundation starting point before working on a crochet project in the round. It enables the creation of a tight, closed center for circular project. It presents an ideal solution for projects such as granny squares, amigurumi projects, or mandalas, just to name a few.
Granny Squares Starts with a Magic Ring

Granny squares are little humble crochet squares that start off with the crochet magic ring method. It is then joined with a slip stitch and then worked continuously in the round eventually creating four even corners.
This is when the magic ring evolves into a square that can be assembled in a variety of different ways. It can be built up into a symmetrical or asymmetrical arrangement, depending on what your pattern calls for.
Granny squares are incredibly versatile and can be used in a variety of ways. One popular way to use granny squares is to join them together to create a larger project like this dress or this bandeau!
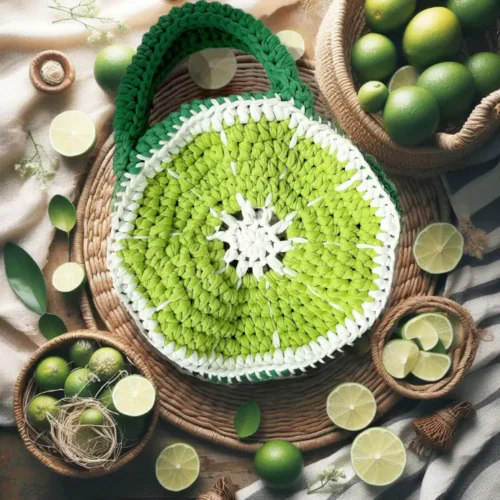
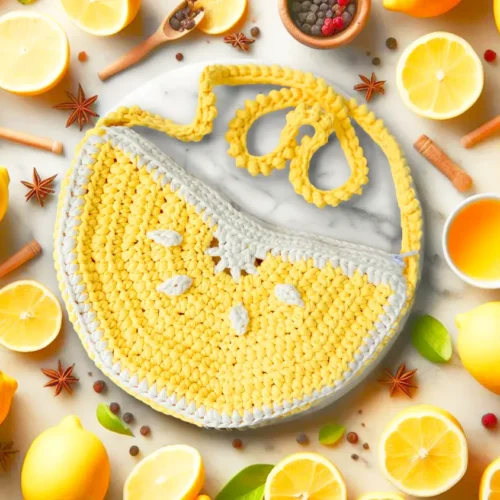
And if this sounds appealing, check out these free patterns below using the simple magic ring technique!


Here are two techniques on how to make work up a magic ring or magic circle in crochet. I will show you how easy it is with a step-by-step photo tutorial showing each step as you go.
If you’d prefer to watch the Magic Ring How To video crochet tutorial instead, then skip these steps and jump right on down.
Related Post:
No more twisted chains in the round
How to Join Yarn ends
Chainless Foundation Stitch
Option 1 – The 3-Fingers Approach
The first option is what I call the 3 fingers approach. Unlike other tutorials where you would need to twist and turn your hand around the yarn. This step only requires the release of 2 fingers to work a knot.


First, take the yarn and wrap it around your 3 middle fingers from the outside in.

Then, remove your 2 bottom fingers while holding on to the loop with your thumb and index finger and insert your hook through the big loop and draw up a small loop through the ring.


Next, use your right hand to hold on to the ring and loop, while you prepare your left hand with the working yarn.


Return the loop to your left hand and work a slip knot

Chain 1, and work your first round of stitches be it single crochet stitches or a double crochet stitches. Any basic crochet stitches will work. You will insert your hook through the center of the ring to make your stitch.

You will be working around the tail as well.

Once you have completed the last stitch, slip stitch into the first stitch to join and pull the working end of the yarn tail to close up the circle.
This technique creates a center that can be adjusted to any size to ensure that there is no hole or gap in the center of your project.
Remember to always pull the tail end of the yarn tightly to close up the loop, and continue working into the round according to your crochet pattern instructions.
If you would like to receive free written patterns and video tutorials straight into your inbox, just click Subscribe to get into our mailing list.
Option 2: The 2 Chains Method
The second option in this crochet technique is another great way to working up a “version” of the magic ring or magic circle. While it may deviate from the traditional magic ring crochet technique, however, this method is the easy way out if all else fails. The best thing about this simple approach is that it requires nothing more than two chains as the crochet foundation.

Work a regular slip knot, but make sure that the loop is small and held tight

With your crochet hook, work 2 chains

Work the required number of stitches through that first chain or the 2nd chain from the hook. The tip here is to not pull your stitches too far away from the chain otherwise, it will stretch and not be able to close up again.

Slip stitch through the first stitch to close. Work your second round as usual.

This is a great alternative to the magic circle/ magic ring if you are having trouble with Option 1.
***
With these step-by-step instructions, you will have successfully mastered the magic ring in no time. Let me know in the comments below which ways work best for you.
I hope this tutorial was helpful! Let me know if you have any other ideas you would like for me to share.
Happy Hooking
Shaz 🧶