How to Crochet a String Bikini Bottom | Free Pattern & 📺 Video Tutorial

Easy string bikini bottom tutorial
Save this Pin for later

If you’re looking for a quick and easy crochet bikini bottom to make this summer, then this one is for you.

This is one of the easiest crochet string bikini designs yet and I have it all laid out here step by step. It is also a perfect first piece to make for beginners!

This pattern tutorial is also available on my YouTube Channel where it is worked up in size small. However, If you would like a printable and ad-free PDF copy of this Rochelle cheeky string bikini bottom pattern, it is available for purchase in my shop or you can add this to your Ravelry queue

(Also, check out the matching top here).

DESIGN INSPIRATION

rochelle string bikini
Paired with the Rochelle String Bikini Top


Designing bikinis was the first crochet-ed item I’ve ever made and it was a lot of trial and error working up the perfect fit.

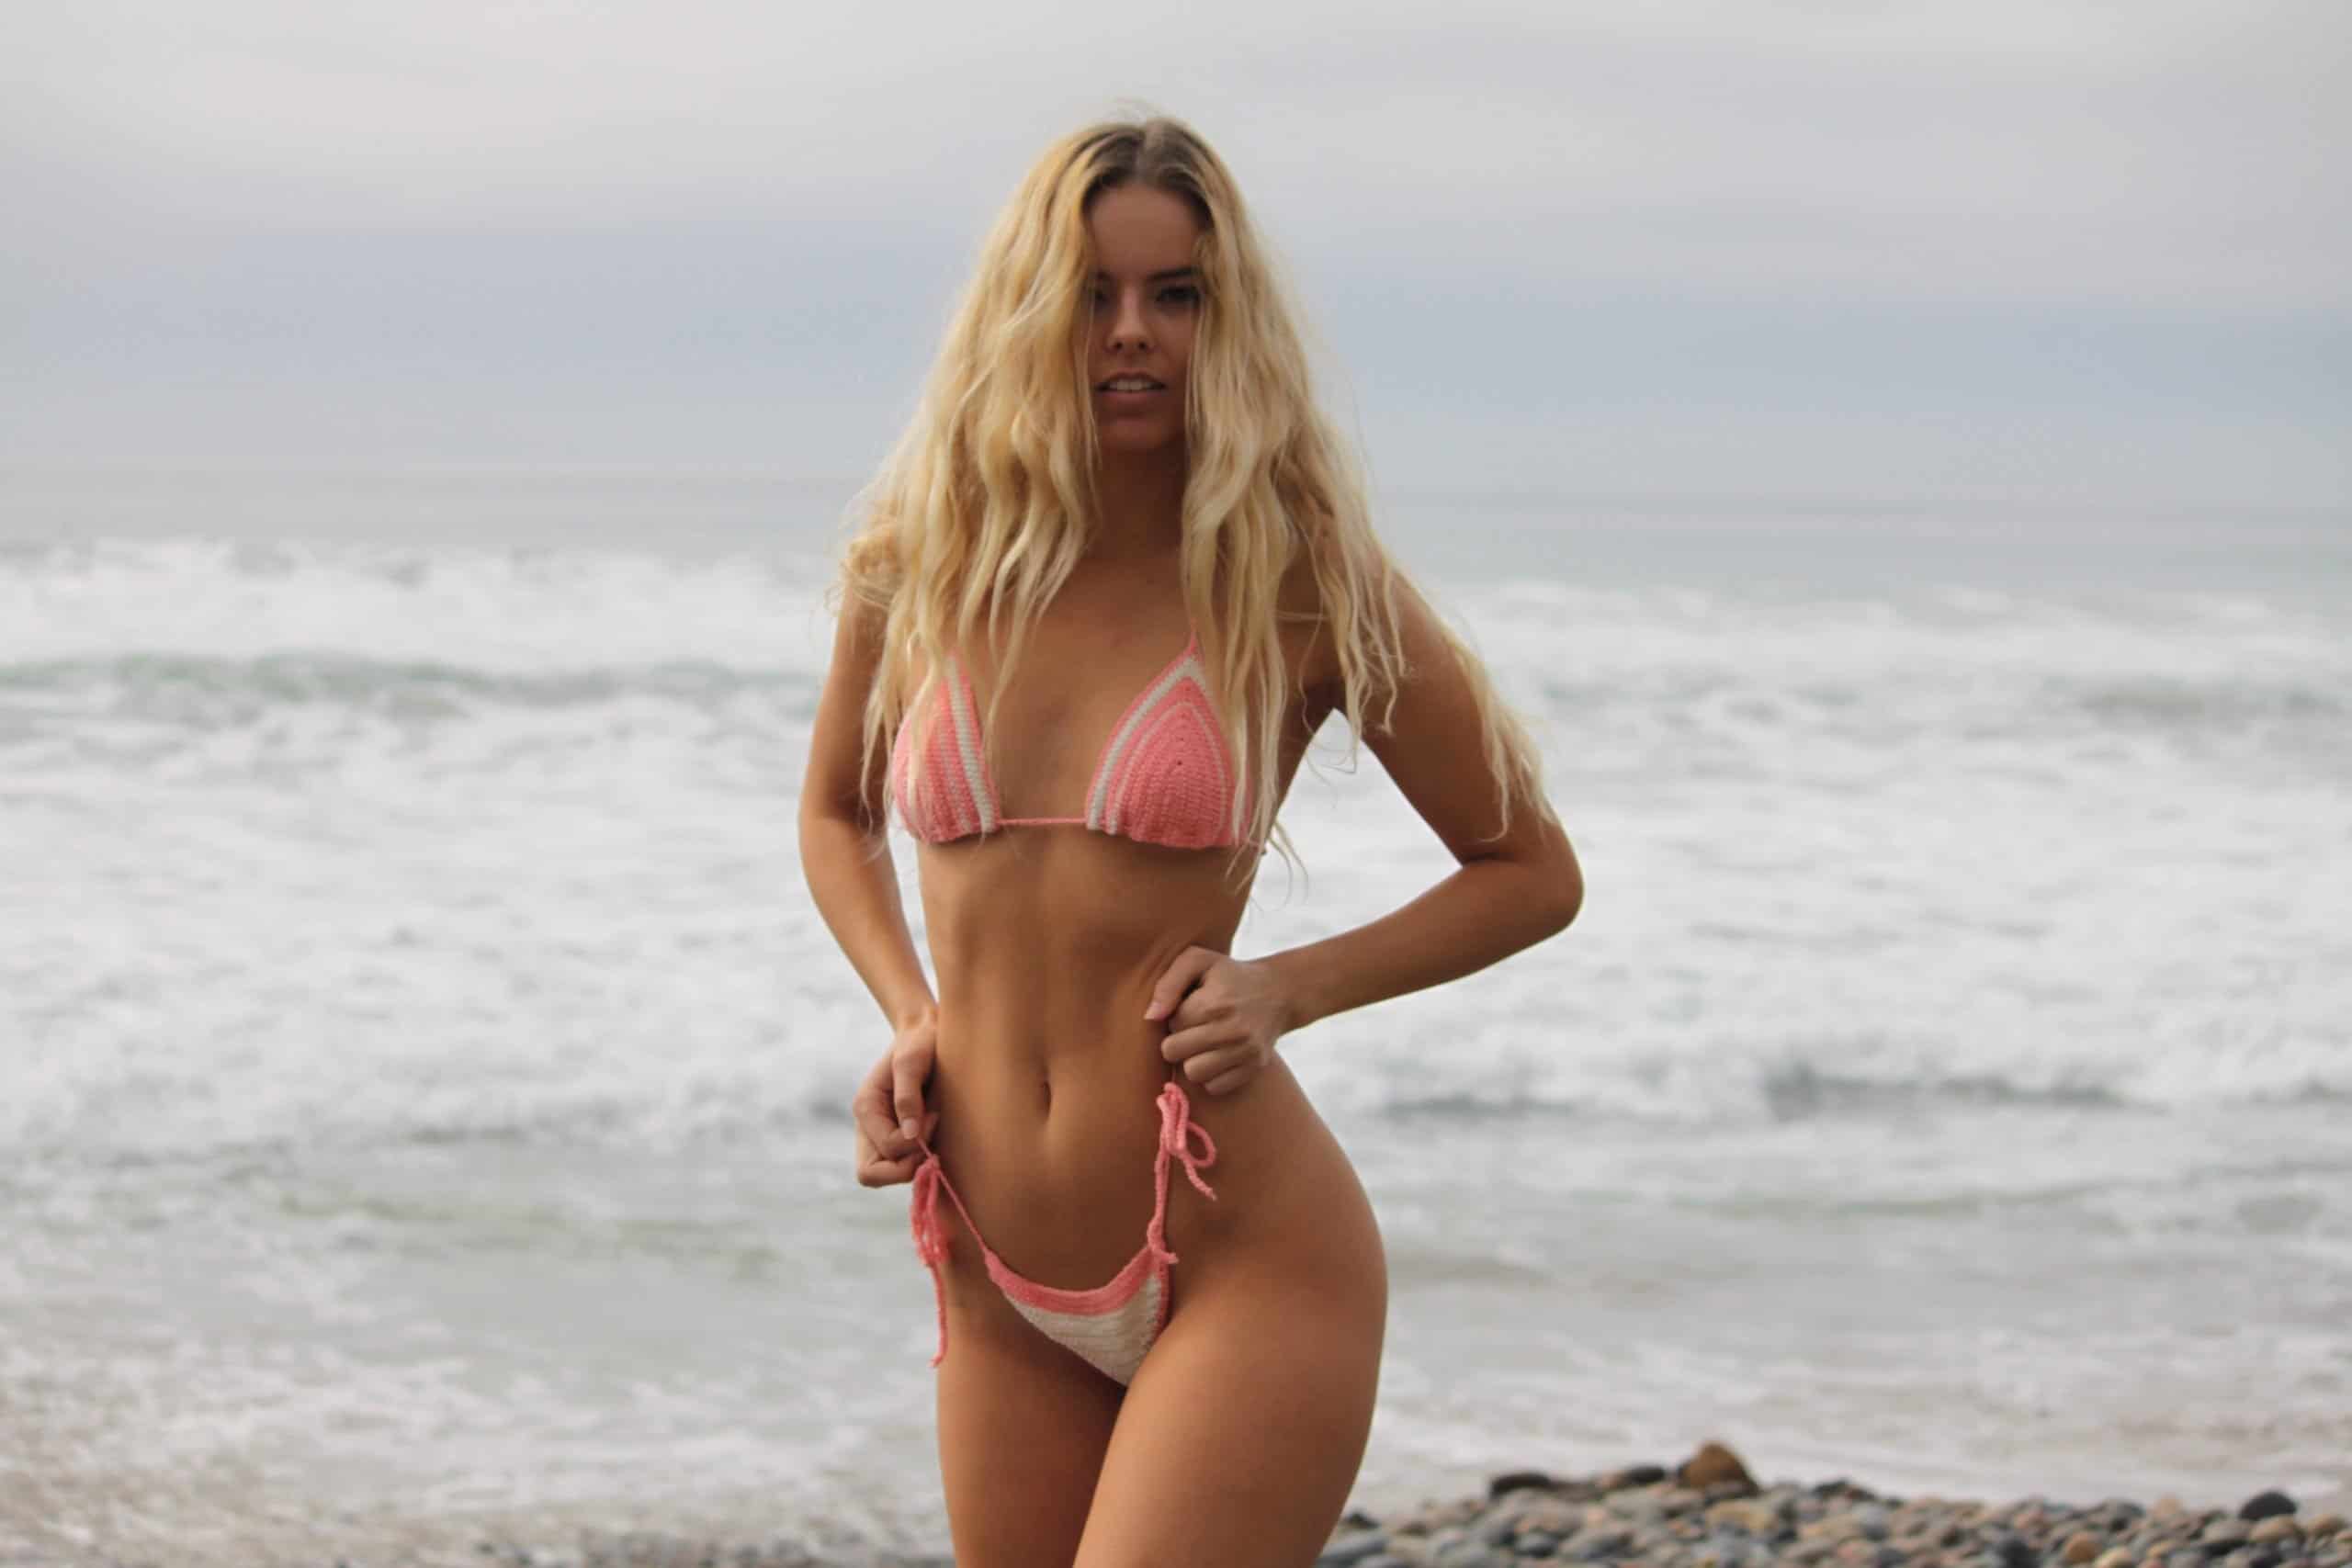
I wanted to create the perfect shape for every size that is not too bunchy at the front or too loose at the back!

Plus, this string bikini bottom works out perfectly for both the beach and pool because I chose the perfect yarn for it – This baby will not sag! 😁


Related Post:

Best yarns for bikinis
10 FAQs about Crochet Bikinis

DESCRIPTION

This string bikini bottom is worked up quickly from the front to the crotch and all the way to the back in one piece. Side ties are then added along the way and finished off with rubber bands.

All you would need to know are some basic stitches like the half double crochet stitch and increases and decreases!

And if you would like to learn how to make your own adjustments and what fits you the best then you will have to check out my Ultimate Crochet Bikini Bottom Guide.

CHECK OUT THE VIDEO TUTORIAL

If you would like to see more video tutorials like this you can check them out here on the blog or Subscribe to my Video Channel on YouTube.

Tools And Materials:

Yarn weight: DK Category 3
BrandCascade Fixation
ColorPink/White
Hook2.25mm
Gauge: 24 Hdc Sts x 16 rows = 4”x 4
No. yarns (balls): XS[S/M/L/XL] [2XL/3XL/4XL/5XL] – 1 ball only for each color (ALL SIZES)
Toolstapestry needlemeasuring tapescissorsrubber band
Skill: Beginner

This post contains affiliate links designed to provide a commission on purchases made at no cost to you. As an Amazon Associate, I earn from qualifying purchases that support my work in providing new content and information on this site.


Things to Note:

  • Prepare gauge to get the right size.
  • Do note this bottom is stretchable when using mentioned yarn
  • This is a cheeky cut style
  • Refer to the measurement chart here
  • Abbreviation page available in English US format
  • The turning chain does NOT count as a stitch, unless mentioned otherwise.
  • Video tutorial shows the making for size Small
  • Pattern will refer to 2 color exchanges as Yarn A for Pink and Yarn B for White.

Your hip size: XS [S/ M/ L/ XL] [2XL/ 3XL/ 4XL/ 5XL] – 32 [34/ 36/ 40/ 44] [48/ 53/ 55/ 57/ 62] inches or 86 [91.5/ 101.5/ 111.5/ 122] [134.5/ 139.5/ 144.5/ 157] cm (size up if you are in between sizes)


Join Our Mailing List

If you would like to receive free written patterns and video tutorials straight into your inbox, just click Subscribe to get into our mailing list.


ROCHELLE STRING BIKINI BOTTOM FREE PATTERN


PART 1: Front to Crotch to Back


1.   Foundation Row: Prepare Yarn A and Ch 48 [50/ 52/ 54/ 56] [58/ 60/ 62/ 64] + Ch 1, turn

2.   Row 1: On the 2nd Ch from hook, work a Hdc St and across, Ch1 turn

3.   Row 2: Hdc2tog 2x, Hdc across until the last 5th St, Hdc2tog 2x, Ch 1 turn

4.   Row 3 – 5: Rep Row 2 for 3 more rows. Switch to Yarn B on the 4th row, Ch1 turn

5.   Row 6: Hdc2tog, Hdc across until the last 3rd St. Hdc2tog, Ch 1 turn

6.   Row 7: Rep Row 6 for 10 [10/ 11/ 12/ 13] [13/ 14/ 15/ 16] more rows. You should have 10 [12/ 12/ 12/ 12] [14/ 14/ 14/ 14] sts remain.

7.   Next Row Crotch: Hdc same number of Sts across for 20 [24/ 26/ 28/ 30] [34/ 36/ 38/ 40] rows. Ch 1 turn

8.   Next Row: Work 2Hdc in the 1st St, Hdc across until the 2nd last St, 2Hdc. Ch 1 turn

9.   Next Rows: Repeat step 8 increase for 12 [12/ 13/ 14/ 15] [15/ 16/ 17/ 18] more rows. Switch to Yarn A and rep step 8 for 4 more rows until the entire length reaches 13 [14/ 15/ 16/ 17] [18/ 19/ 20/ 21] inches or 33 [35.6/ 38.1/ 40.6/ 43.2] [45.7/ 48.3/ 50.8/ 53.3] cm

10.  Bindoff


 image 149


PART 2: Stitching along the sides

1. Fold work in half and place a stitch marker, this will
be your middle fold.

2. Row 1: Prepare Yarn A and turn to the
row side at the Back and insert your hook through the last row’s post. Work 1
Hdc St.


3. Cont to work 1 Hdc St on each rows post until you reach
the 4th row before the stitch marker.

4. On the next St, Sc 2 and Slst 2. Ch 1 turn

5. Row 2: Slst 2, Sc 2, Cont to Hdc across until the last St,. Ch 1 turn

6. Row 3: Hdc across until last 3rd Sts. Work 1 Sc and 1 Sl sts. Bind off.

7. Rep step 1 – 6 on the other side.


PART 3: Adding Ties and Rubberband


1.   With Yarn A, Insert hook (anywhere) along the Crotch row facing the RS and draw up a loop.

2.   Place rubber band along the edge, between the yarn and the hook, and work a Sc around the rubber band. Work 2 Sc Sts on each rows post.

3.   Once you have reached the 2nd last stitch at the corner end, tug the rubber band so it is laying straight with the Sts. Just make sure it is not bunched up or spread apart.

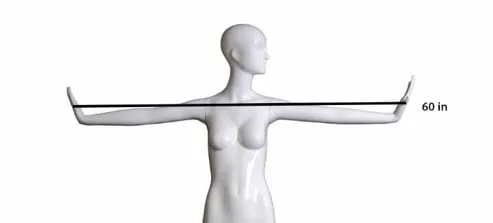
4.   Next, measure about 2 arms length of yarn (approx 60”) – with one hand holding the St and another hand pulling the yarn. Release the St and drag another 60” of yarn to make 2 pieces of 60″ yarn. See: How to make ties

5.   Next, insert your hook through the last St, and pull up the double yarn and work 1 Sc St. Then work up a chain with both yarns until the end of the yarn.

6.   Insert your hook through the last St, pick up yarn, draw up a loop and cont to Sc each St with the rubber band in between until the next corner end.

7.   Repeat step 2 – 6 until you have almost completed the round, leaving approx 10 sts before reaching the round

8.   Tug the rubber band and tie a double knot on both bands, then Sc over and around the knot.

9.   Bind off and weave on all loose ends.


measure ties
2 arm’s length of ties


TIP: See how to attach a Rubberband (See Video)


1.   Make sure rubber band is behind work and in between Sts.

2.   Keep tugging rubber band in order to have a taut finish. Not too tight or loose.

3.   Stop 2” / 5cm or 10 sts before closing and tie a knot (twice) Sc over and around the knot while hiding rubber band and strand, Slst to close.

4.   Cut any remaining rubber band

5.   Best to use round face elastic rubber band like this. 


elastic rubberband


END


If you are looking for the entire tool used to make this Rochelle String Bikini Bottom crochet pattern, check them out here below:

2.25 mm Clover Amour Crochet Hook

Cascade Fixation Yarn in Pink

Cascade Fixation Yarn in White

Elastic Rubber Band

Rochelle String Bikini Bottom Pdf Pattern file


If you would like to receive free written patterns and video tutorials straight into your inbox, join our mailing list now.


Don’t forget to tag me on Instagram and Facebook @theknottylace, I would love to see your work!

Happy hooking
Shaz 🌺


Follow me on social:
Instagram | Pinterest | Facebook | Twitter | YouTube
Subscribe and get all the new patterns and updates in your inbox


This pattern and images are copyrighted by The Knotty Lace and are free for your personal use. I ask that you do not copy, share, adjust, alter or resell my Pattern(s) and picture(s). If you wish to sell ready-made products using my pattern(s), please do credit mention The Knotty Lace. Thank you.

Follow me on:

Instagram | Pinterest Facebook | YouTube
Subscribe and get all the new patterns and updates in your inbox

This pattern and images are copyrighted
by The Knotty Lace and are free for your personal use. I ask that you do not
copy, share, adjust, alter or resell my Pattern(s) and picture(s). If you wish
to sell ready-made products using my pattern(s), please do give credit mention
to The Knotty Lace. Thank you.

HI THERE, IM 

shaz

Thanks for stopping by. If you’re here, that means you’re looking for some fun crochet patterns, tutorials or maybe browsing for some Q&A. Great! coz I’ve got you covered. 

LETS BE FRIENDS

label-your-wips-with-smart-tag-2

Get this free downloadable file and start labeling your Work In Progress (WIPs)Read more

You will automatically be on our mailing list by submitting your email address. Unsubscribe at any time.

Latest Video

Subscribe to my YouTube Channel

Browse by Category

🎉 We have been chosen as one of the top 100 Crochet Blogs on FeedSpot

Recent Post

Leave a Reply

Your email address will not be published. Required fields are marked *