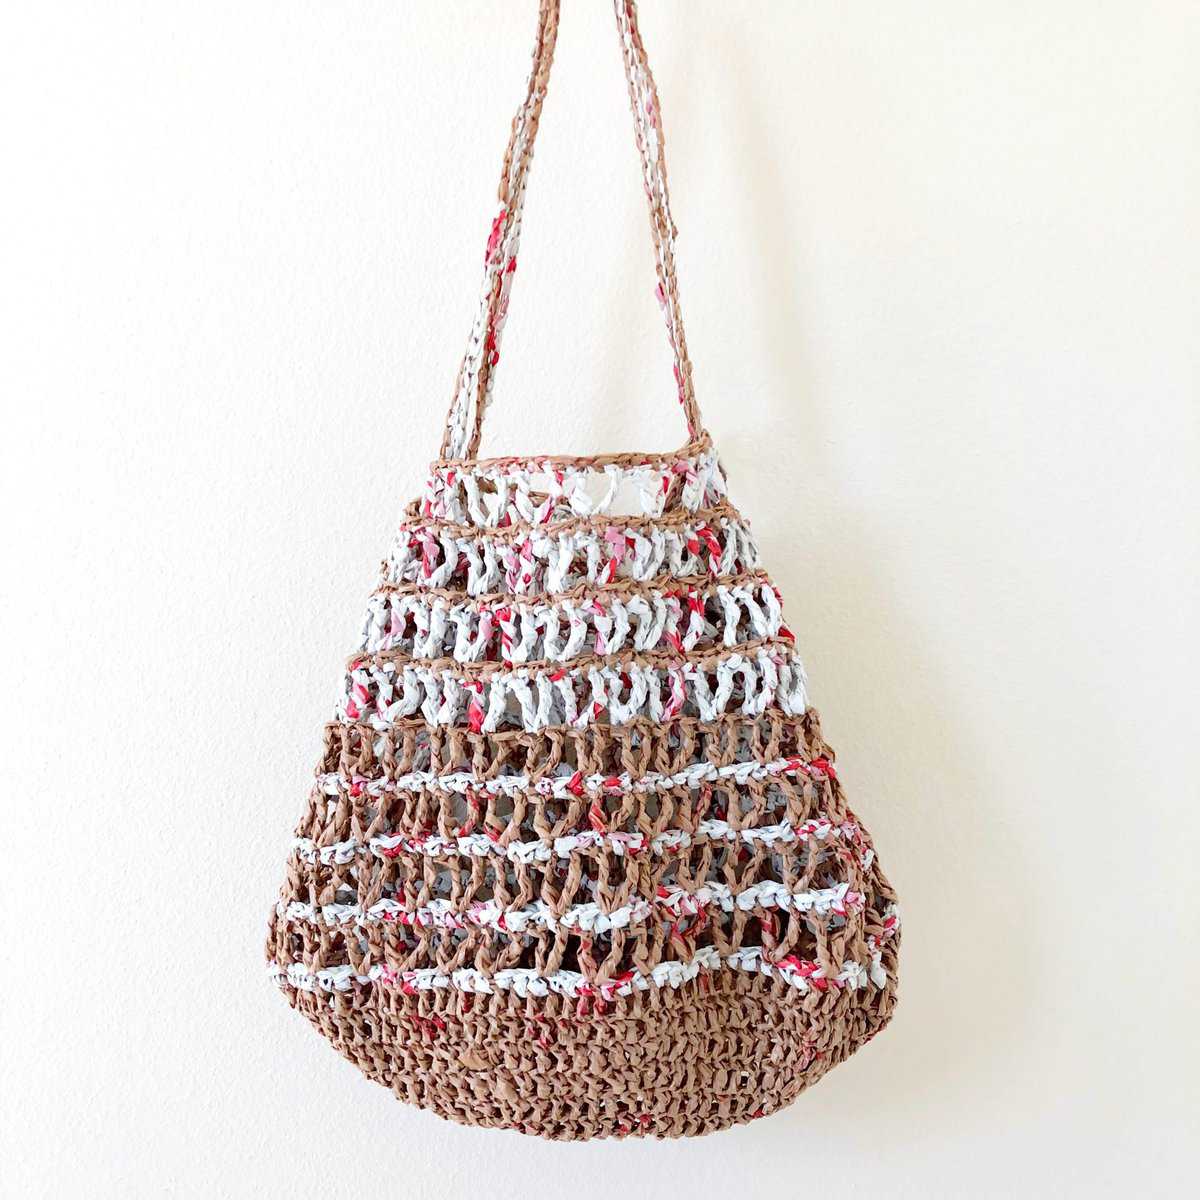
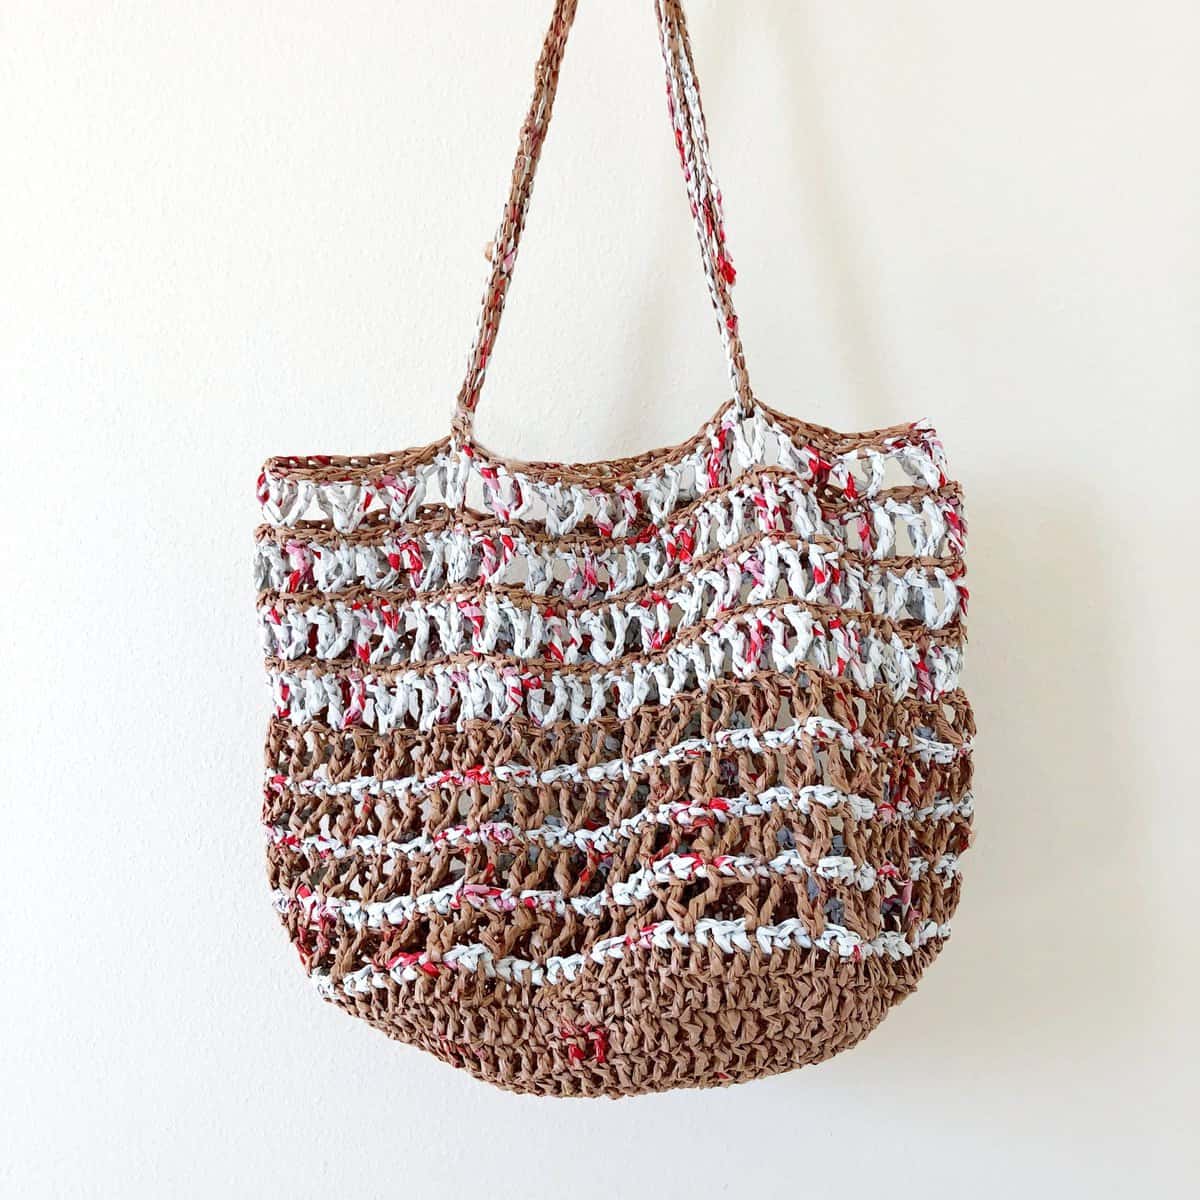
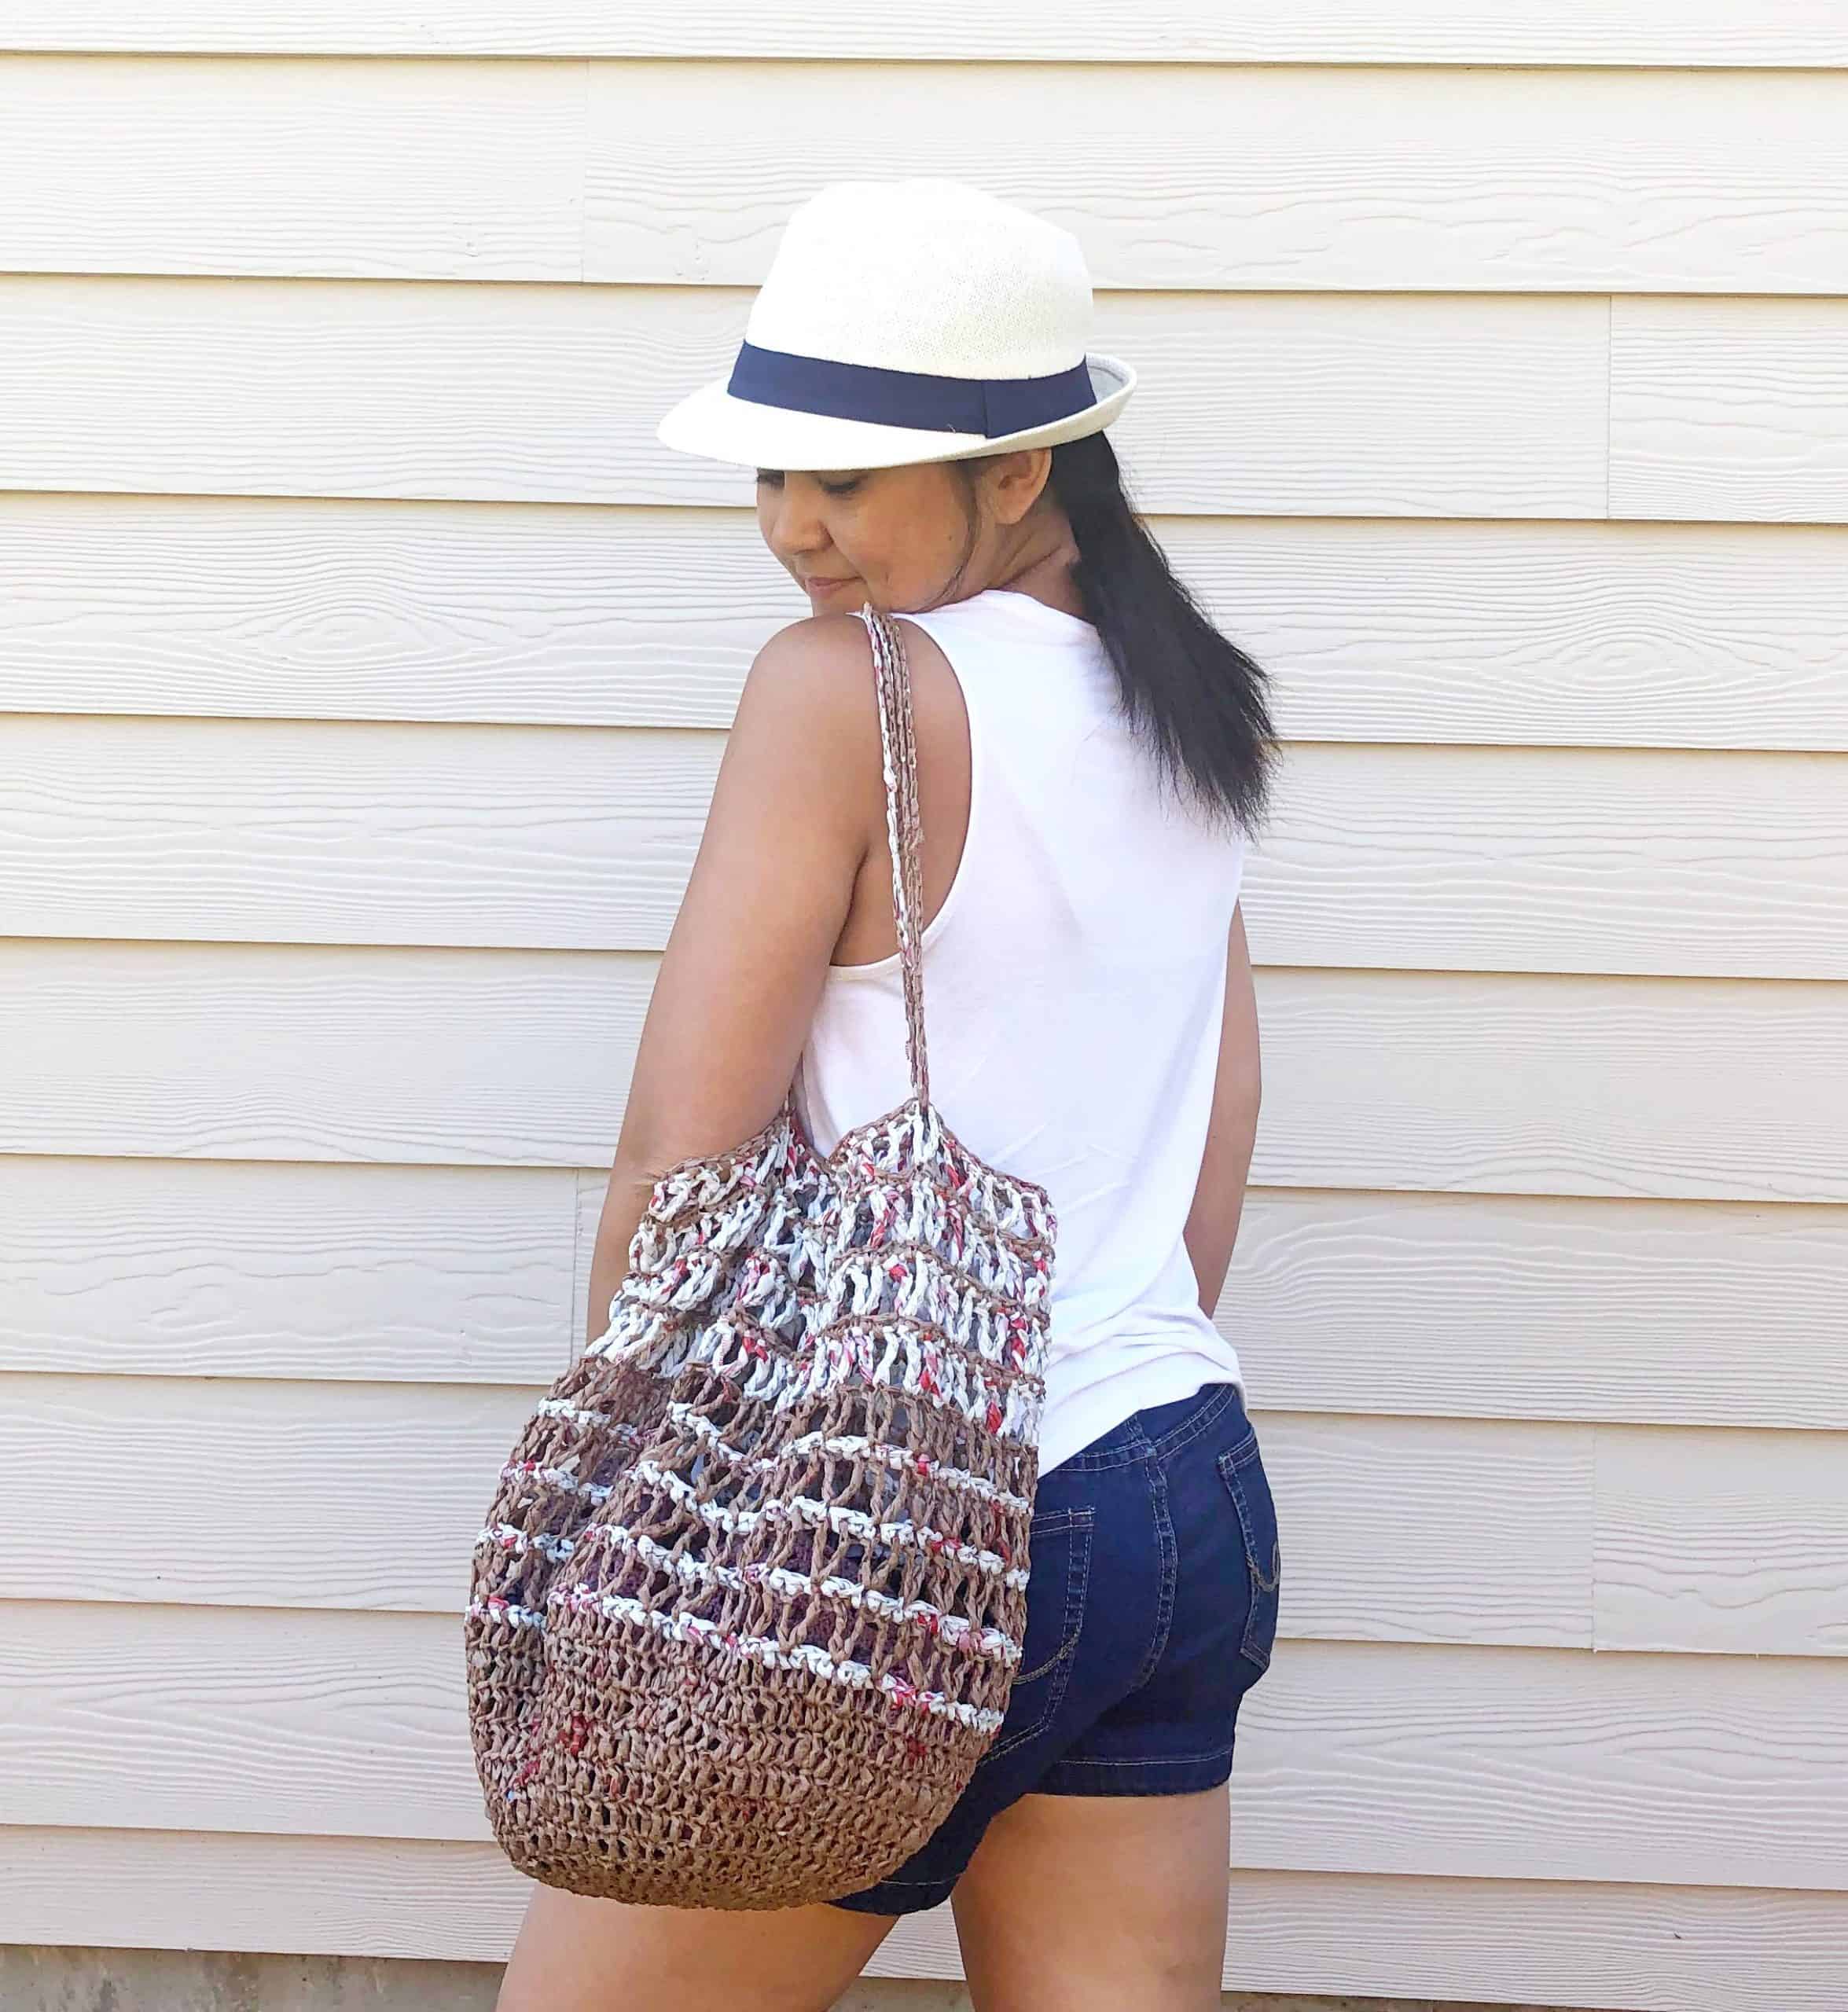
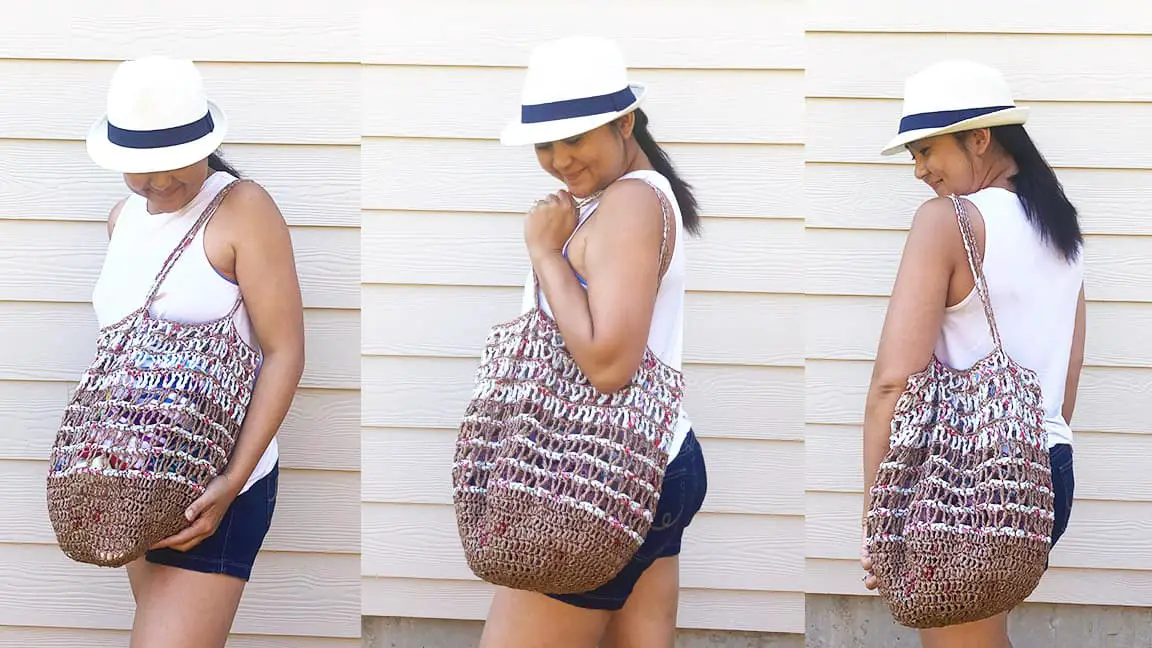
Carry them 2 ways!
This year I plan to reuse and reduce! I do a lot of my grocery shopping at Fred Meyers and last-minute essentials at Target, hence I do have a lot of plastic bags  .
.
In a way, I still make use of them at home for trash in the bathroom, or for packing up dirty shoes, etc. But there are always more bags! Is anyone else just like me?  .
.
If you would like a printable ad-free PDF copy of this pattern, it is available for purchase in my shop, or check out the video tutorial here
DESIGN INSPIRATION
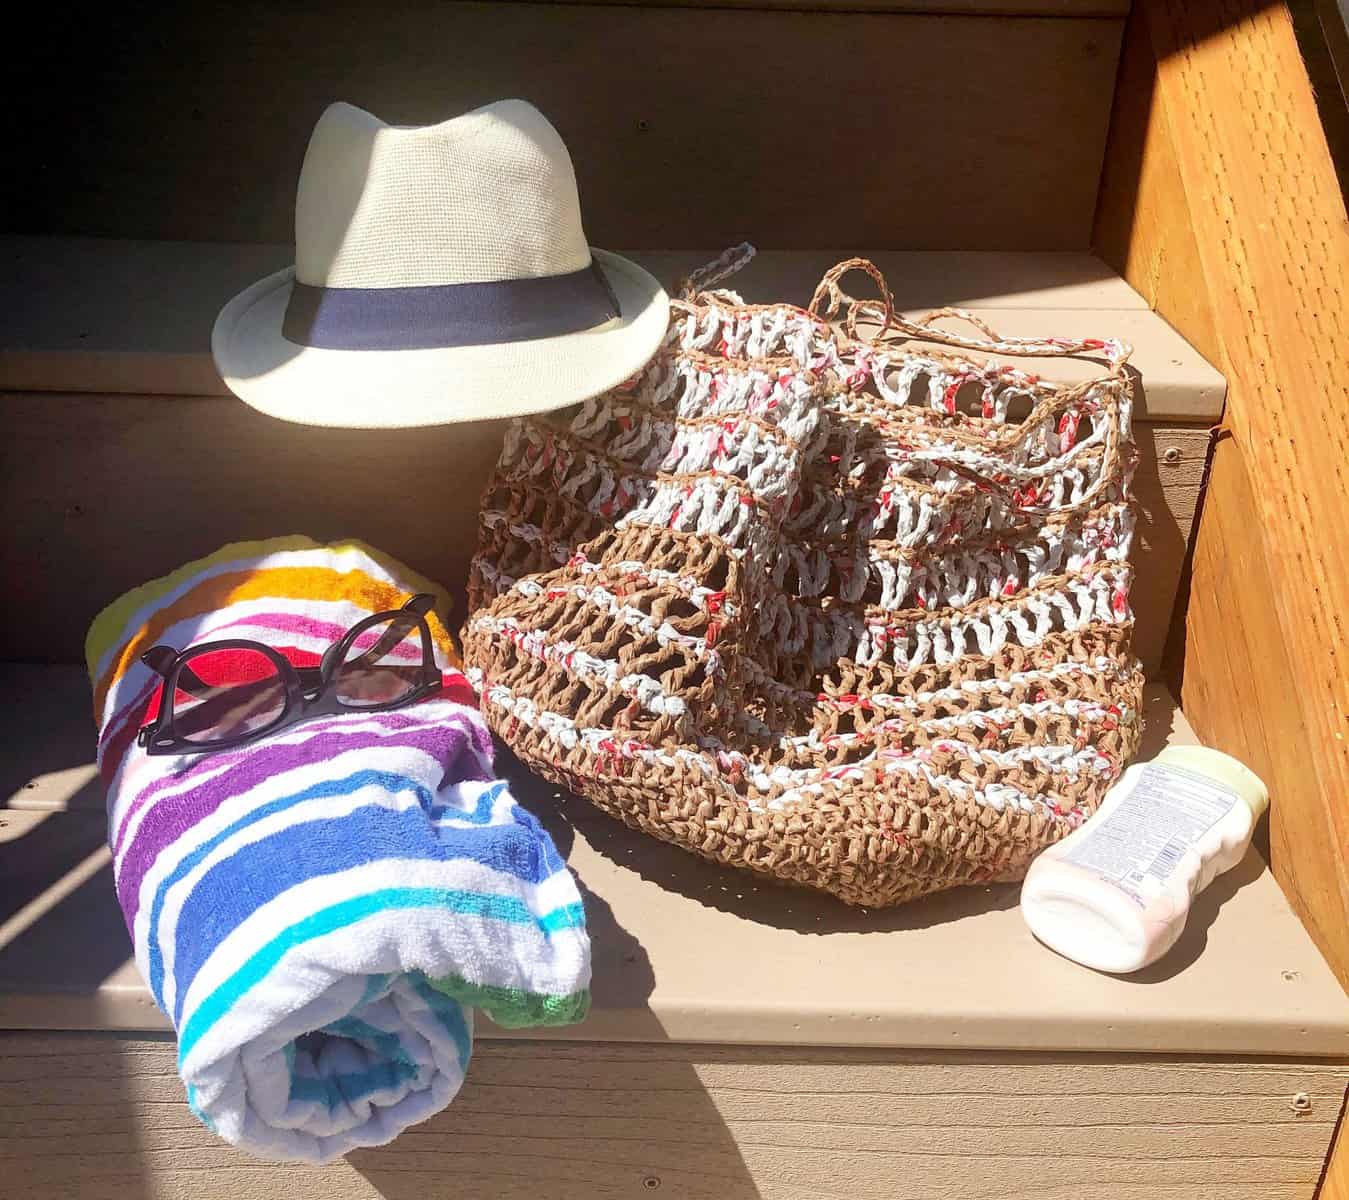
This summer, we have plans to vacation in Hawaii and that means a lot of beach time! The kids love playing in the sand and yes they do have a huge bag of sand toys!
Because their toys are constantly wet and sandy, I needed to find a mesh-like bag that would sieve off the sand and stay dry at the same time. That’s when I had a  Light bulb moment!
I knew I needed to make them a mesh-like sand toy bag that would stay dry! And that’s how this plarn bag idea came about! Thanks, kiddos!
If the kids are happy, mama’s happy too!
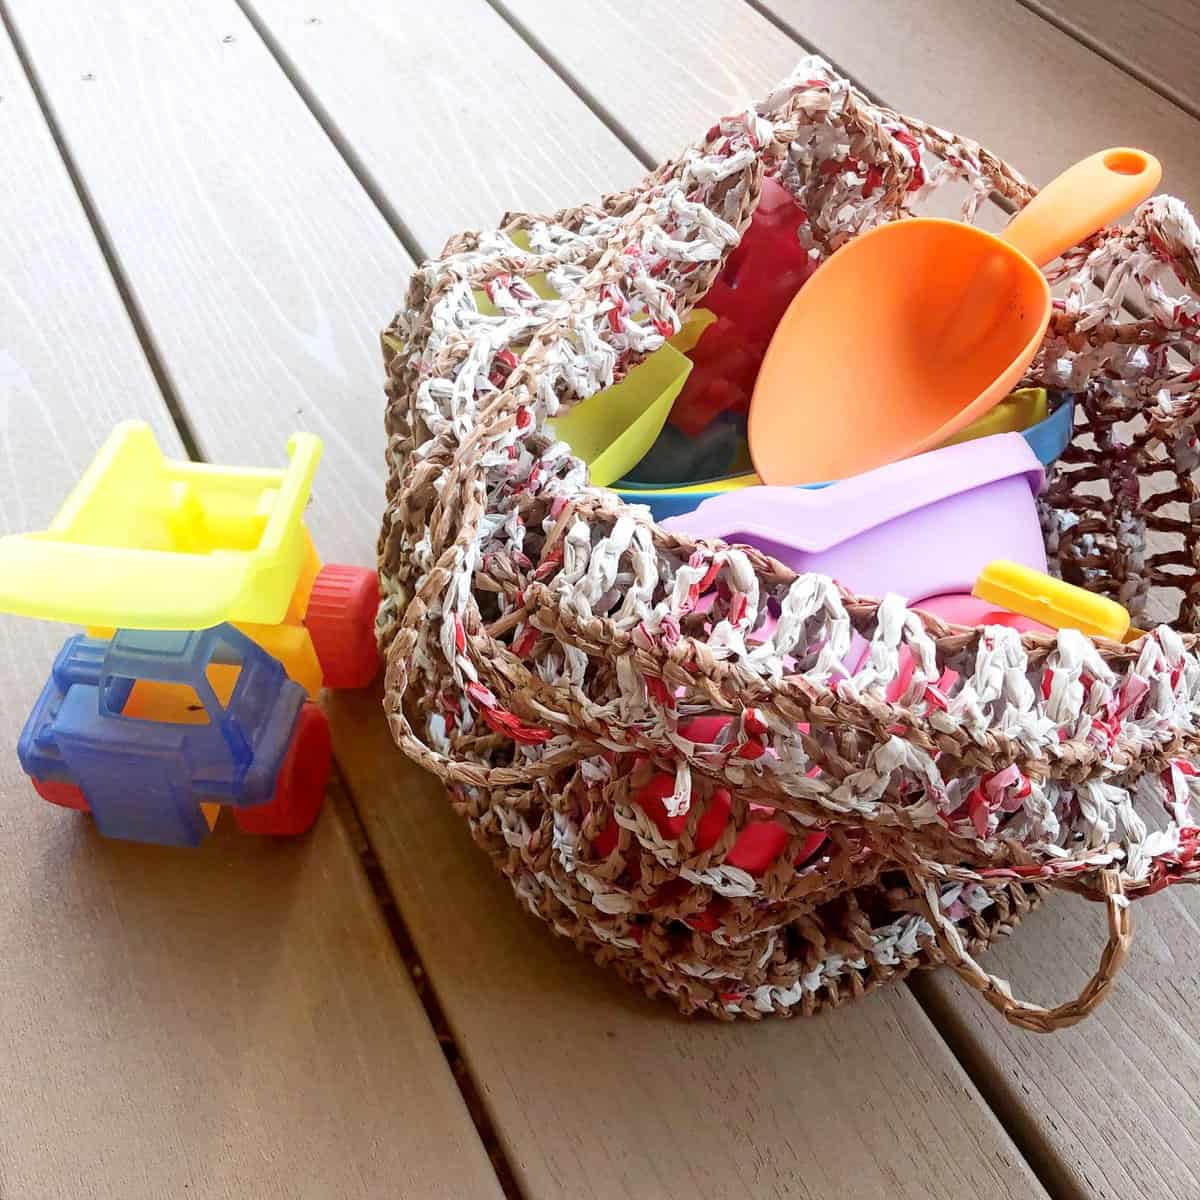
Kids and their sand toys!
DESCRIPTION
Any type of plastic grocery bag works. Once they are cut into strips, join each strip and start plarning! Working from the base in the round, continue to crochet in the round using “V” stitches. This is a quick and great project for you and the environment! Plus it’s free!
V Stitches
CHECK OUT THE VIDEO TUTORIAL HERE
If you would like to receive free written patterns and video tutorials straight into your inbox, just click Subscribe to get into our mailing list.
Things to Note:
-
- No Gauge is required for this as the bag size depends on the thickness of the plarn used
-
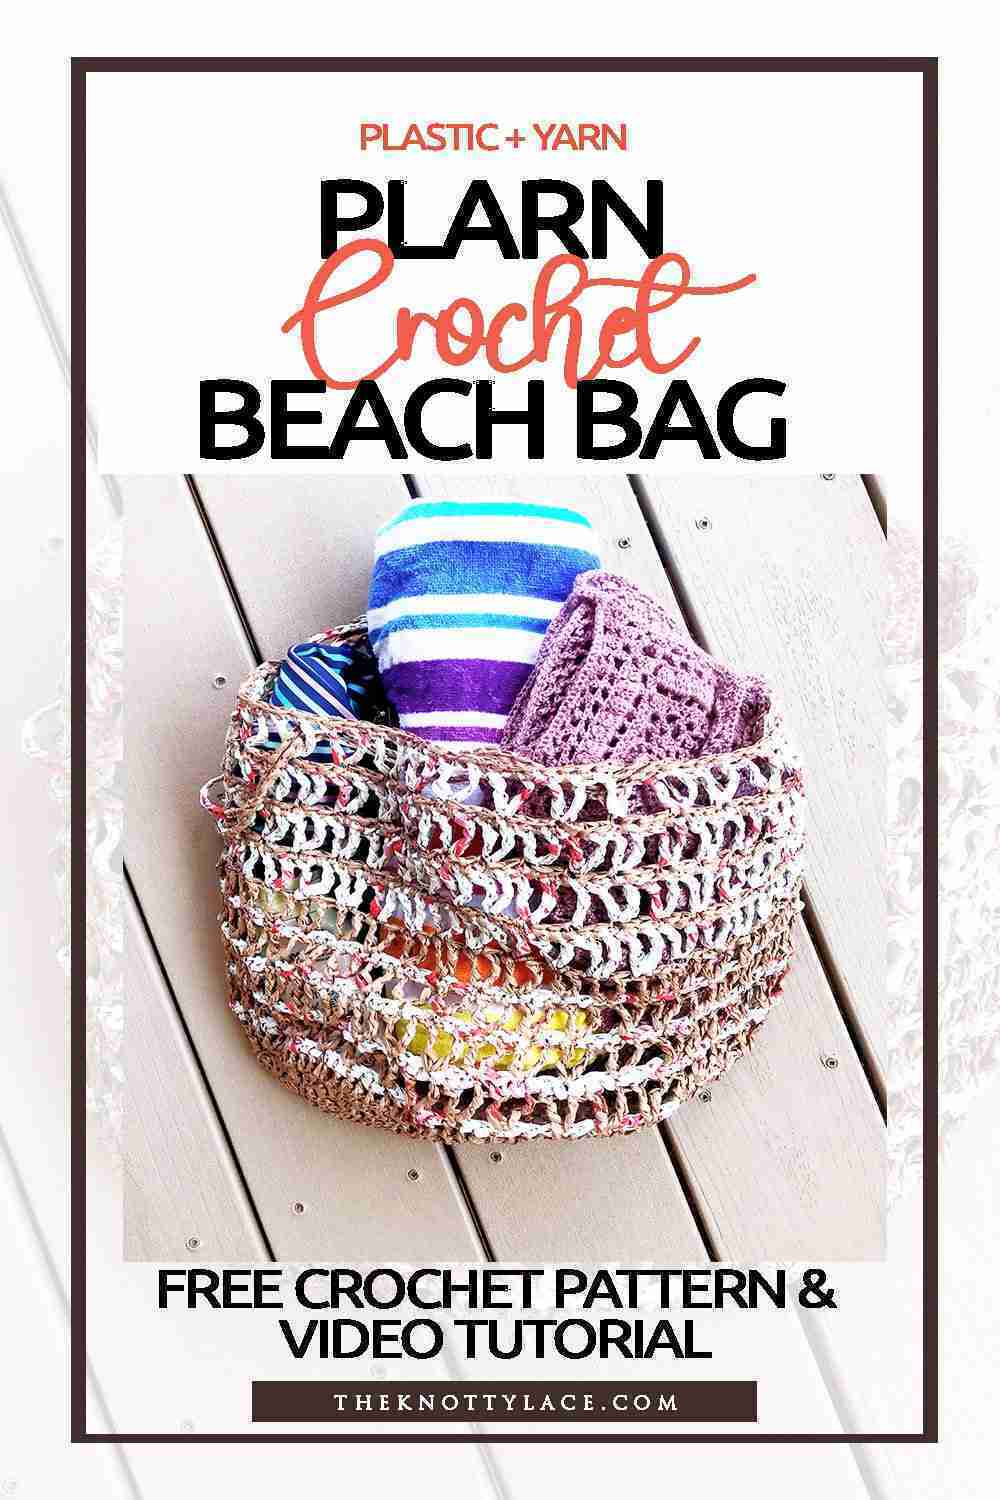
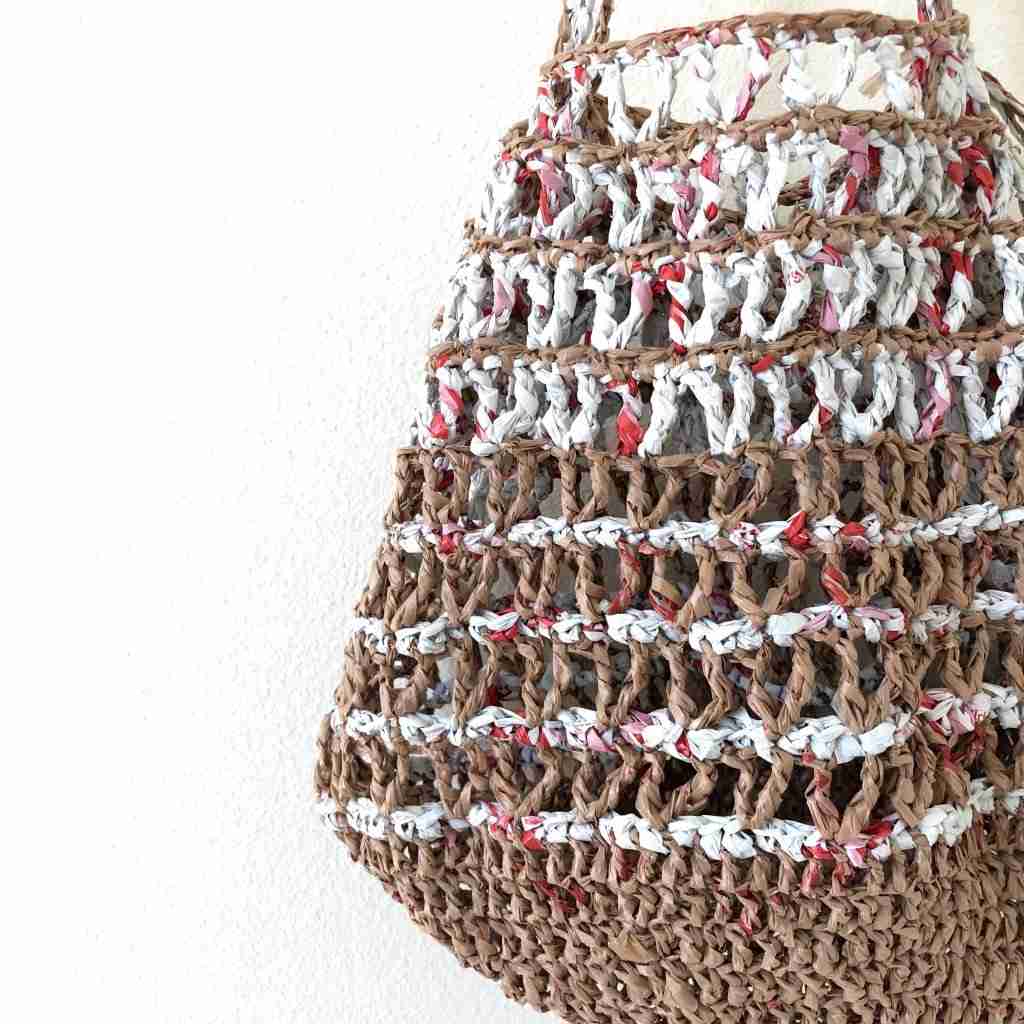
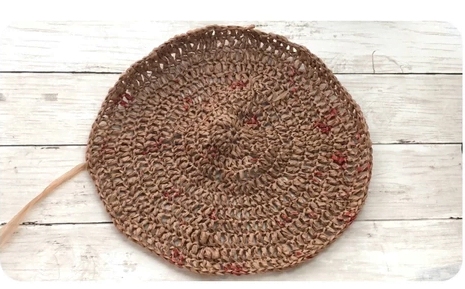
- Size shown: H x W: 10 x 14 in / 25 x 35.5 cm
-
- Chain up does not count as a stitch unless mentioned otherwise.
-
- Definition of 2Dc Vs Dc2 : Work 2 Dc in the same St vs 1 Dc in the next 2 Sts.
-
- Abbreviation page available in English US format
PLASTIC CROCHET BEACH BAG PATTERN
Instructions
PART 1: How to turn Plastic bags into Plarn
1. Flatten bag and fold approx 1 in/2.5cm lengthwise and cont to fold over.
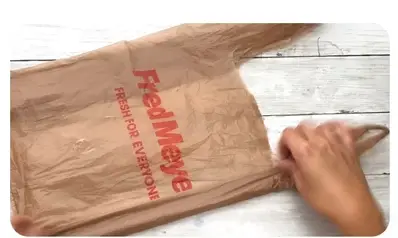
2. Cut where the handle ends and cut 1 in/ 2.5cm at the bottom
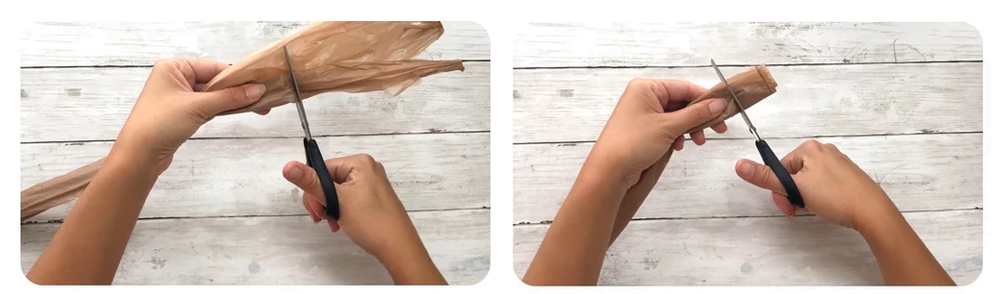
Step 2
3. Unfold about 2in/ 5cm at the top and cut folded side 1 in/ 2.5 cm apart. Note: If your plastic bag is fairly thick, you should cut between ½ – ¾ in / 1.3 – 2cm
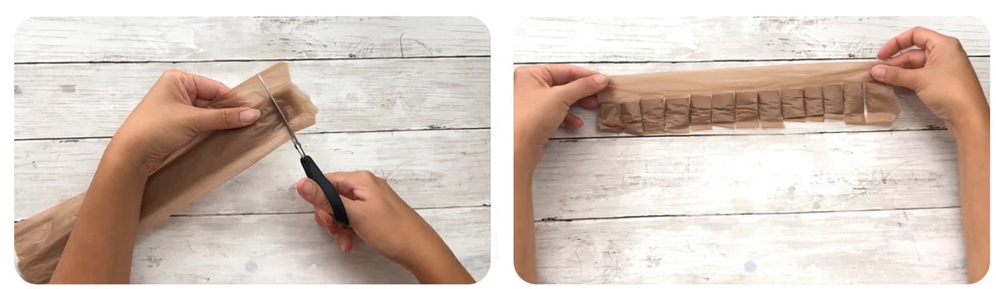
Step 3
4. Open the bag and cut the first strip diagonally.
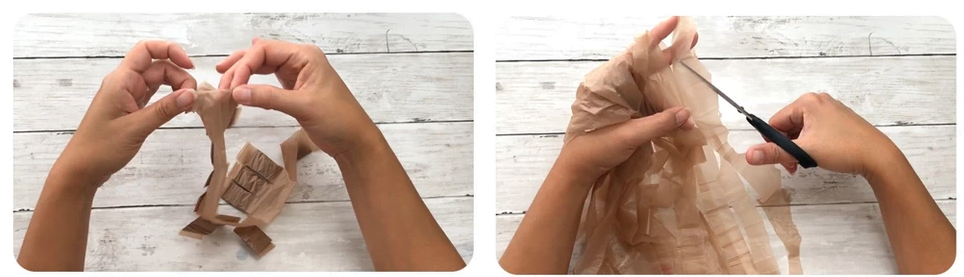
Step 4
5. Cut the next strip diagonally across through to the other slit. Repeat on all strips.
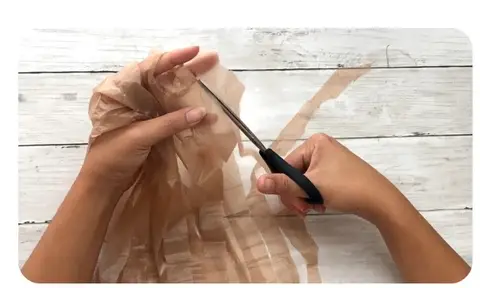
6. Pick up plarn and roll up into a ball. 7. Cont steps 1 – 6 until you have enough plarns. Join plarn ends with a simple knot.
Part2: Bottom Base (Tan plarn)
-
- Foundation row: Magic Ring (MR)
-
- Rnd 1: Work 10 Sc on MR, Slst to close round, Ch up 1,
-
- Rnd 2: Work 2Dc in each St, Slst to close round, Ch up 1 [20 Sts]
-
- Rnd 3: Through the 1st St, *(work 1 Dc, then 2Dc in the next St) Rep (*) in the round. Slst to close round, Ch up 1 [30 Sts]
-
- Rnd 4: Through the 1st St, *(Dc 2, 2Dc in the next St) Rep (*) in the round. Slst to close round, Ch up 1 [40 Sts]
-
- Rnd 5: Through the 1st St, *(Dc 3, 2Dc in the next St) Rep (*) in the round. Slst to close round, Ch up 1 [50 Sts]
-
- Rnd 5: Through the 1st St, *(Dc 4, 2Dc in the next St) Rep (*) in the round. Slst to close round, Ch up 1 [60 Sts]
-
- Next round: Cont to increase 1 St on every round ie (Dc x + 1, then 2Dc). Rep until you have reached your preferred diameter. For ref, I have worked a total of 10 rounds with a diameter of 14 in / 35.5 cm
-
- Last round: Stop increasing and work 1 Dc in each St. On the last St, drop tan plarn to the back and draw up the white plarn and Slst to close round. Ch up 1. (Do not bind off)
Part 3: Body
1. Rnd 1: Sc bet each post in the round. On the last St, drop white plarn to the back and draw up tan plarn and Slst to close round, Ch up 4
2. Rnd 2: *(Sk 2 Sts, Tr on the next St, Ch 1, Tr in the same St,). This is a “V” Stitch. Rep (*) in the round. On the last St, drop tan plarn to the back and draw up white plarn and Slst to close round, Ch up 1
3. Rnd 3 – 8: Rep Rnd 1 and 2 for 3 more rounds.
4. Rnd 9: With the White plarn, Ch 3 more *(Sk 2 sts, Tr on the next St, Ch 1, Tr in the same St) Rep (*) in the round. On the last St, drop white plarn to the back and draw up tan plarn, Slst to close round, Ch up 1
5. Rnd 10: Sc each St in the round. On the last St drop tan plarn to the back and draw up white plarn, Slst to close round, Ch up 4
6. Rnd 11: *(Sk 2 sts, Tr on the next St, Ch 1, Tr in the same St) Rep (*) in the round. On the last St, drop white plarn to the back and draw up tan plarn, Slst to close round, Ch up 1
7. Rnd 12 – 14: Rep Rnd 10, 11, 10
8. Rnd 15: *(Sk 3 sts, Tr on the next St, Ch 1, Tr in the same St) Rep (*) in the round. on the last St, drop white plarn to the back and draw up tan plarn to close round, Ch up 1
9. Rnd 16: Sc each St in the round, on the last St, on the last St, drop tan plarn to the back and draw up white plarn, Slst to close round. Bind off

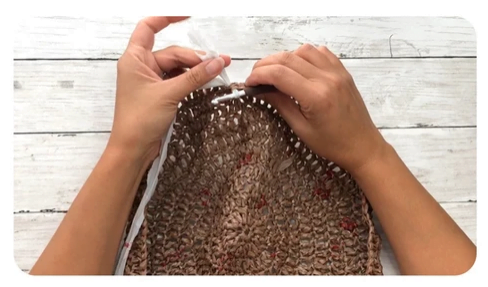
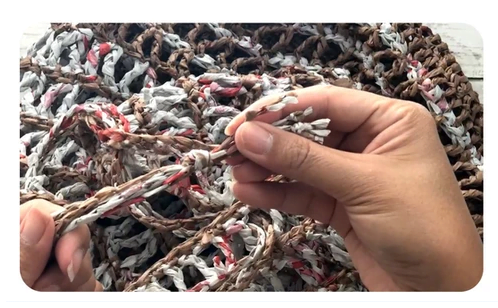
Part 4: Straps/ Ties
1. Take 1 pc of white and tan plarn each and tie a knot together.
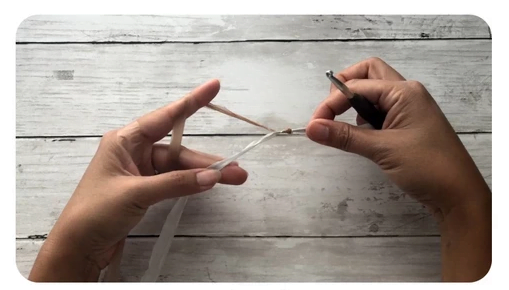
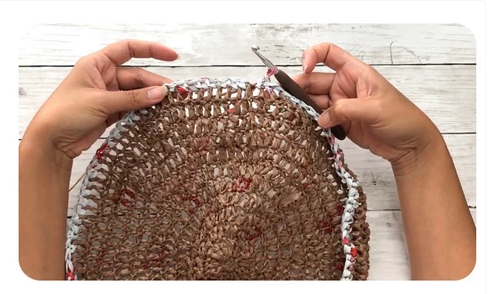
Image 1
2. Pick up the top plarn like you would when working a stitch, and hold on to the bottom yarn (image 1)
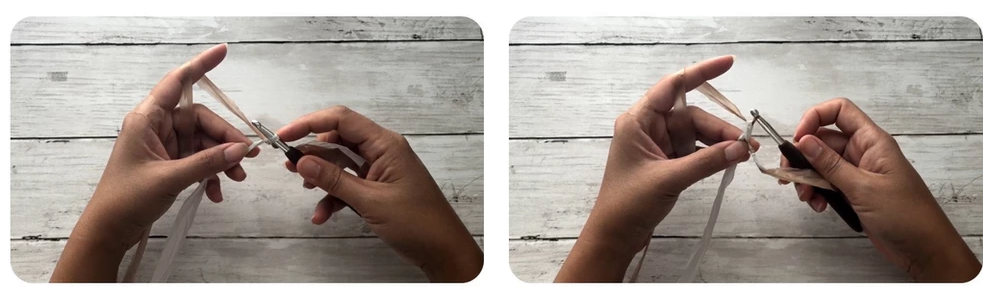
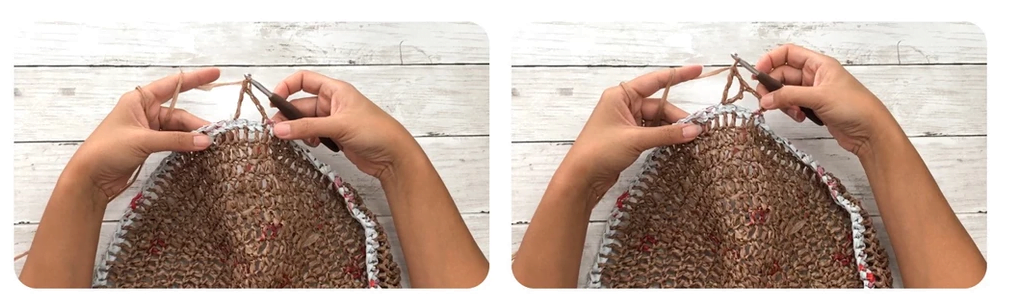
Image 2
3. Wrap the bottom plarn over the hook from the front to the back, while holding on to the bottom plarn and Pt the top plarn. (image 2)
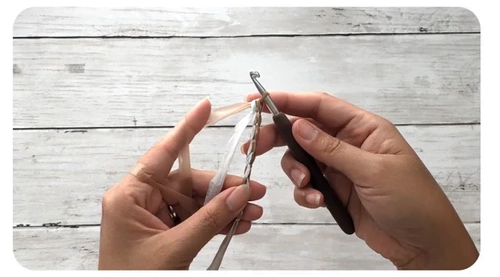
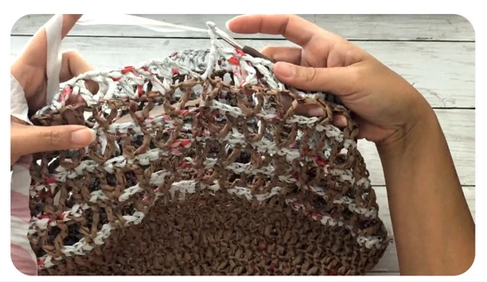
4. Rep step 3 until you reach your pref length. I have made the straps approx. 50in/ 127cm in length. Make 1 more strap
Part 5: Attaching Strap ties
1. Count No of “V” stitches and divide that number by 4. I have 27 “V” stitches which gives me a count of 6.75 spaces.
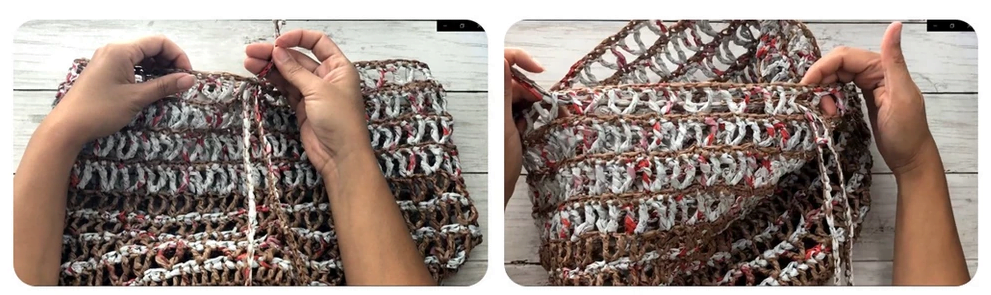
2. Insert both ties into any one “V” space and skip 6 spaces. Then I will pull out the 2 ties through the next space.
3. Cont to skip 6 spaces and weave in/out 2 more times until you’re back in the round.
4. Tie 2 knots. You can leave a “tassel” if you prefer or cut off both ends.
5. Weave in all loose ends by inserting your hook through the Sts and pulling them through the ends.
END
If you would like to receive free written patterns and video tutorials straight into your inbox, join our mailing list now.
Don’t forget to tag me on Instagram and Facebook @theknottylace, I would love to see your work!
Happy hooking
Shaz 
Follow me on social:
Instagram | Pinterest | Facebook | Twitter | YouTube
Subscribe and get all the new patterns and updates in your inbox
This pattern and images are copyrighted by The Knotty Lace and are free for your personal use. I ask that you do not copy, share, adjust, alter or resell my Pattern(s) and picture(s). If you wish to sell ready-made products using my pattern(s), please do credit mention The Knotty Lace. Thank you.