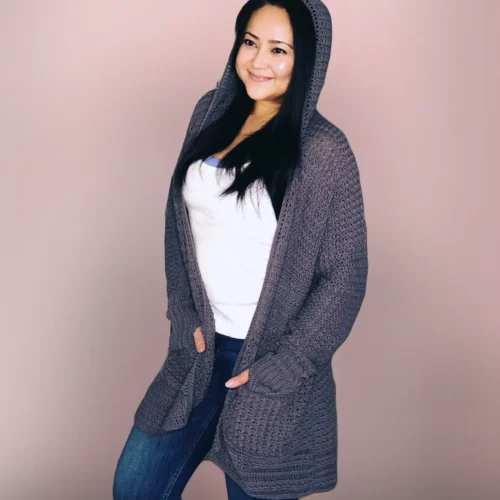

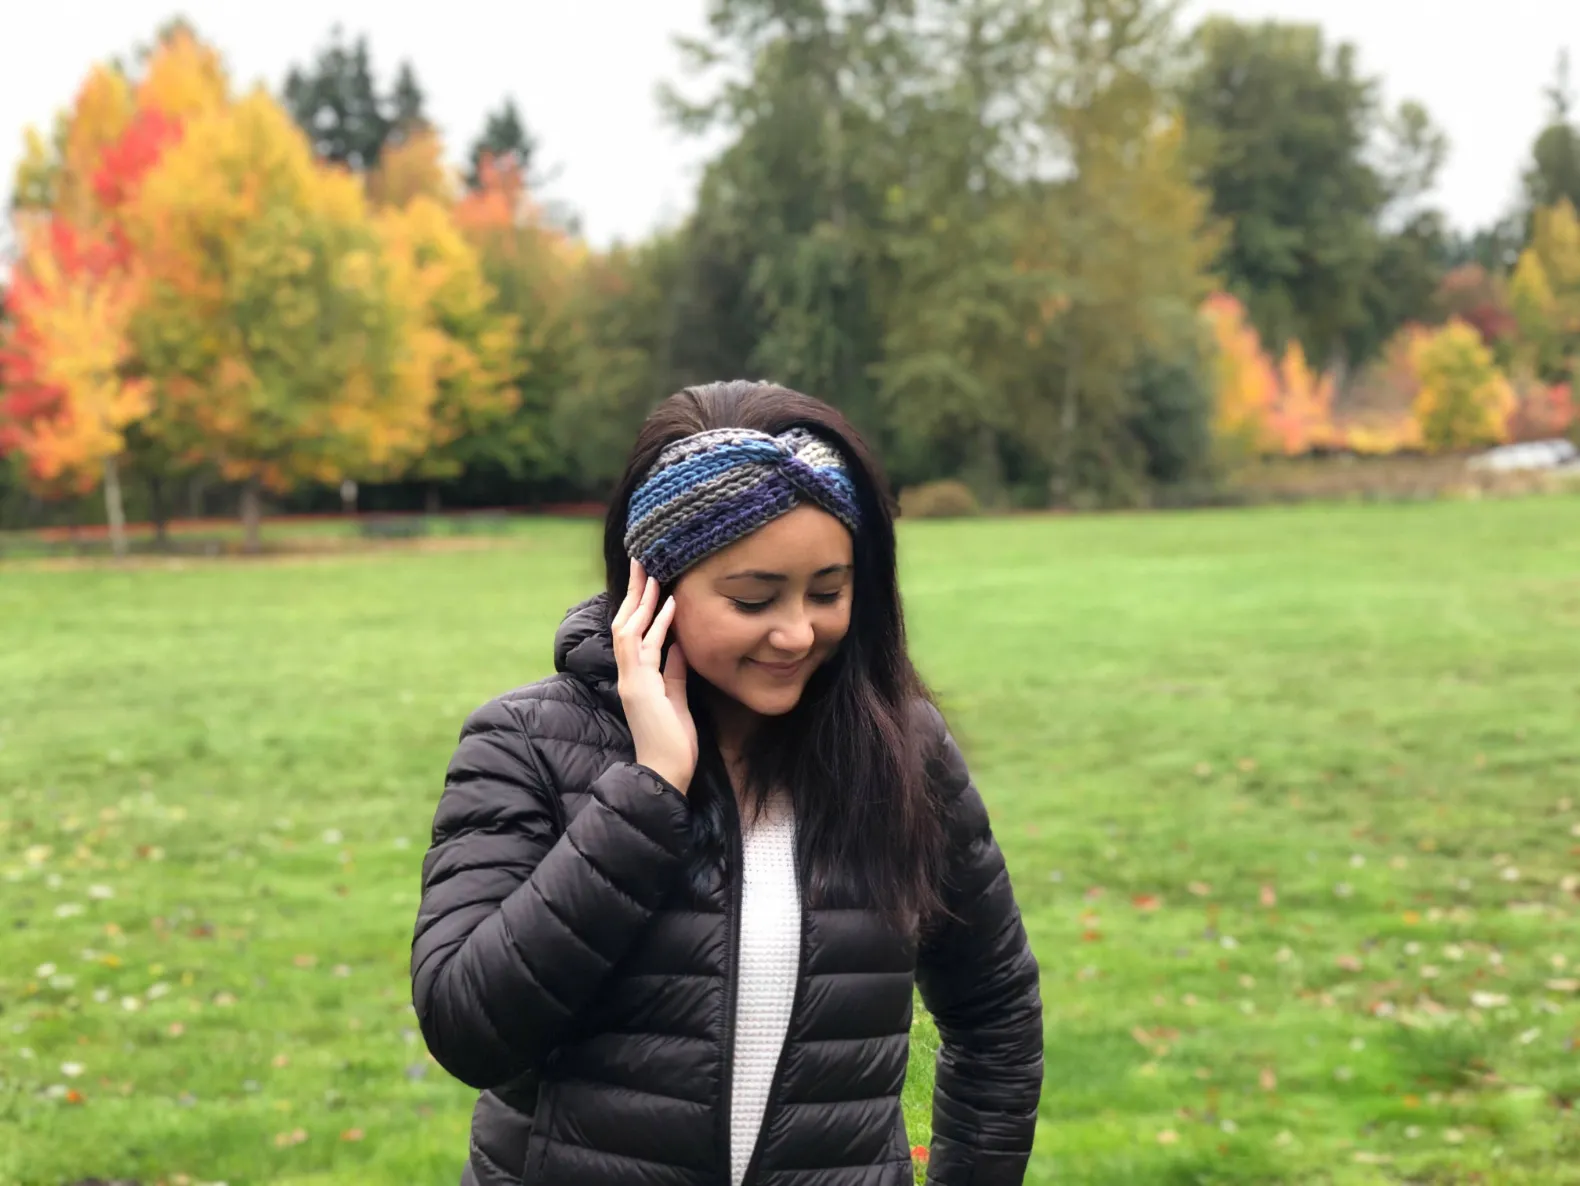
Making an easy, beginner-friendly crochet ear warmer / headband that looks like knit with a twisted finish was my inspiration. This project does not require a lot of yarn and any chunky scrap yarn can be used (that’s what I did).
I also wanted a versatile ear warmer that could double up as a headband. Besides being the perfect head cover on those bad hair days, it also makes for a great accompaniment to my messy buns.
It’s quick and easy to whip up and is a great pattern for any beginner to start off with this fall.
Related Post:
More Crochet Ideas for Fall
Crochet Hooded Cowl Pattern
Description
This easy ear warmer pattern has a few techniques that are great to learn for crochet beginners. We first start with the chainless foundation stitch to give it the stretchiness it needs. I used this technique here.
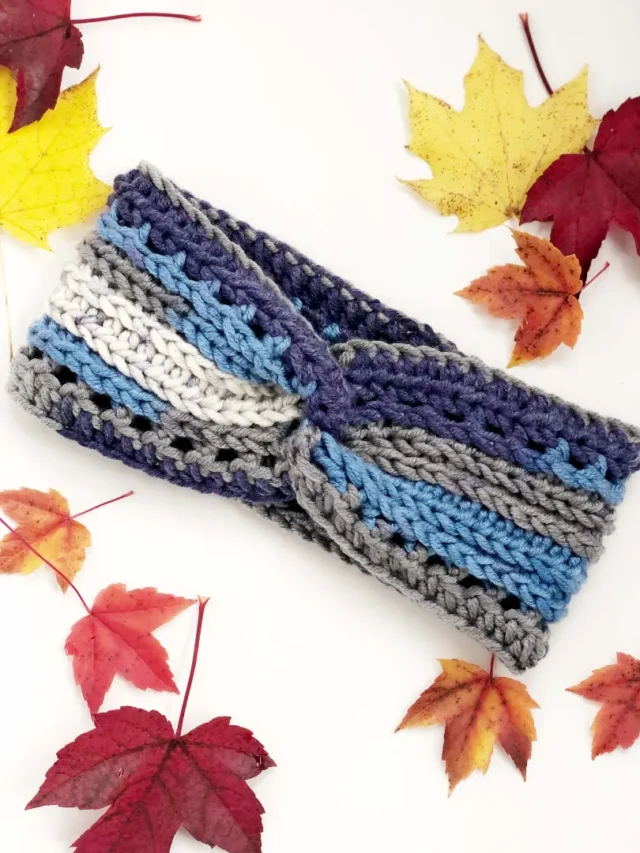
Each row is worked in the 3rd loop and back loop to give it that knit-like look using half double crochet stitches.
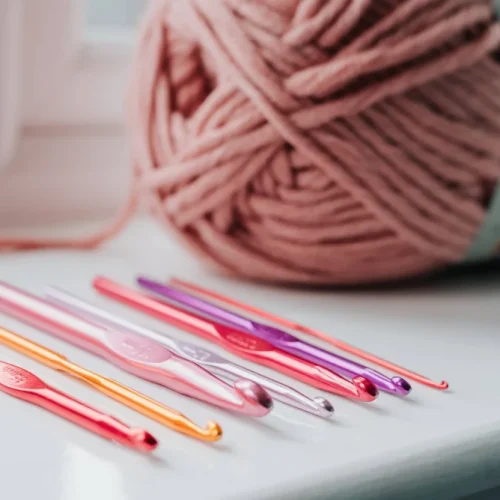
I am using a category 6 weight yarn which is a super bulky yarn and also was leftover yarn I had for a while (which didn’t have a label on it anymore, lol).
But another great alternative that I have found similar to this is the Bernat Softee Chunky yarn, which is very close to what I have used here.
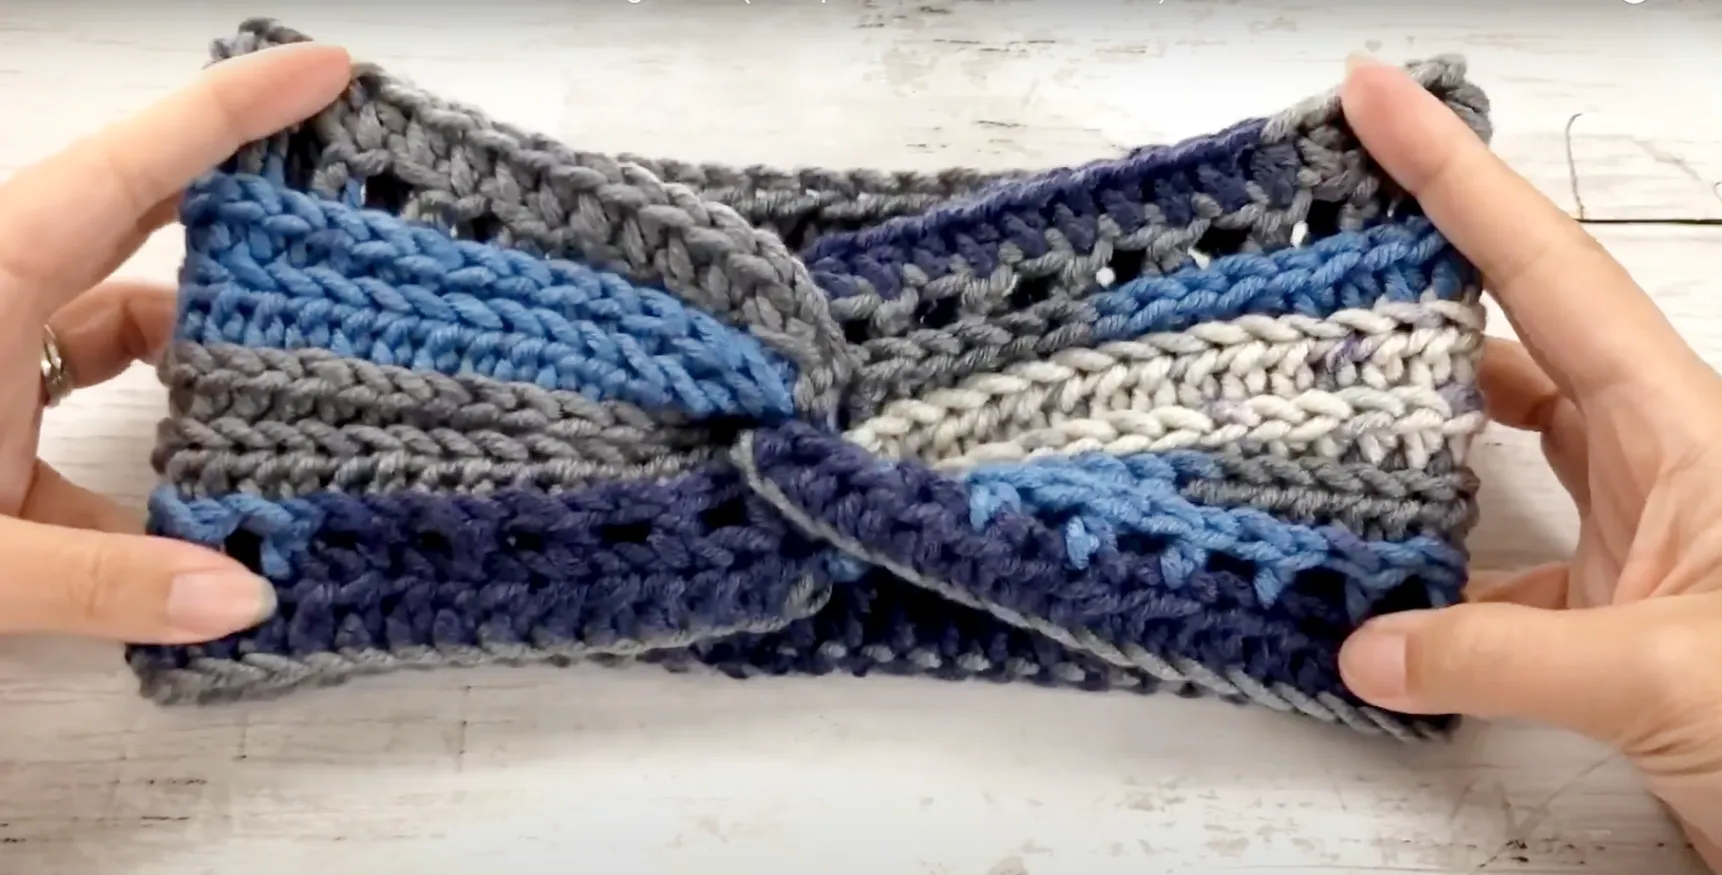
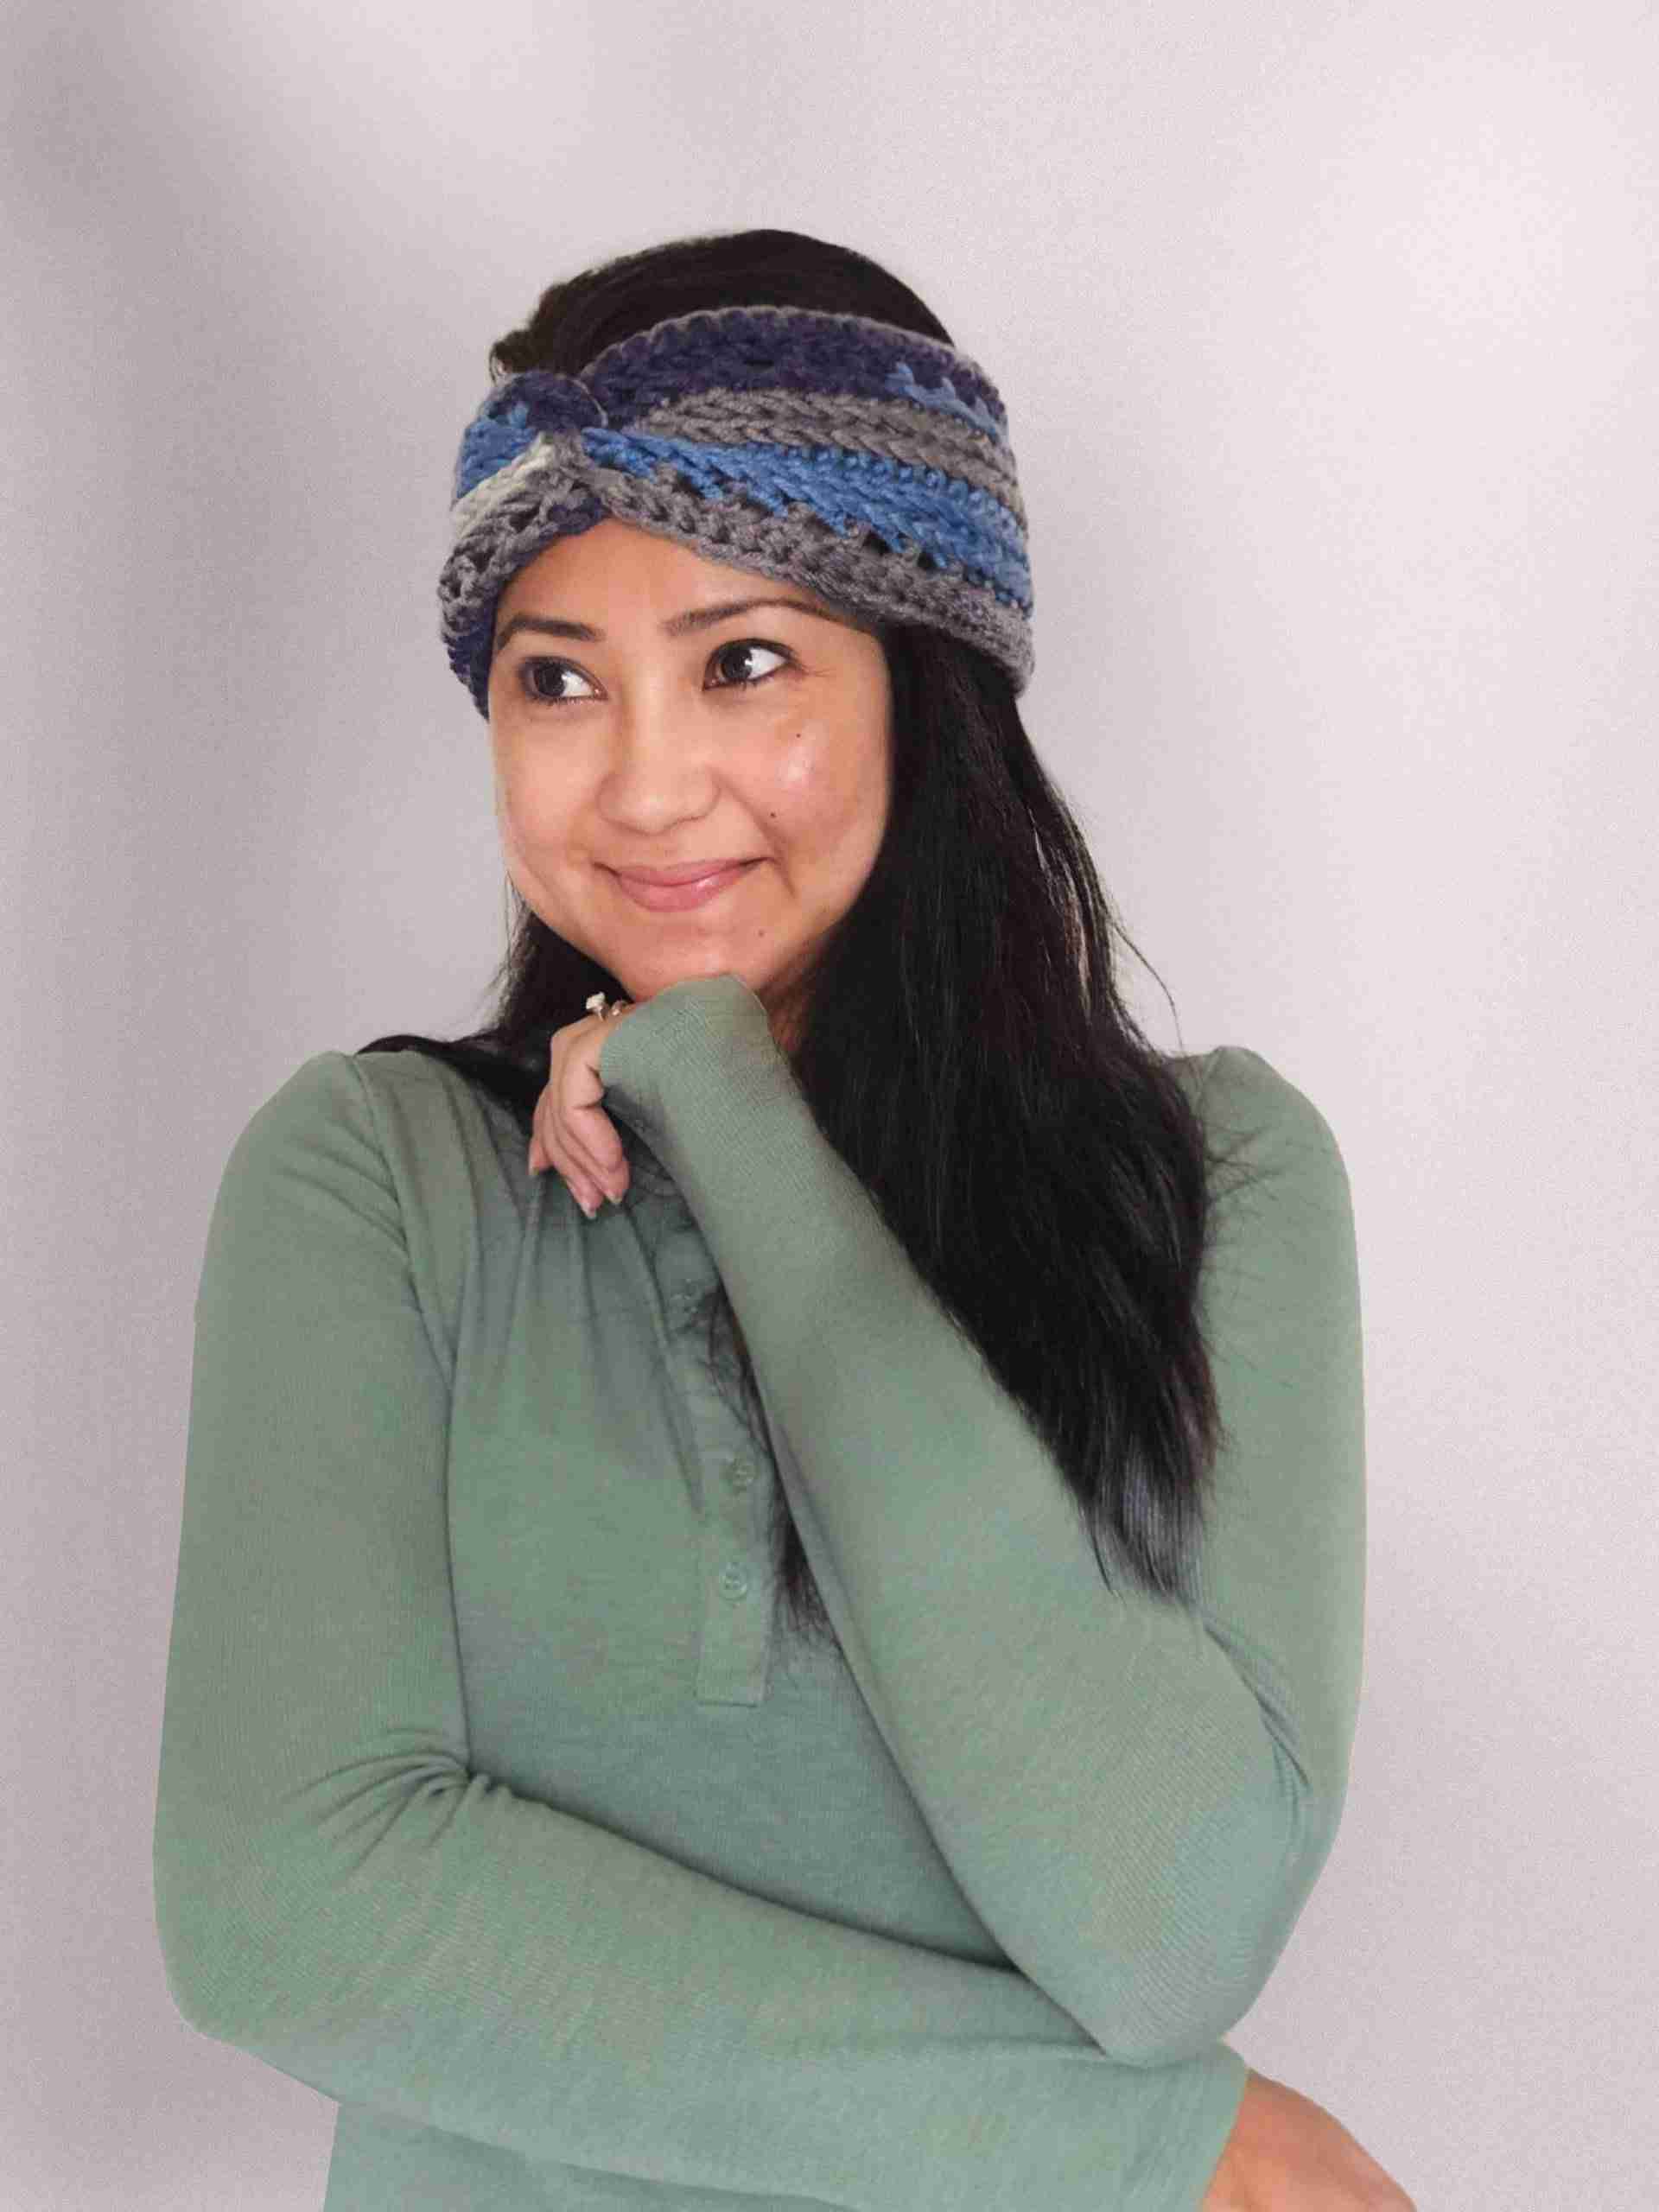
Another great technique to learn is how to twist a chunky headband! When I first started I was mind-boggled as to how this twisted headband look was achieved. But of course, with plenty of trial and error, I managed to nail the perfect twist and so can you!
This free crochet ear warmer pattern is a beginner-friendly pattern that is perfect for those who are new to crocheting or looking for a quick and satisfying project. Whether you’re making it for yourself or as a thoughtful gift, this pattern is sure to impress.
And if you’re looking for other beginner-friendly patterns, check out this crochet hooded cowl that you might love.
Yarn Weight and Sizing:
Understanding Yarn Weight:
The yarn weight you choose plays a pivotal role in the overall feel and warmth of your ear warmer.
For this project, I highly recommend opting for a bulky weight yarn, typically falling under the category of yarn weight 5 or 6. Why bulky yarn, you ask? Well, not only does it contribute to a faster crochet process, but it also adds a substantial layer of warmth.
Picture it as wrapping yourself in a soft, chunky hug – exactly the kind of comfort you want during colder months.
Keep an eye out for labels indicating “chunky” or “bulky.” These designations ensure you’re selecting a yarn that aligns with the cozy vision you have for your ear warmer.
It’s not just about thickness; it’s about creating a piece that is not only functional but also stylish and snug.
Head Circumference:
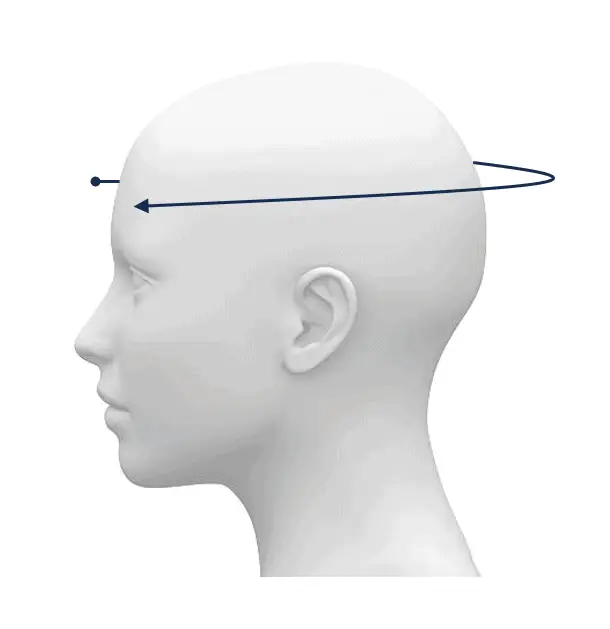
To accurately determine the ideal size for your ear warmer, take a measuring tape and wrap it around the widest part of your head, just above the ears.
This measurement is the key to a snug fit that stays put, ensuring your ear warmer doesn’t slide off or feel too tight.
Consider the stretch factor as well. While crocheted items do have some natural stretch, it’s crucial to start with the right measurement. Keep in mind that the yarn’s thickness, crochet hook size and stitch pattern can influence how much the finished product will stretch when worn.
Taking the time to measure your head size properly sets the foundation for a project that is not only aesthetically pleasing but also supremely comfortable in cold weather.
This step is particularly crucial if you’re making crochet ear warmers for others or customizing the pattern for different head sizes. A little extra attention to detail at the beginning ensures that your finished ear warmer is tailor-made for the intended wearer.
Watch the Video tutorial here:
If you would like to receive free written patterns and video tutorials straight into your inbox, just click Subscribe to get into our mailing list.
Things to Note:
- Turning chain does not count as a stitch unless mentioned otherwise
- Special Stitch – 3rd loop St: This stitch refers to the loop underneath the regular 2 loops. (ref to image 1)
- Step by step Video Tutorial available here
- Abbreviation page available in English US format
- Measurements for A1/A2/T1/T2/C1/C2:
- Your head measurement: (A1/A2) Adult: 21 – 23 in/ 53 – 58.5 cm, (T1/T2) Tween: 20 – 22 in/ 51 – 56 cm, (C1/C2) Child Sizes: 18 – 20 in / 45.5 – 51 cm
These measurements are only estimates and are best to measure around your head’s circumference to get the best fit. Chains should end on an odd number.
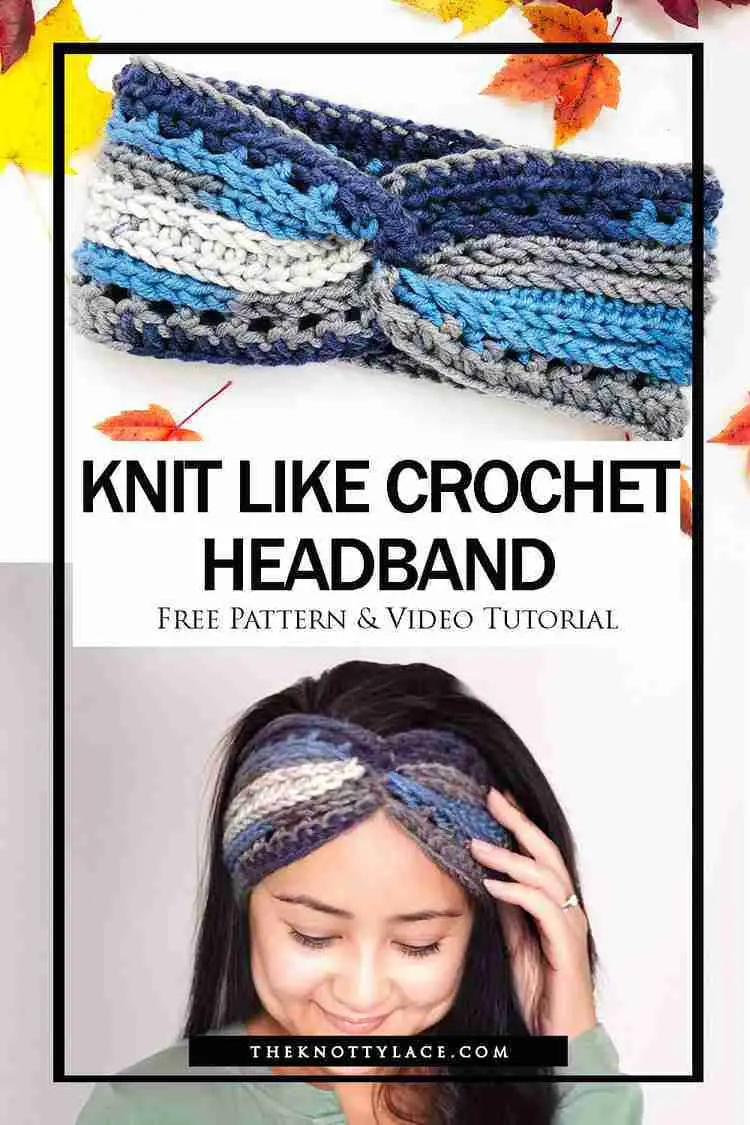
Autumn Crochet Knit Like Ear Warmer Headband – Free Pattern
INSTRUCTIONS
Part 1: Base
1. Foundation Row: Ch (55/ 61/ 51/ 57/ 47/ 51) Chainless foundation St + 1 (Video tutorial here). If you are customizing your size, end your chains on an odd number.
2. Row 1: Hdc each St across, Ch 1 turn
3. Row 2: *(Hdc, Ch 1, SK 1), Rep (*) across, Ch 1 turn
4. Row 3: *(Hdc through the 3rd loop of the prev Hdc St, Hdc on the underside of the Ch St), Rep (*) across, On the last St, Hdc, Ch 1turn
5. Row 4: Hdc through the (BLO) back loop across, on the last St, Hdc, Ch 1 turn. 1. For child’s size you can go straight to Row 7.
6. Row 5: Hdc through the 3rd loop across, On the last St, Hdc, Ch 1 turn
7. Row 6: Rep Row 4
8. Row 7: *(Hdc through the 3rd loop, Ch 1, SK 1), Rep (*) across, On the last St, Hdc, Ch 1 turn
9. Row8: Hdc each St across, Ch 1 turn
10. Leave a long tail for seaming. Bind off
Part 2: Seaming ends
1. Thread the yarn tail through your tapestry and place the headband RS up
2. Fold the 2 ends in half and connect each end together in a zig-zag form
 3. Insert your tapestry needle through all 4 layers, and whip St across
4. At the end of the St, work a knot to secure and weave in the tail.
5. Bind off and turn the headband RS out. 6. Weave in all loose ends.
END

If you are looking for the entire tool used to make this Knit-Like Stitch Crochet Ear Warmer / Headband, check them out here below:
· 10 mm Clover Amour Crochet Hook
· Yarn alternative – Bernat Softee Chunky
· Autumn Knit Like Stitch Crochet Headband printable PDF
And there you have it – a delightful, warm, and stylish crochet ear warmer using knit-like stitches. This free pattern is not only a fantastic project for beginner crocheters but also a great gift idea for friends and family.
This new project will keep you cozy and fashionable in cold weather all fall and winter long.
With the free pattern, video tutorial, and helpful tips, you’re sure to create a warm and stylish accessory that will keep you cozy all winter long.
This Easy Crochet Ear Warmer Pattern for Beginners is A Great Crochet Project for Everyone.
If you would like to receive free written patterns and video tutorials straight into your inbox, join our mailing list now.
And don’t forget to tag me on Instagram and Facebook @theknottylace, I would love to see your work!
Happy Hooking,
Shaz🌺