DESIGN INSPIRATION
The inspiration behind this hooded cowl design is a delightful blend of nostalgic charm.
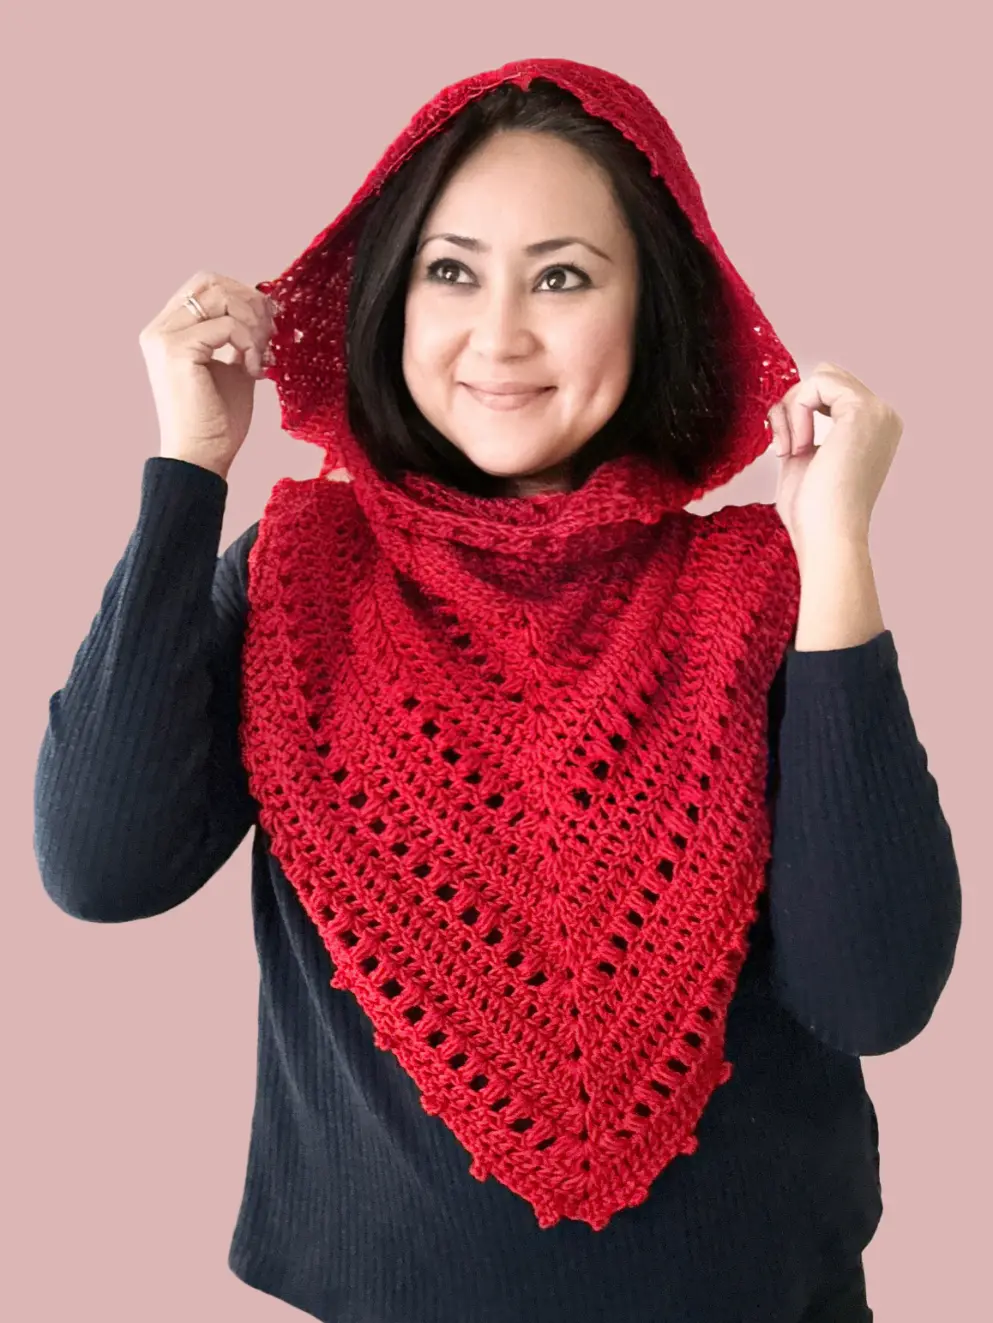
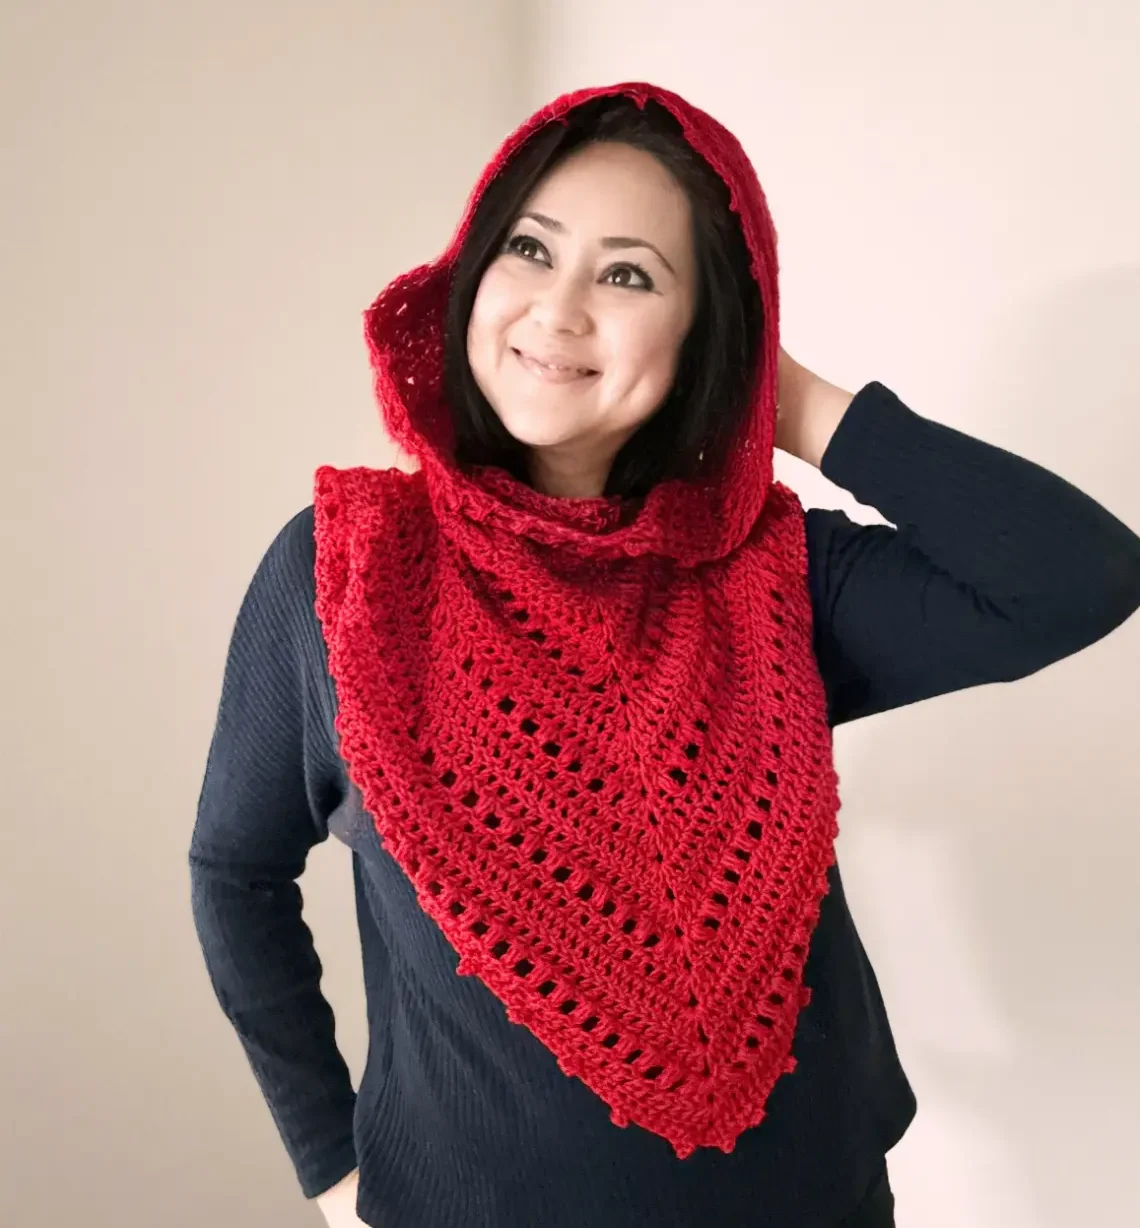
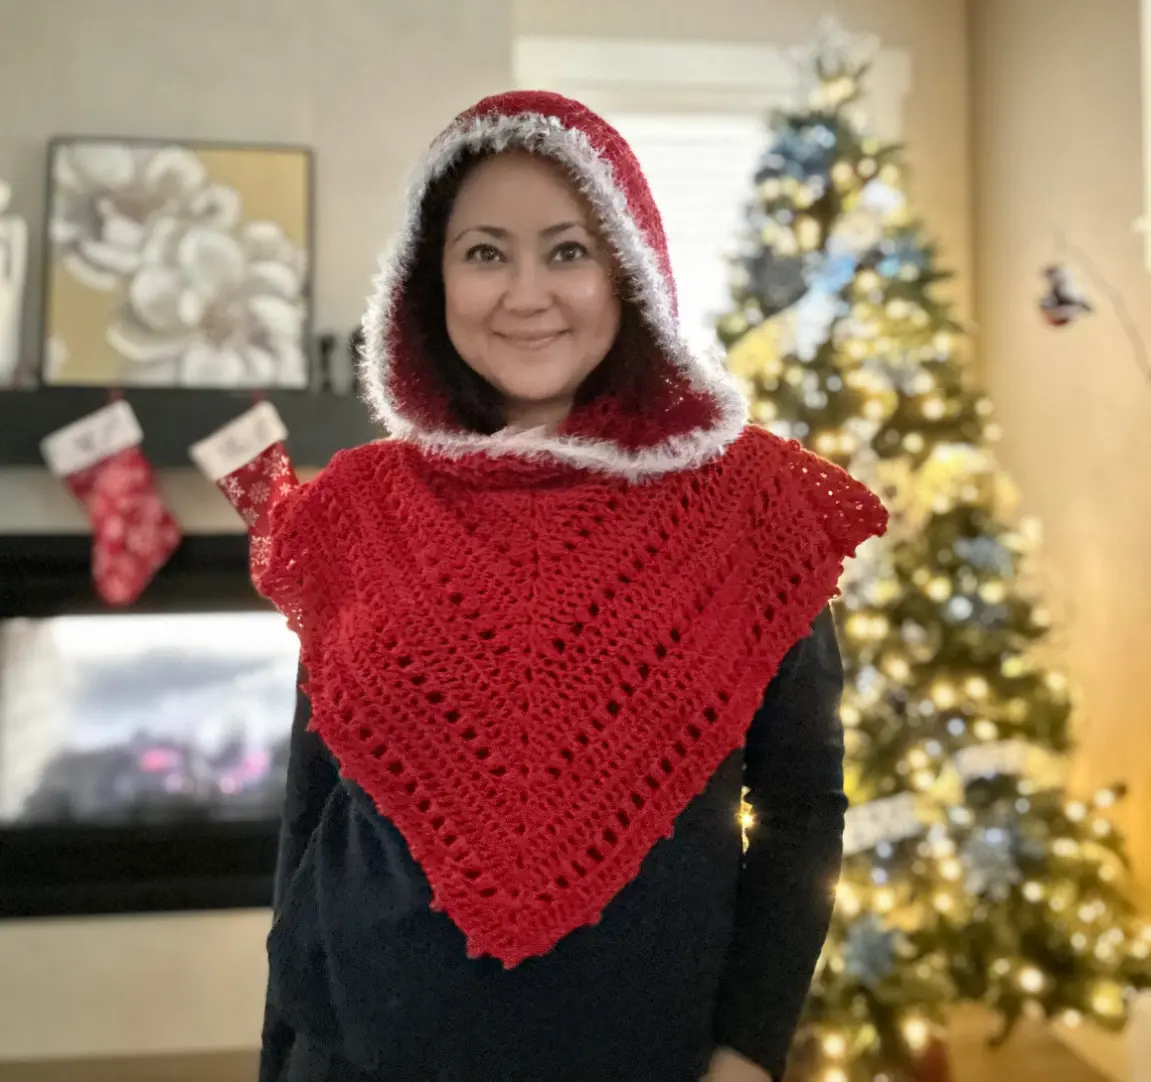
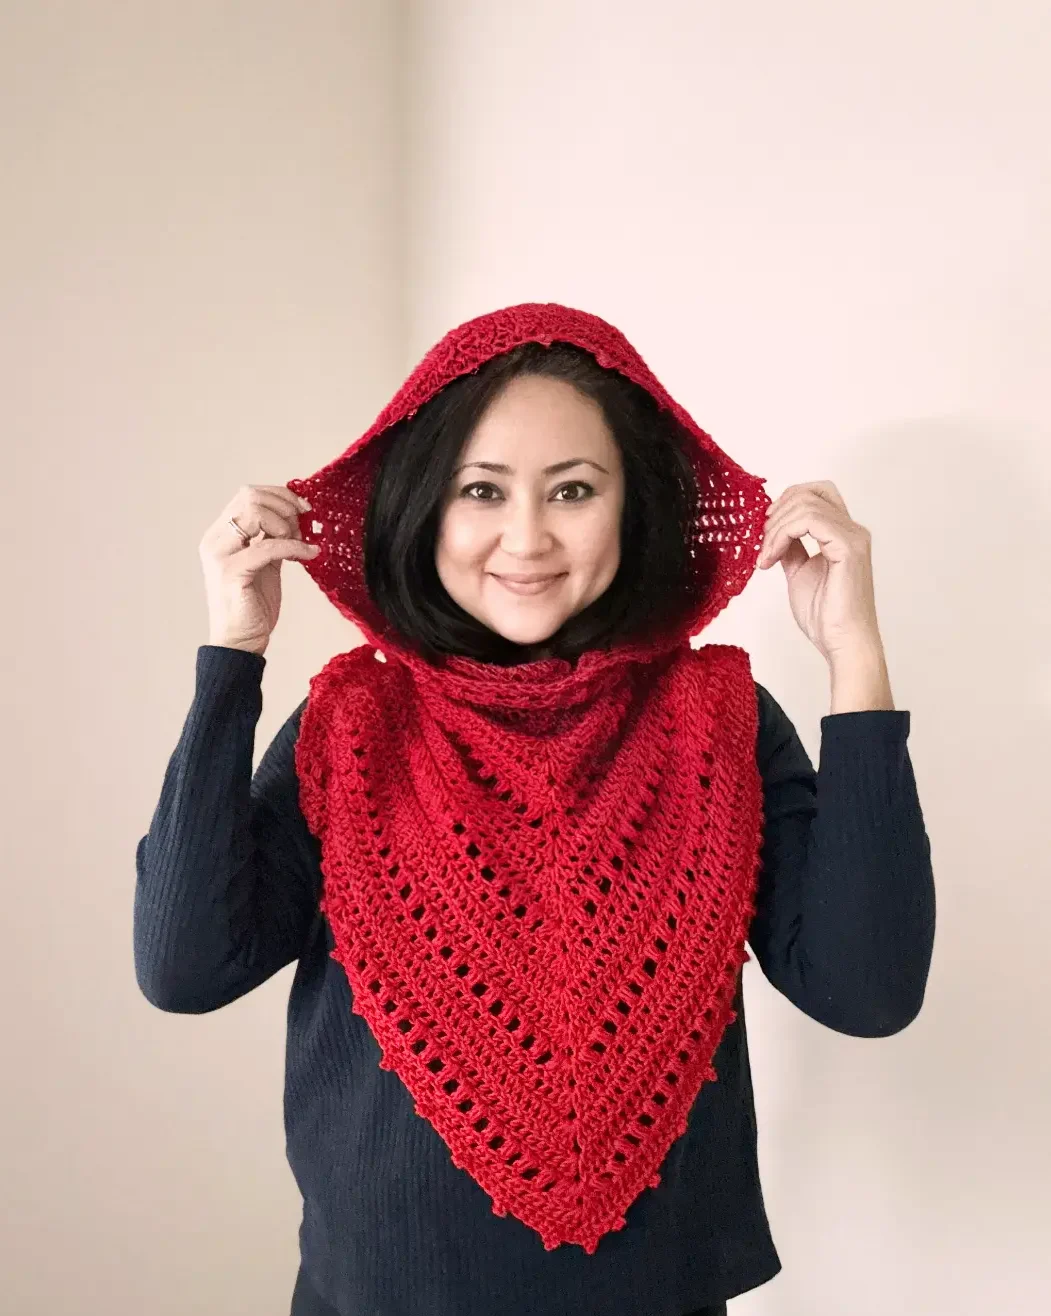
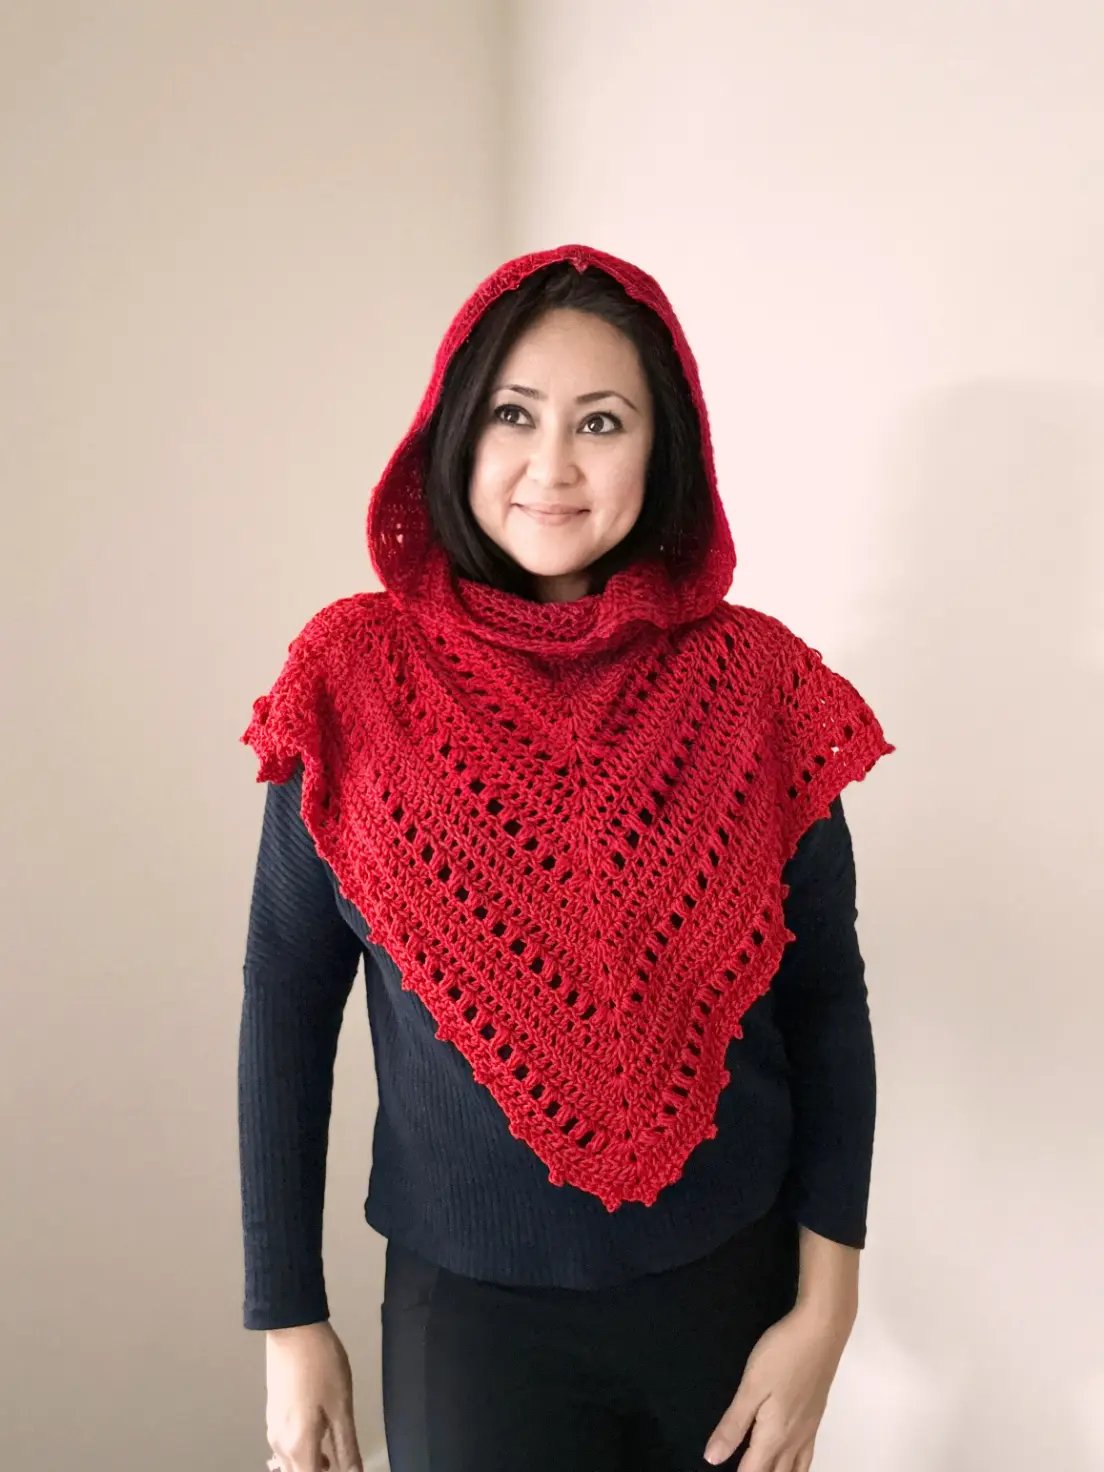
I’m picturing the Little Red Riding Hood’s cape / poncho combined with a soft and cozy cowl. My goal was simple: a neck warmer that exudes extra warmth and comfort, featuring a crochet hood for that extra snug touch and possibly a poncho! Phew… I must say, I’m genuinely pleased with the final outcome.
Crafting this piece was driven by a desire for a quick and satisfying do-it-yourself project, ideal for personal use or as a thoughtful gift. The optional picot stitch along the hoodie serves as a charming detail, providing a touch of elegance and versatility.
Related Post:
Pattern Construction
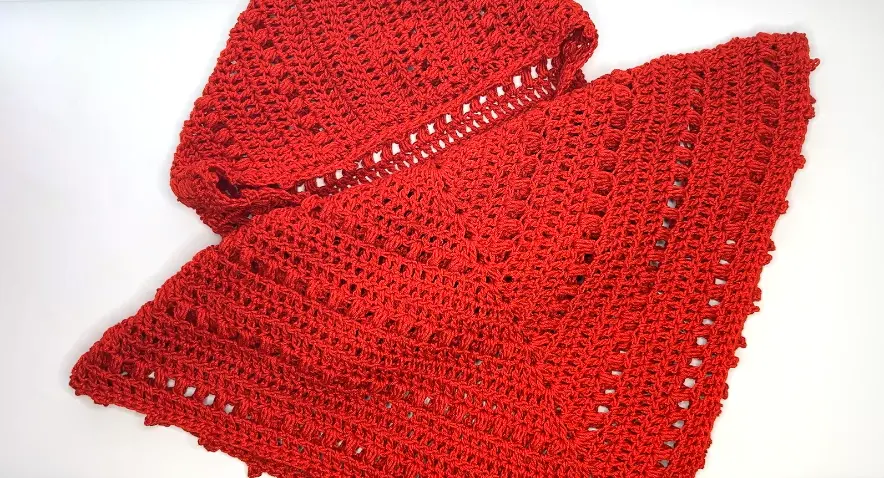
Creating a chic and snug crochet hooded cowl that is perfect for beginners yet ensures a seamless fusion of style and comfort. Using only basic stitches like the single crochet, half double crochet, and double crochet, makes it the perfect free pattern for any crocheter.
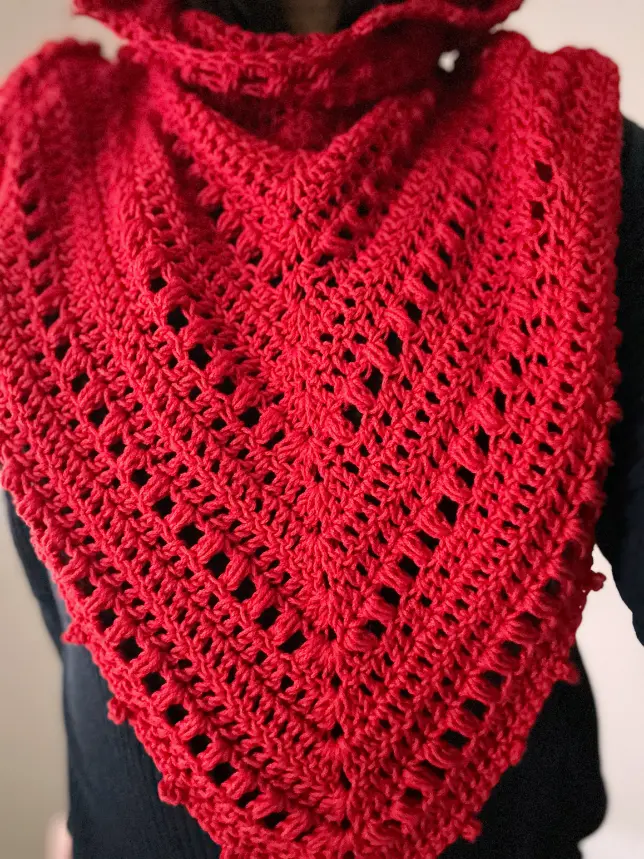
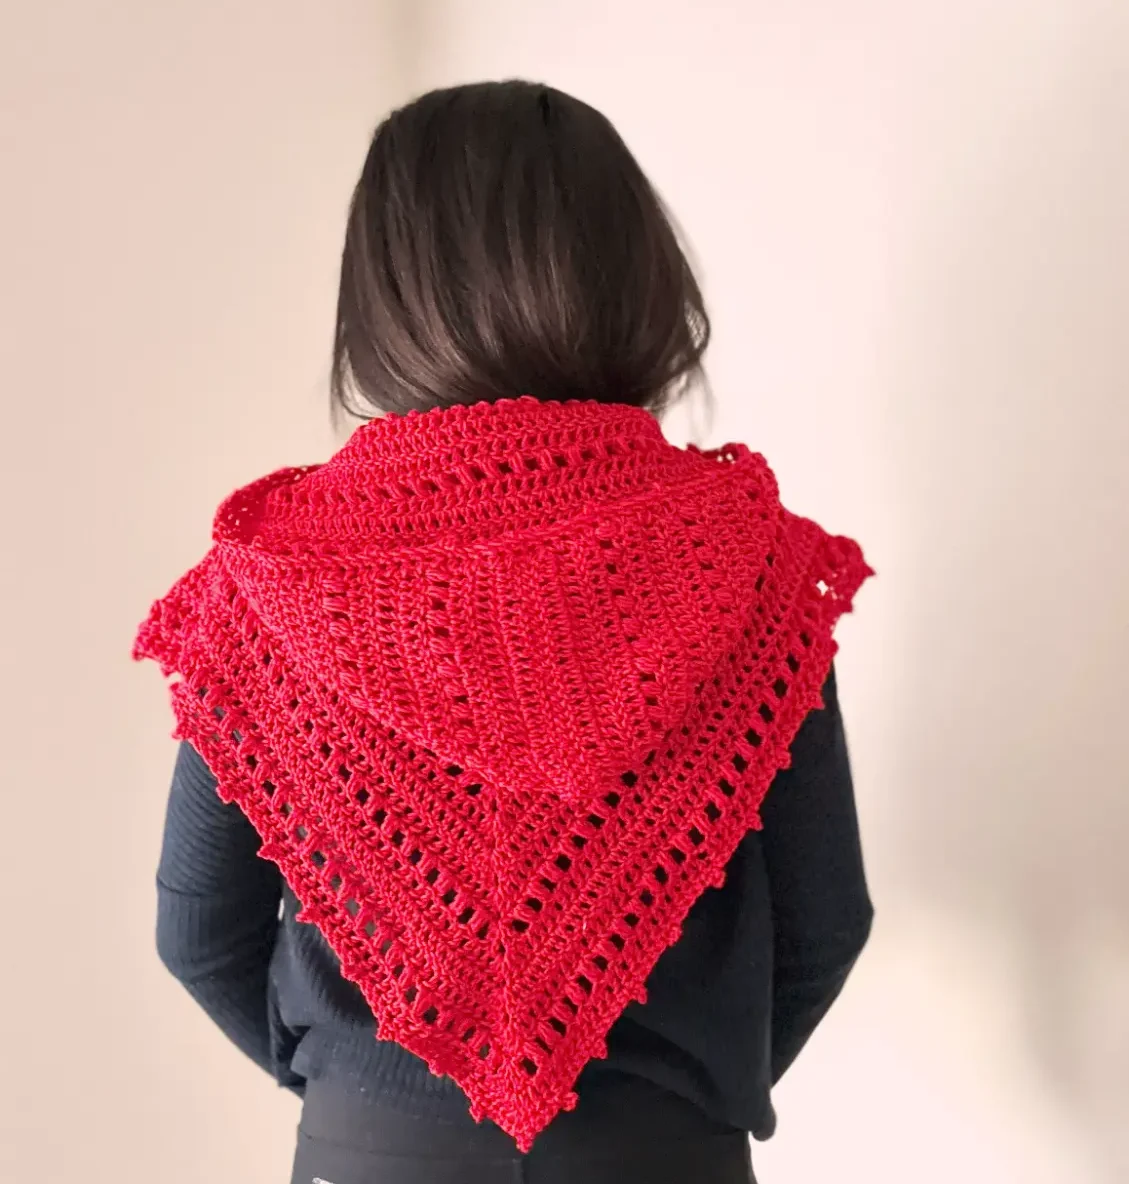
Adding a touch of flair, I also incorporated the picot stitch to the side of the hood and some puff stitches for that beautiful texture.
The back of the hood is split into two sections to avoid the dreaded pointy tip giving it a polished curved finish. The hood is entirely adjustable, allowing you to effortlessly create an oversized hooded cowl or tailor it to your liking.
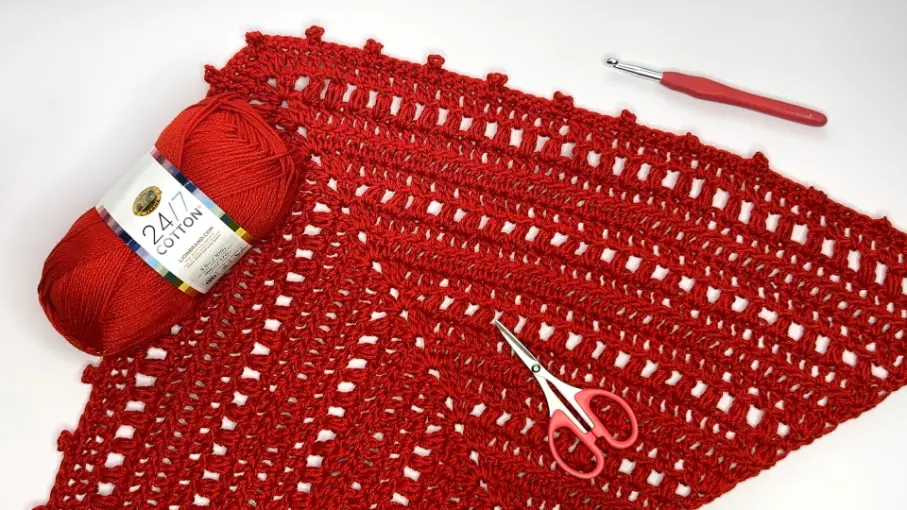
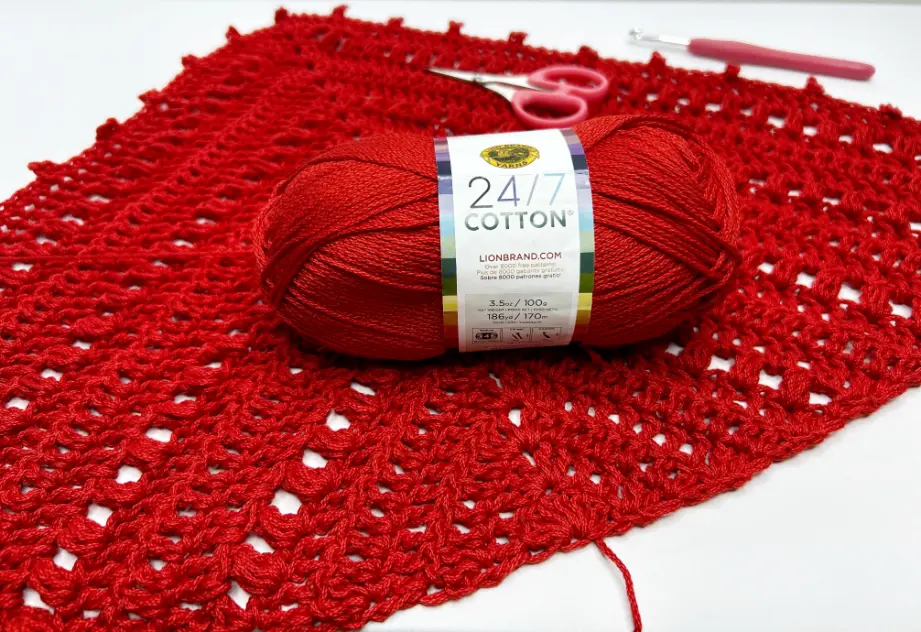
Being in a festive mood, I decided to go with a bright red yarn by 24/7 Cotton Yarn by Lion Brand Yarn. You can also go for a bulky weight yarn or a chunky yarn for a thicker and warmer cowl.
But consider adjusting the gauge before using any alternative yarn. This can affect how the yarn’s texture, and fiber content complement your finish cowl.
To ensure a well-fitted and comfortable hooded cowl, it all boils down to the correct measurements and yarn weight. Precise measurements of your neck and head circumference, as well as the chosen yarn, will guarantee a cowl that snugly wraps around your shoulders and head.
Choosing the Perfect Yarn
Selecting the right yarn weight is crucial for your hooded cowl project, influencing both its comfort and appearance.
For colder regions, opt for “bulky weight” or “chunky” yarns, ensuring insulation and warmth. Alternatively, in milder climates or for indoor wear, lighter “worsted” or “sport” weight yarns strike a balance between warmth and breathability.
Factor in the fiber content—wool or alpaca for warmth, moisture-wicking, and durability, while softer fibers like cotton or bamboo suit sensitive skin.
Apart from practicality, think about aesthetics. Choose between solid colors and variegated blends, smooth textures, or fuzzy yarns to personalize your hooded cowl. These decisions will shape the unique character of your creation.
In the end, finding your ideal yarn depends on personal preferences and the cowl’s purpose. Explore textures, envision the final result, and take the time to select the perfect yarn. This ensures your lovely hooded cowl not only keeps you snug but also becomes a stylish winter wardrobe staple.
Measure as You go
Customizing your crochet cowl pattern size is key for comfort and style. For length adjustments, add or reduce any number of rows based on your desired preference; longer cowls offer a dramatic appearance and more warmth.
Width modifications cater to personal fit – increase stitches for a wider cowl or decrease for a narrower one, ensuring a consistent stitch count throughout for balance.
Tailor the hood size to your liking by adjusting chains and stitches. A larger head or preference for roomier hoods perhaps?
Widen with additional chains or narrow by reducing stitches in the hood section. Experiment with proportions for a face-framing fit.
Remember, gauge and tension vary, so create a swatch using the pattern’s instructions to ensure accuracy. Measure stitches and rows, adjusting your hook size as needed.
With these tips, you’re set to customize your hooded cowl size. Once tailored to perfection, the next section will inspire you with design ideas to make your creation truly unique.
This crochet cowl also goes really well with these other warm and cozy free crochet patterns below:

Heather Legging Sweater

Off Shoulder Sweater

Argyle Jacket
If you would like to see more video tutorials like this you can check them out here on the blog or Subscribe to my Video Channel on YouTube.
Pro Tip
1. Experiment with Different Yarn Weight: While the recommended yarn in the pattern is highly recommended, don’t be afraid to explore different weights and fiber. Different fibers, weights, and textures can dramatically change the look and feel of your finished hooded cowl. Consider trying a bulky yarn for a chunky and cozy design or a variegated yarn for a vibrant, eye-catching effect.
2. Play with Color: Crocheting allows for endless possibilities when it comes to color combinations. Have fun experimenting with different color schemes to add a personal touch to your hooded cowl. You can use a single color for a classic and elegant look or create a bold statement by incorporating multiple hues. Don’t be afraid to get creative and let your imagination soar.
3. Embellish with Details: Once you’ve mastered the basic hooded cowl pattern, why not take it up a notch by adding some unique details? Consider exploring different ways of personalizing your cowl like adding buttons, pom-poms, or tassels to enhance the overall design. These small accents can make a big difference and give your creation a touch of personality.
Tools And Materials
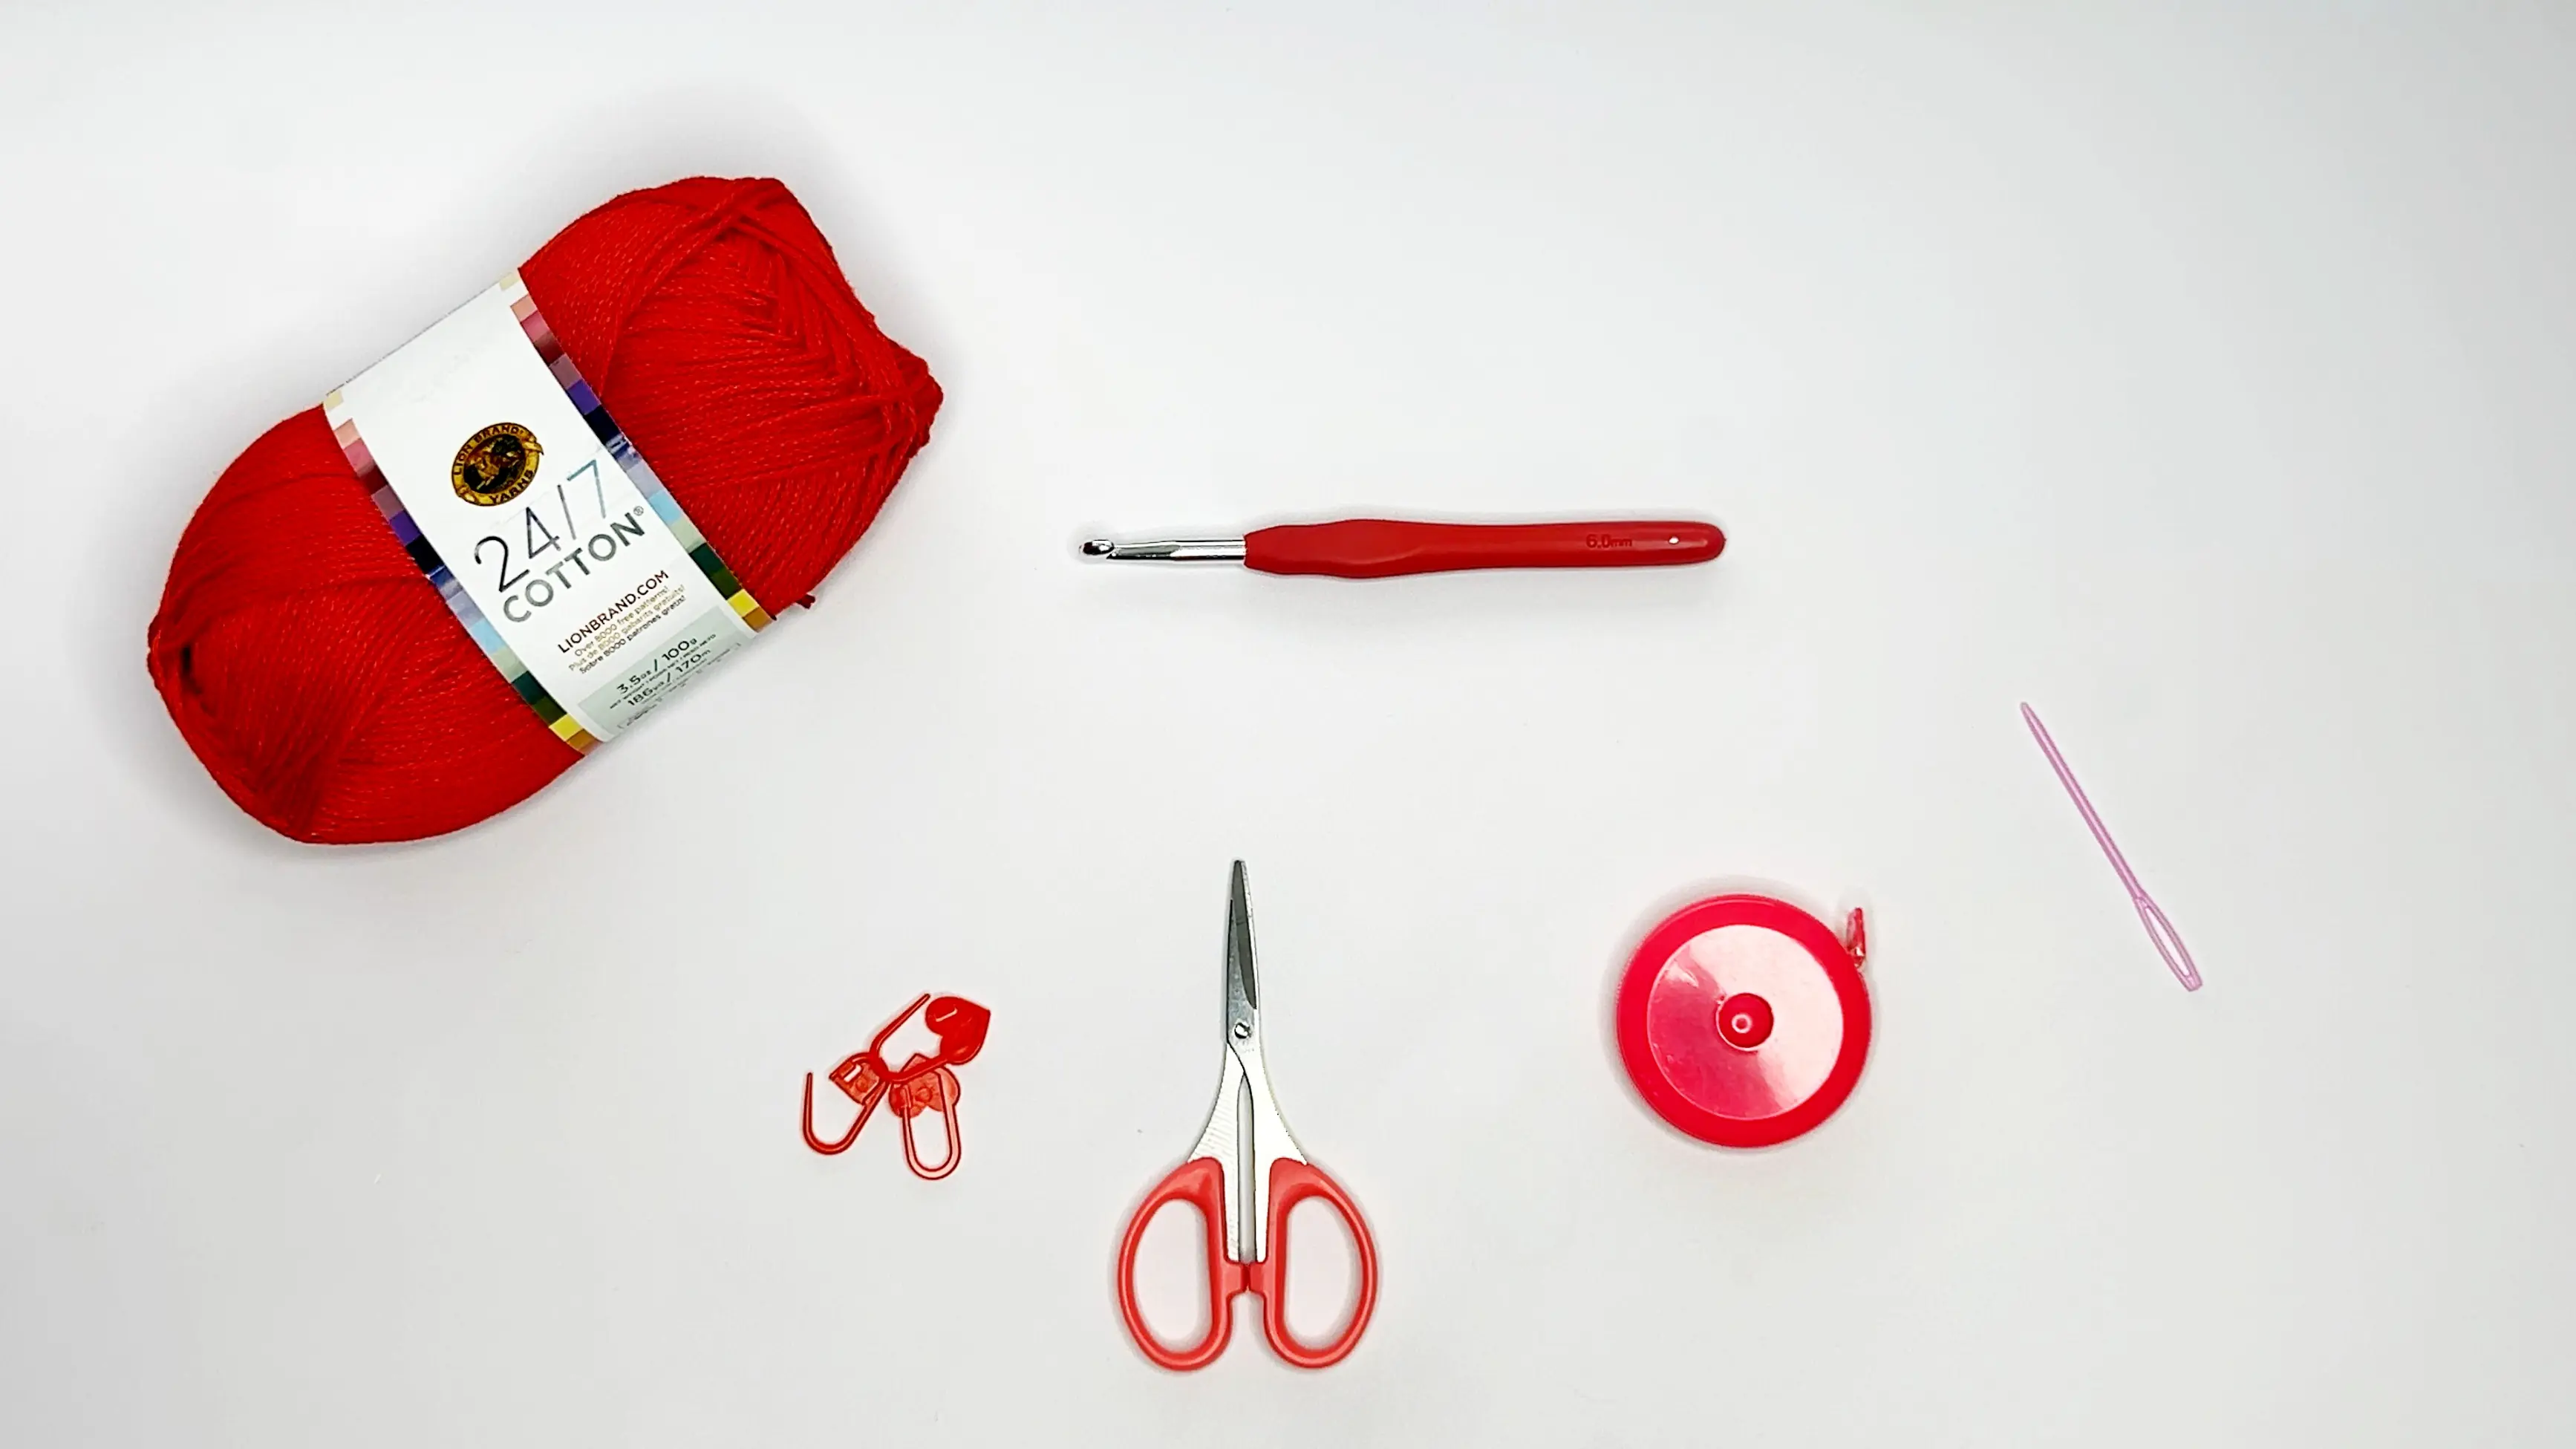
Yarn weight: Category 4
Brand: 24/7 Cotton by Lion Brand
Color: Red
Hook: 6.00 mm hook
Gauge: 14 Dc Sts x 6 Rows = 4 x 4 in/ 10 cm
No. yarns (skeins or yardage): 4 skeins or 686 yards (this is only an estimation)
Tools: tapestry needle, measuring tape, Scissors, Stitch Markers
Skill: Beginner
If you would like to receive free written patterns and video tutorials straight into your inbox, just click Subscribe to get into our mailing list.
Things to Note:
- Prepare a pattern gauge to get the right size. You may need to adjust your tension or change the hook size to achieve the same gauge.
- This pattern is measured as you go. The Length and hood can be adjusted to your liking
- This pattern will include 2 decorative stitches – The Puff St and the Picot Stitch
- Step by step Video Tutorial available here
- Abbreviation page available in English US format
For reference, I am 5′ 2″ (160cm) in height.
Crochet Cowl Hoodie – Free Pattern
INSTRUCTIONS
PART 1: Front & Back Panel
- Foundation: Work a magic ring (see Video tutorial here)
- Row 1: Ch 2, Dc 6 in the ring loop (You should have 7 Dc Sts), Close Magic Ring and Ch 1 turn – (All sizes)
- Row 2: 2Dc, Dc 2, (2Dc, Ch 1, 2Dc) in the 4th St, Dc 2, 2Dc, Ch 1 turn
- Row 3: 2Dc, Dc 5, (2Dc, Ch 1, 2Dc) in the Ch Sp, Dc 5, 2Dc, Ch 1 turn
- Row 4: 2Dc, Dc 8, (2Dc, Ch 1, 2Dc) in the Ch Sp, Dc 8, 2Dc, Ch 1 turn
- Row 5: 2Dc, Dc 11, (2Dc, Ch 1, 2Dc) in the Ch Sp, Dc 11, 2Dc, Ch 1 turn
- Row 6: 2Dc, Dc 14, (2Dc, Ch 1, 2Dc) in the Ch Sp, Dc 14, 2Dc, Ch 1 turn
What is a Puff Stitch: It is a group of half double crochet stitches closed up in one stitch. In this tutorial you will yarn over, insert hook and draw up a loop – do this 3 times, yarn over and close up that stitch
- Row 7: 2Hdc, Ch 1, Sk 1 *(Puff Stitch, Ch 1, Sk 1), Rep (*) until before the Ch Sp, (2Dc, Ch 1, 2Dc) in the Ch Sp, *(Ch 1, Sk 1, Puff Stitch), Rep (*) until the 2nd last St, 2Hdc, Ch 1 turn
- Row 8: 2Dc, work Dc Sts into each Ch Sp and puff St across until the Ch Sp at the Middle inc Sts, (2Dc, Ch 1, 2Dc) in the Ch Sp, Dc into each Ch Sp and puff St across until the 2nd last St, 2Dc, Ch 1 turn
- Row 9: 2Dc, work Dc Sts into each St across until before the Ch Sp, (2Dc, Ch 1, 2Dc) in the Ch Sp, Dc into each St across until the 2nd last St, 2Dc, Ch 1 turn
- Next Row: Rep Row 9
- Next Rows: Rep Rows 7 – 9 until you have your desired length and width of your shoulders and front piece. Once you have completed all your rows, ideally your last row should be a Puff St row.
For ref, I made 3 more sets of Dc & Puff St rows
- 2nd Last Row: Rep Row 8
What is a Picot Stitch: It is a folded Chain stitch. In this tutorial it is a Chain of 3, slip stitch into the single crochet stitch at the bottom of that chain.
- Last Row (Picot): Sc into the 1st St, *(Ch 3, Slst into the Sc St at the bottom of the Ch, Sc 5), Rep(*) across until the Ch Sp at the inc Sts, Work a picot into that Ch Sp. Rep (*) across, bind off
- Make a second piece.
PART 2: Measure and Assembling
- Measure around your forehead leaving enough space for your head to go through and some.
For ref, I measured 22 in / 56 cm
- Place both pieces RS out and place a SM in the middle of the triangle (the center of the magic ring).
- Now measure half of your measurement circumference (mine is 11 in / 28 cm) and use the SM as your middle point for your neck opening.
- Place 2 SM on both ends and secure both triangles together.
- You can add more SM for a secure alignment
- Take your hook and Sc both pieces together until the 1st SM (Yellow SM). Bind off
- Rep Step 6 on the other side.
PART 3: Cowl
- Turn triangle pieces RS out and from the seam side, draw up a loop and work even and loose Sc Sts along the neckline in the round, Sl st into the 1st St to join
- Row 1: Ch 2, Dc into each St in the round, Sl st to join,
- Row 2 – 3: Rep Row 1 for 2 rows
- Row 4: *(Puff St, Ch 1, Sk 1), Rep (*) in the round, Sl st to join.
- Next Rows: Rep Rows 1 – 4 one more time.
Feel free to add or remove as many rows as you’d like
- Bind off
PART 4: Hood
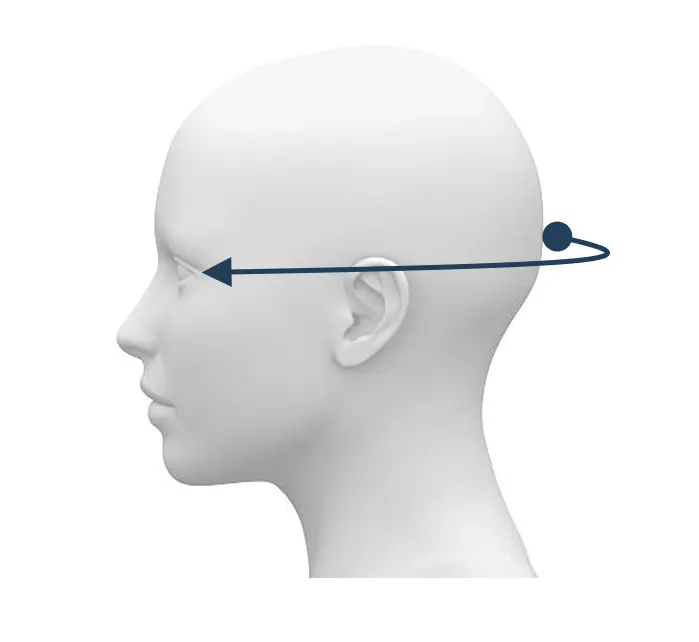
- Measure from the center back of your head (parallel to your eyes) towards the front of your face. This will be the depth of your hood, so allow for some extra room.
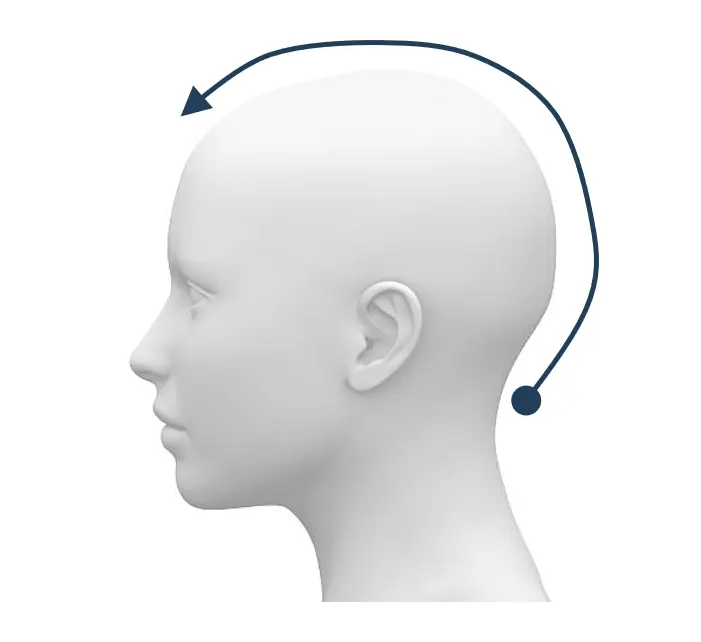
- Next, measure the back of your hairline over to your forehead. This will be the length of your hood. Take into consideration the extra length along the cowl. Adjust the length to your liking.
For ref, I measured a width of 10 in / 25 cm and a length of 15 in / 37.5 cm
- Flatten your cowl and place a SM in center front.
- Divide your measurement into 2 (mine is 5 in / 12.5cm) and measure your cowl from the end side towards the center. Place 2 SM on each side.
- Pick up your hook and draw up a loop from the 1st SM (on the WS), Ch 2
- Row 1: Dc into each Puff St and Ch Sp across until you reach the next SM, Ch 1 turn
- Row 2 – 3: Dc each Stitch across, Ch 1 turn
- Row 4: *(Puff St, Ch 1, Sk 1), Rep (*) across, Ch 1 turn
- Next Rows: Rep Rows 1 – 4 until you’ve reached your pref measured length of the hood minus 2 inches/ 5cm.
Ideally, end your last row on the puff stitch row.
- Place a SM in the middle of the hood row and work your Dc Sts until 3rd St bef the SM, Dc2tog (Dec) the next 2 Sts, Ch 1 turn
- Next Row: Dec the next 2 Sts, and cont to Dc across, Ch 1 turn
- Next Row: Dc across until the 3rd last St, Dec the next 2 Sts, Ch 1
- Bind off
- Rep Steps 11, 12 and 11 from the middle point, . Bind off
- Fold the hood WS out and Sc or sew the sides together.
- Bind off
PART 5: Tidying Up the Hood
- Row 1: Insert your hook anywhere along the side of the hood and draw up a loop, Ch 1 and work loose Hdc Sts along the sides of the hood in the round, Slst to join,
- Row 2: *(Ch 3, work a Picot St, Sc 5), Rep(*) along the rim of the hood. Ch 1 and bind off.
- Weave in all loose ends.
END
If you are looking for the entire tool used to make this Crochet Hooded Cowl, check them out here below: