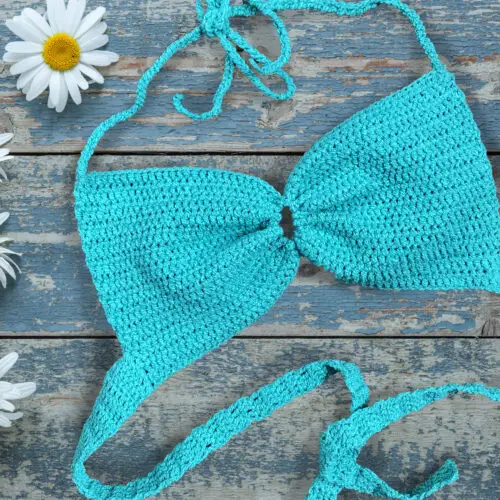
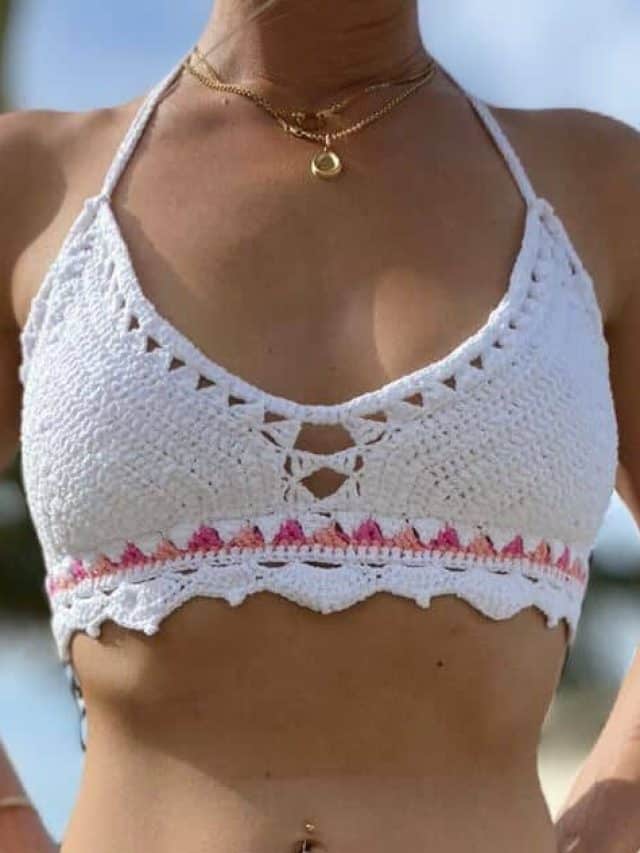
Today I want to share with you the Sahara Crochet Bikini Bralette / Top that is oh so comfy, your girls will be thanking you!
It hugs every curve, with completely adjustable straps and a sideband that adds that little bit of support. But if you have bigger gals, try adding Shaper pad cups and possibly elastic bands under the bust too for that 100% support!
And trust me when I say that those extra padding will help with the extra lift needed!
-

Sahara Bralette paired with matching bottom
Check out the matching bottom here. This pattern tutorial is also available on my YouTube channel where it is worked up in cup size C. However, If you would like a printable ad-free PDF copy of this pattern, it is available for purchase in my shop, or add this to your Ravelry queue
DESIGN INSPIRATION
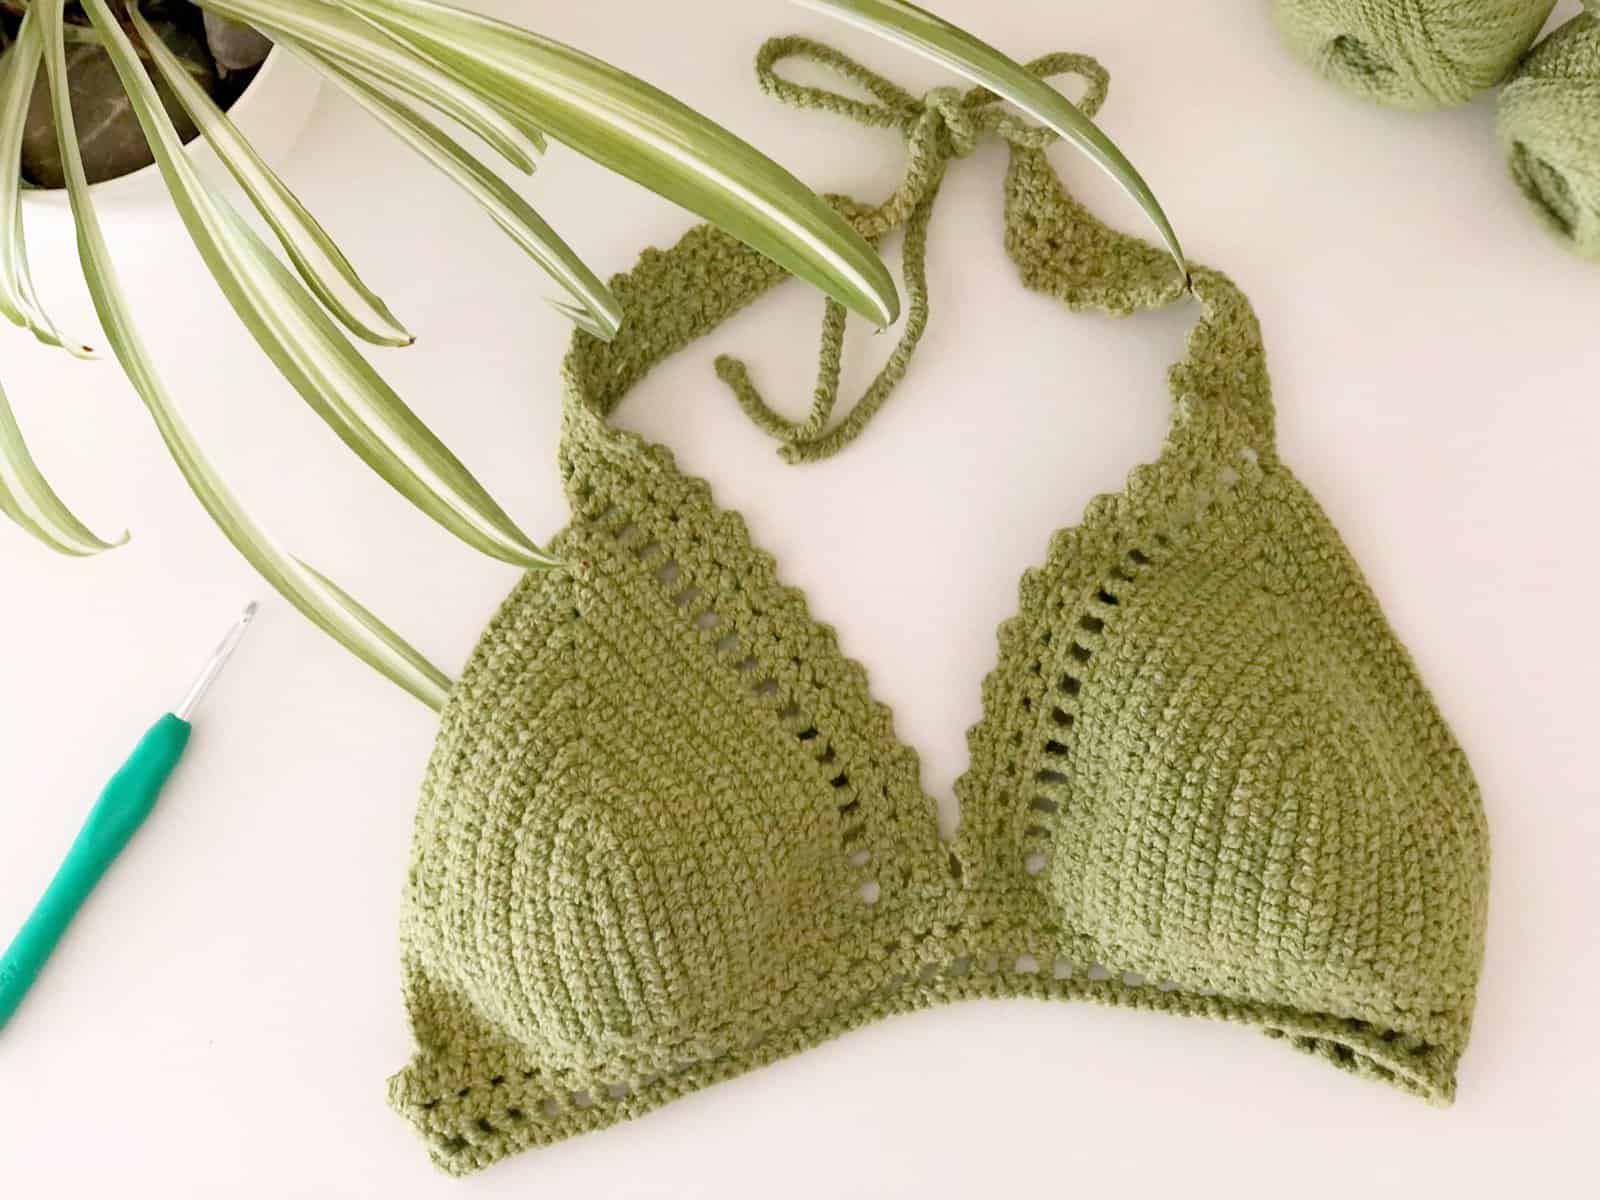
That one great bralette is all we need. And it was time to have a pattern that fits the bill (well we do have many ). Nicely curved cups with a timeless border pattern give this bralette an evergreen style suited for any beach or pool occasion.
Did you know it can also be worn 2 ways! Plus this pattern comes in six cup sizes from A to F cups and is completely customizable.
And remember to always use the right type of yarn for swimwear to extend the comfort of wear and most importantly so that it does not sag or carry water weight. Yikes, I don’t think we would want that!
Related Post:

This bralette is worked by joining 2 cups together, with the upside-down triangle pattern on both the top and bottom of the cups. Ties are seamlessly added along the way to avoid weaving in too many ends.
Cup sizes are easily adjustable to fit perfectly when measured along. And if you are measuring along, see how much yarn you actually need with our yarn calculator here.
If you would like to see more video tutorials like this you can check them out here on the blog or Subscribe to my Video Channel on YouTube.
TOOLS & MATERIALS:
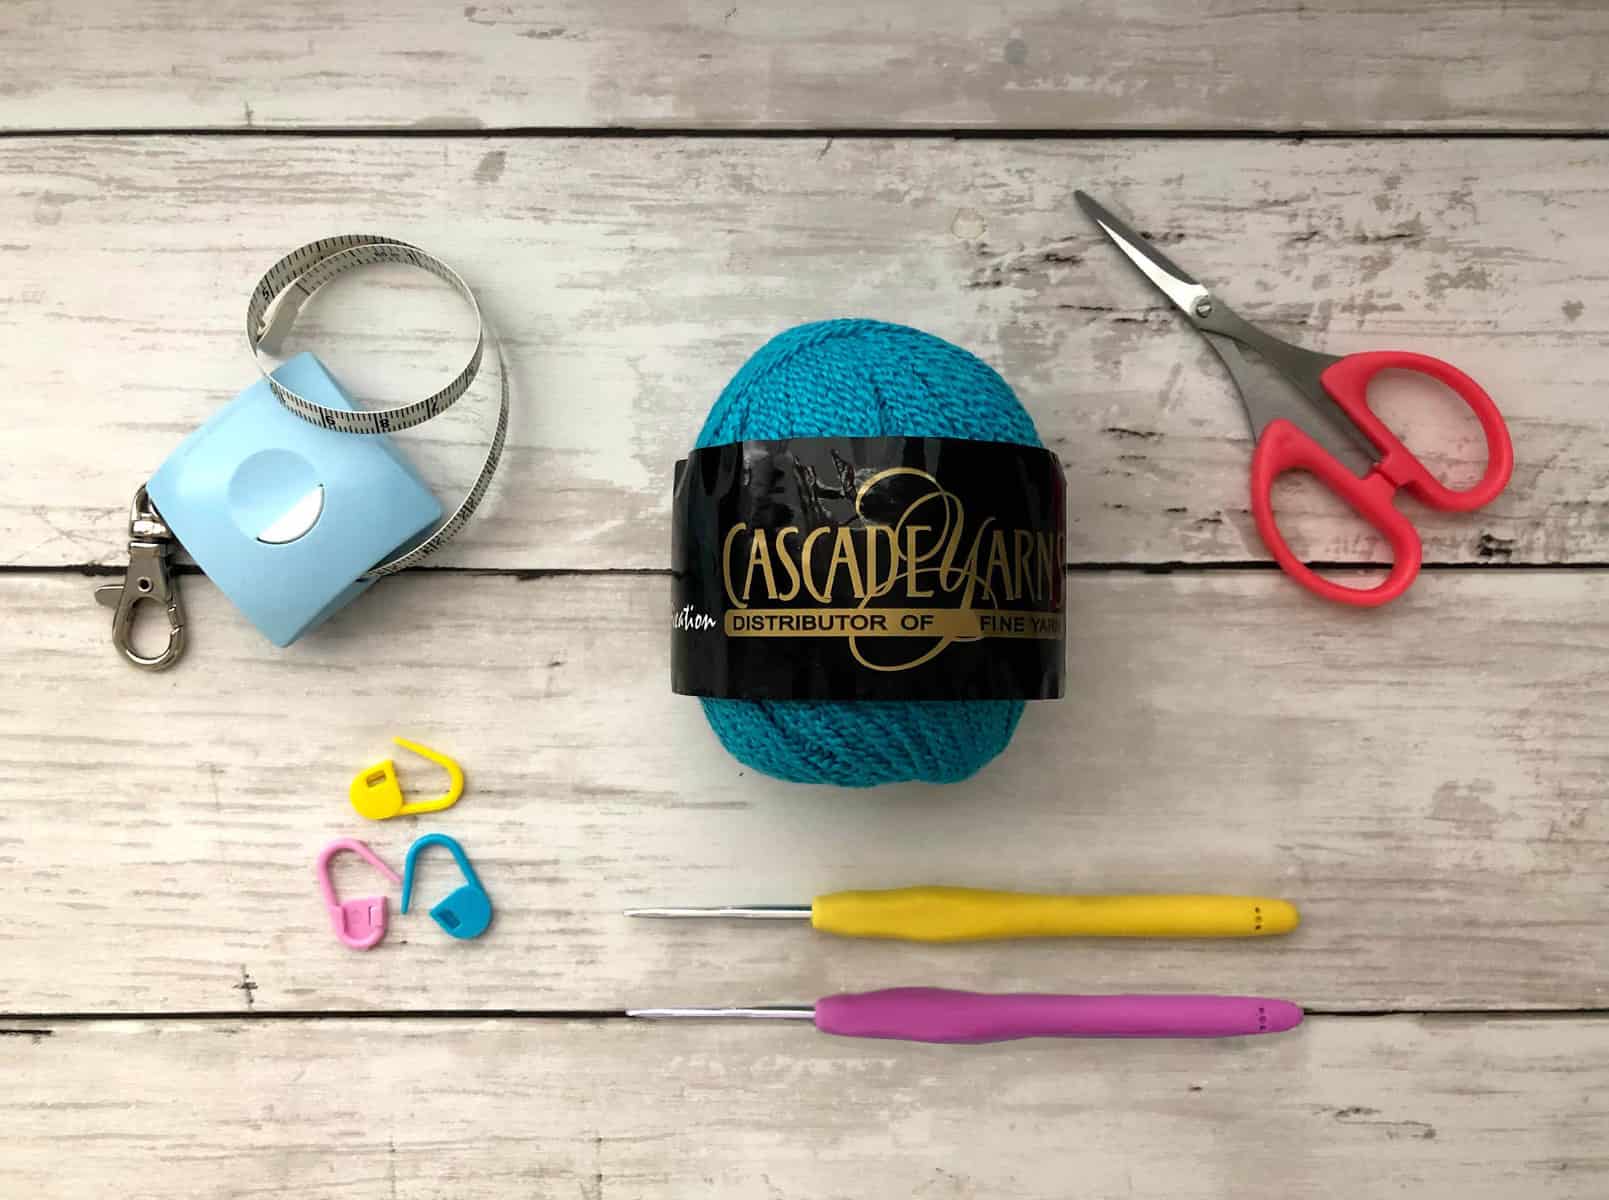
Yarn weight: DK Category 3
Brand: Cascade Fixation
Color: Teal
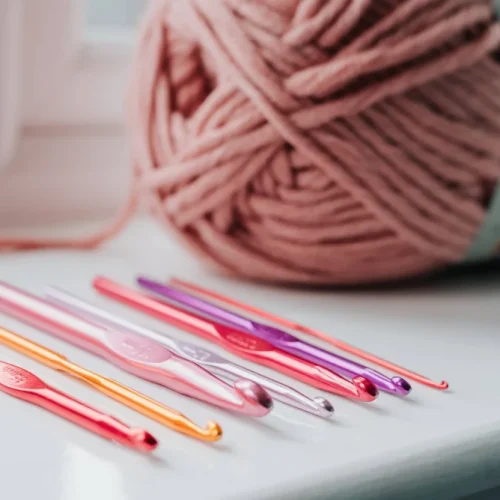
Hook: 2.25mm
Gauge: 24 Hdc Sts x 16 rows = 4”x 4”
No. yarns (balls): A[B/C/D/E/F] – 1[1/1/1.5/1.5/1.5] total
Tools: tapestry needle, measuring tape, scissors, stitch markers
Skill: Easy

If you would like to receive free written patterns and video tutorials straight into your inbox, just click Subscribe above to get into our mailing list.
Sahara Bralette Crochet Bikini Top Pattern

Part 1: Making the Cups
- Foundation: Ch 14 + 1 for all sizes
- Row 1: From the 2nd Ch from hook, work 1 Hdc and cont to Hdc across the chain, Ch 1, turn [14 sts]
- Row 2: Work 14 Hdc Sts, turn to the post side and work 5 Hdc group Sts (Shell Stitch) on the last Hdc post. Cont 14 Hdc Sts on the chain side, Ch 1 turn
- Row 3: Hdc 16 Sts, work a Shell St in the next St, Hdc 16 Sts, Ch 1, turn
- Row 4: Hdc 18 Sts, work a Shell St on next St, Hdc 18 Sts, Ch 1, turn
- Row 5: Hdc 20 Sts, work a Shell St on next St, Hdc 20 Sts, Ch 1, turn
- Row 6: Hdc 22 Sts, on the next St, work 3 Hdc in next St, Hdc until the end, Ch 1 turn.
- Row 7: *(Cont to Hdc until the 1st St of the 3 Hdc group Sts, work 3 Hdc in the next St, Hdc until the end, Ch 1 turn.) Rep (*) for 2[4/6/8/10/12] more rows. You may add/ remove any number of rows here to fit your size. However, do note it should be at least 2” / 5 cm smaller than your cup size, as we will be adding the border pattern to the sides.
- Bind off and make a second cup by repeating steps 1 – 8. 10. On the last St of the second cup, Ch 5 and Slst to the first St on the first cup to join. 11. Bind off
Part 2: Border Pattern
1. Row 1: Insert your hook through the first St at the corner of RS of the cup and Ch 5
2. Yo, insert hook through the same St, draw up a loop, Yo, Pt 2,
3. Yo, Sk 2, insert hook, draw up a loop,
4. (Yo, Pt 2) 3x, Ch 3
5. Rep steps 2 – 4 around the cup, towards the middle chain, and throughout the second cup. On the last St Ch 5
6. Row 2: Rep steps 2 – 4 throughout the row. On the last St, Ch 1 turn
7. Row 3: *(Hdc through the first St, 2Hdc on the Ch Sp), rep (*) until you reach the second last St at the tip of the cup.
8. Make ties. Pull 2 arm’s length worth of yarn starting from the tip of the cup 4 times.
- Click to see the tutorial
9. Fold in half and insert your hook through the next St, draw up the double yarn, Ch 1
10. Cont to work double yarn chain until the end.
11. Insert hook through the last St at the end of the tie and draw up a loop
12. Cont to work (*) until you reach the second last St on the tip of the second cup
13. Rep steps 8 – 11
14. Cont to work (*) until you reach the second last St at the end of that row.
Part 3: Side Ties
- From the second last St, just like before pull 2 arms length worth of yarn 4 times.
- Fold in half and insert your hook through the last St on the side of the cup
- Draw up both double yarn and work up double yarn chain until the end.
- Next, insert hook though the last St at the beginning of the tie made earlier and pick up yarn and draw up a loop
- Work 1 loose Hdc on each rows post until you reach the middle chain. Cont to Hdc each Ch and across the second cup.
- On the last St, work another set of ties by rep Steps 1 – 3. Bind off
Part 4: Side Pattern
- Fold the tie inward and under the cup. Mark the tie with a SM where the center of the cup and tie meet.
- Rep the same on the other side.
- Row 1: Next insert your hook through the first SM on the RS and Ch 5.
- Yo, insert hook through the same St, draw up loop, Yo, Pt 2, Yo, Sk 2, insert hook, draw up loop, (Yo, Pt 2) 3x, Ch 3
- Rep step 4 pattern until you reach the second SM
- Row 2: Ch 5 turn and rep step 4 until the end of the row, Ch 1 turn
- Row 3: *(Hdc through the first St, 2Hdc on the Ch Sp), rep (*) until the end of the row
- Bind off and weave in all loose ends
END
-

Party at the back
If you are looking for the entire tool used to make this Sahara Crochet Bralette Bikini pattern, check them out here below:
Optional:
If you would like to receive free written patterns and video tutorials straight into your inbox, join our mailing list now.
Don’t forget to tag me on Instagram and Facebook @theknottylace, I would love to see your work!
Happy hooking
Shaz 🧶