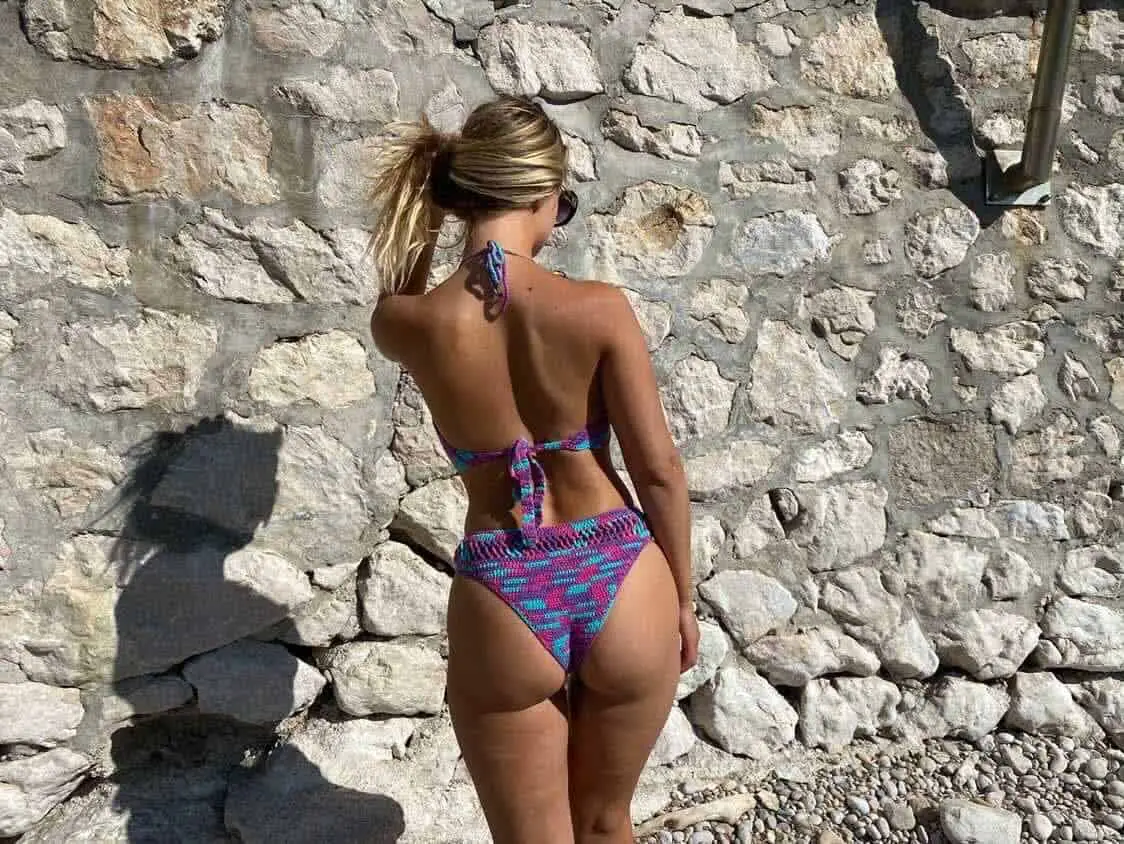

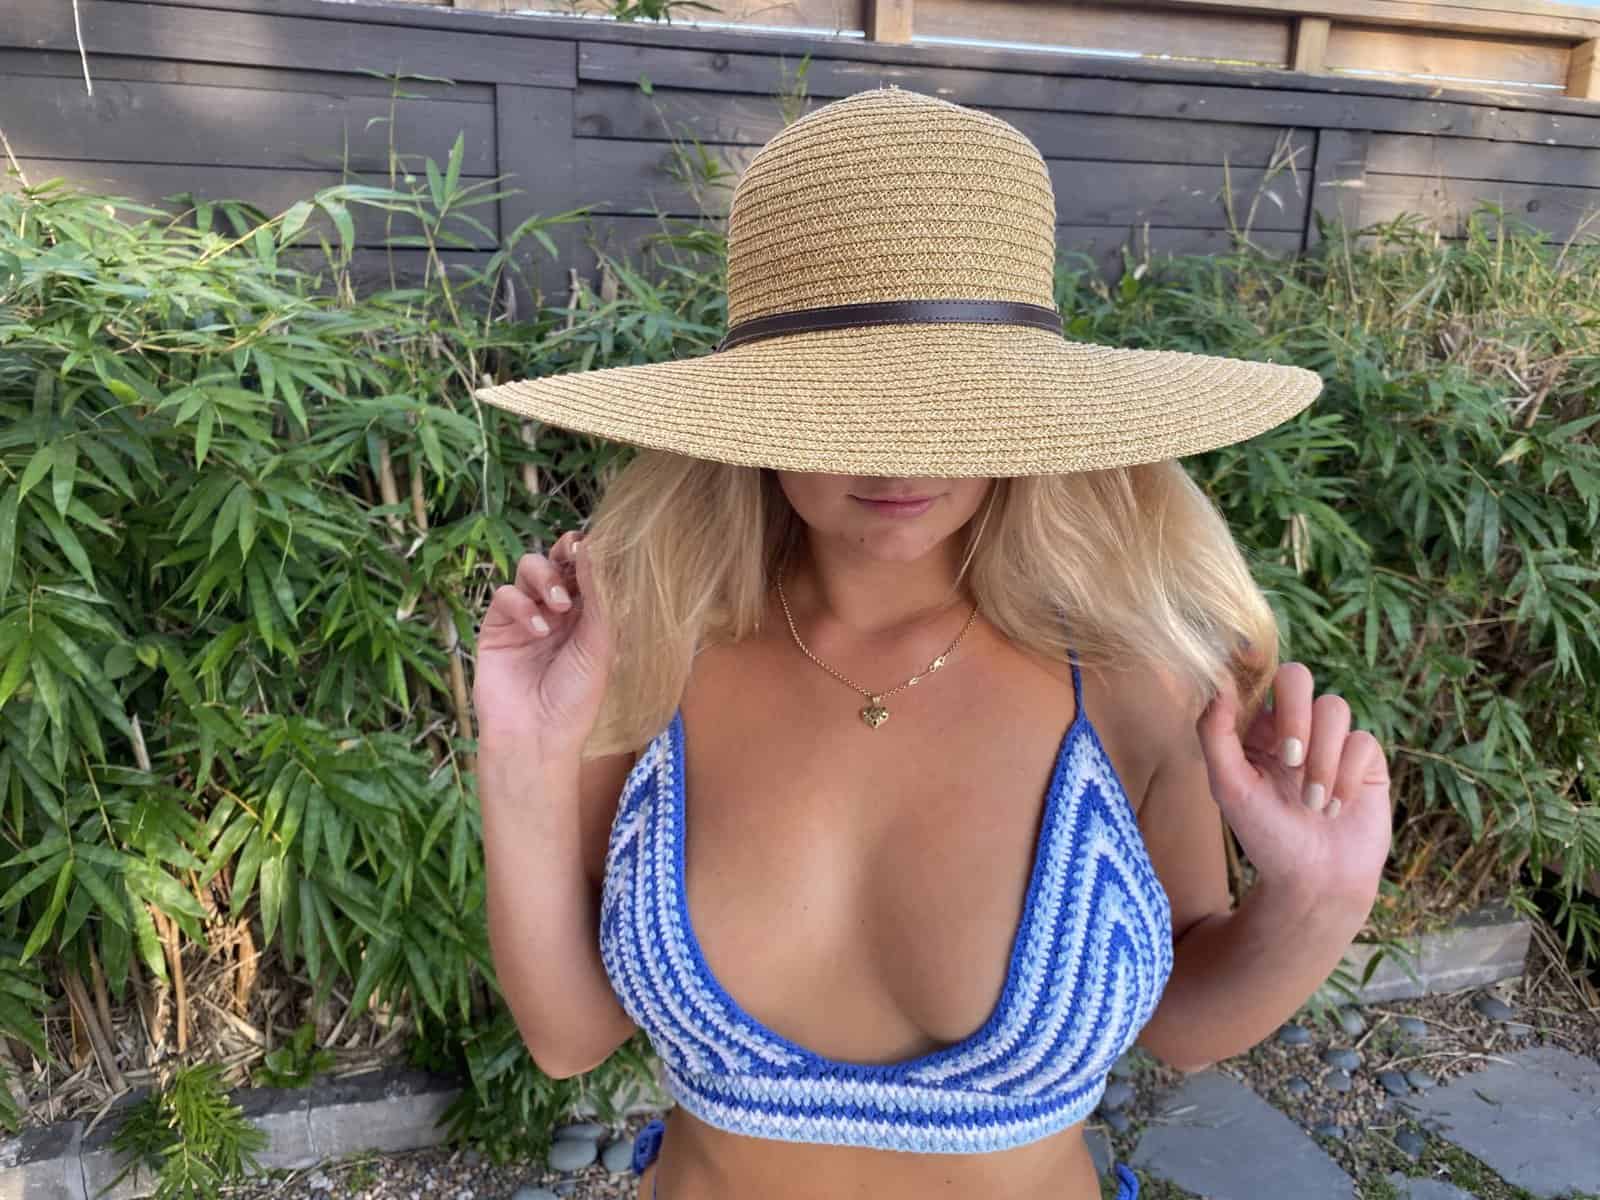
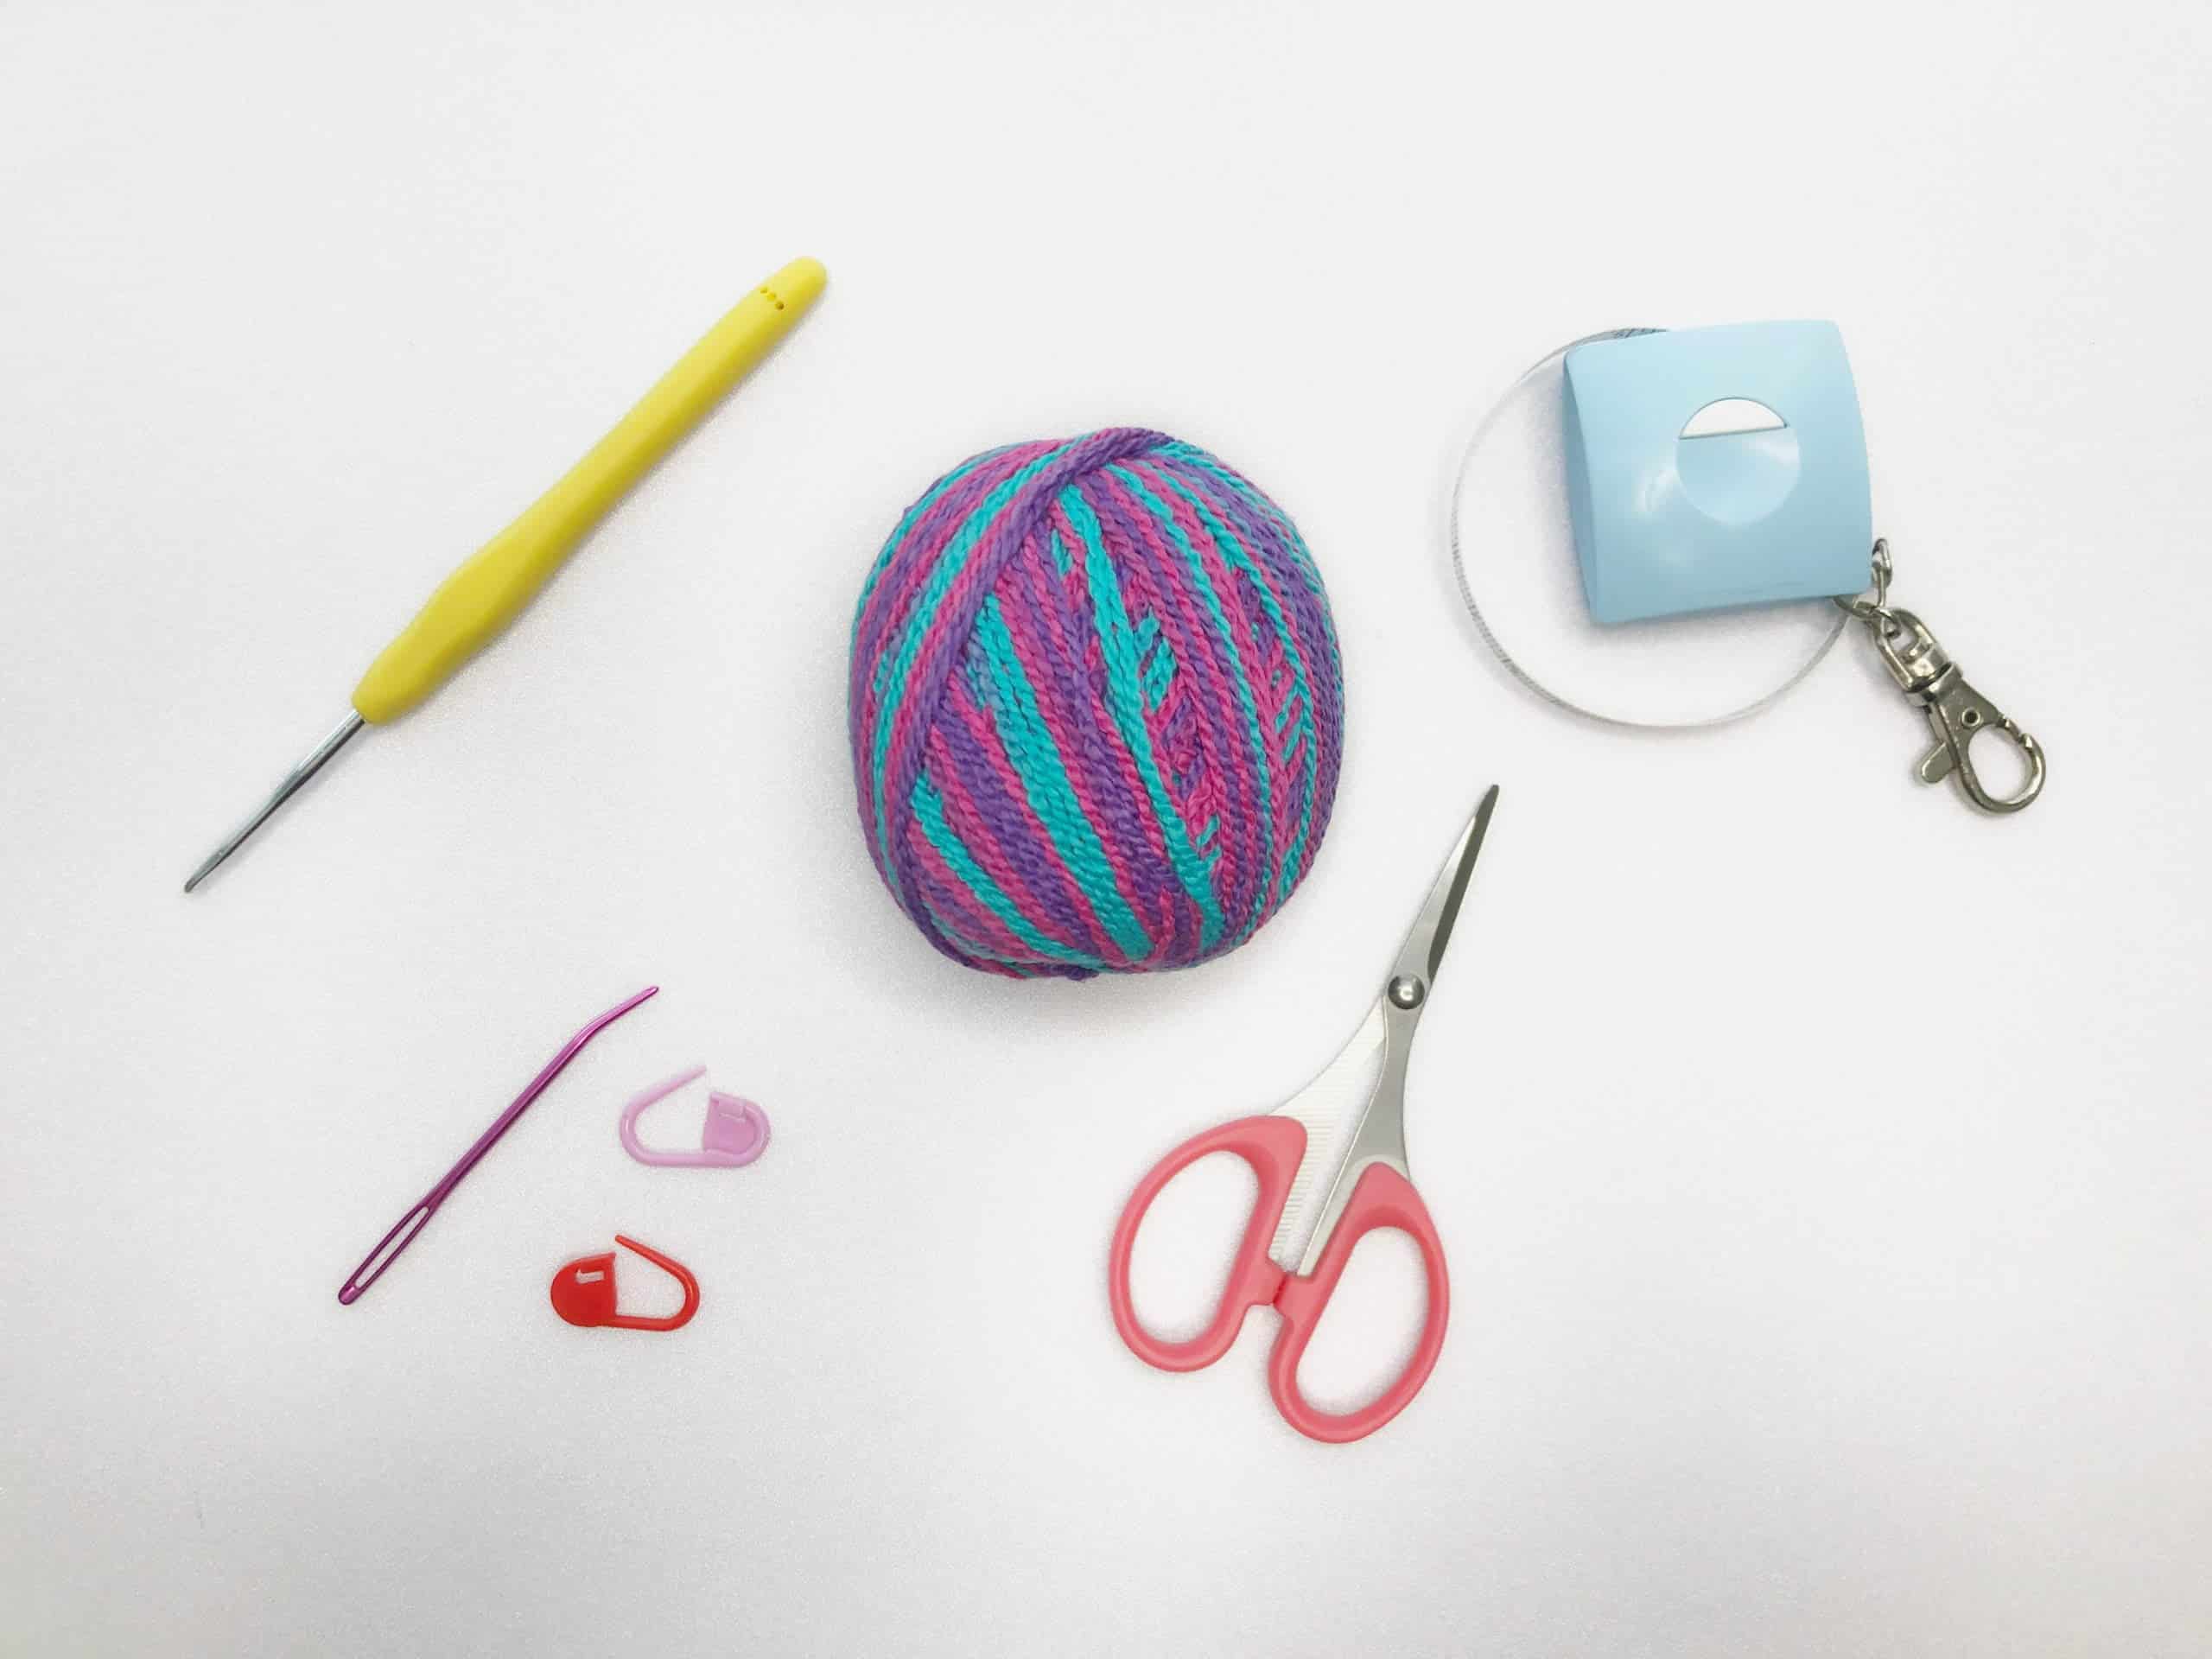
For this pattern I am using the Cascade fixation Sprayed Dyed yarn in the color Spring Bouquet and a 2.5mm hook.
Using simple Half Double Crochet Stitches and shell Stitches for the edging is all you have to know for this pattern. It is a great pattern for beginners to start of with while learning a new technique of twisting two panels together. This twist is also perfect for other projects as well such as headbands and cowls.
This top also comes in 9 sizes and its matching bottom.

This Crochet Bralette pattern also comes Ad Free with a full step-by-step picture-guided PDF file and video tutorial to guide you throughout the entire process.
And If you like this twist style, check out the free headband/ ear warmer pattern I made using this same technique!


Things to Note:
§ Prepare pattern gauge to get the right size. You may need to adjust your tension or change hook size to achieve the same gauge
§ Do note this top is stretchable when using mentioned yarn
§ Turning chain does not count as a stitch unless mentioned otherwise
§ Step by step Video Tutorial available here
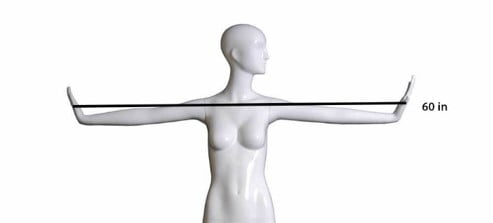
Your body measurements:

- The pattern consists of 9 sizes.
- Measurements above are for the finished bralette and not cup size
- If you are in between cup and chest sizes, refer to the chest width for your size.
- Do note that there is a negative ease of 2in / 5cm when using the mentioned yarn.
- The model is wearing size Small for reference purposes.
**
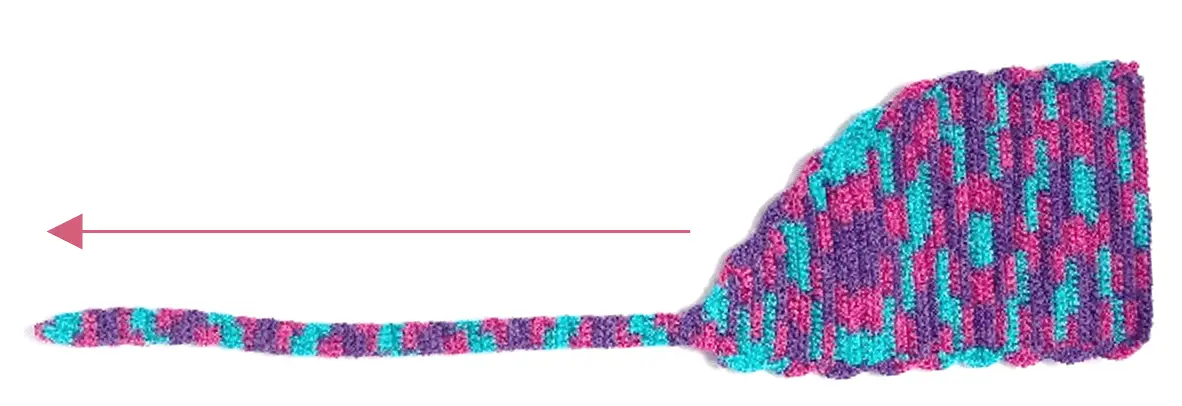
PART 1: CUPS
*Working from the middle to the sides
1. Foundation Row: Ch 30 [33/ 36/ 39/ 42] [45/ 48/ 51/ 54 ] + Ch 1, turn
2. Row 1: Work 1 Hdc from the 2nd Ch from Hook, Hdc across, Ch1 turn
3. Row 2: Hdc each St across, Ch 1 turn.
4. Next Rows: Rep row 2 for a total of 15 [16/ 19/ 20/ 21] [23/ 24/ 25/ 26] rows. Ch 1 turn
5. Next Rows (Decrease): Hdc each St across until the 3rd last St, Hdc2tog, Ch 1 turn.
6. Next Rows: Hdc2tog, Hdc each St across, Ch 1 turn.
7. Next Row: Rep Steps 5 & 6 for a total of 8 [8/ 9/ 10/ 11] [11/ 12/ 13/ 13] rows
*Depending on which side your last row was, you will cont to decrease at the top only
8. Next Rows (Double Decrease): Hdc each St across until the 5th last St, Hdc2tog 2x, Ch 1 turn.
9. Next Rows: Hdc2tog 2x, Hdc each St across, Ch 1 turn.
10. Next Rows: Rep Step 8 &9 until you have 4 Sts remaining.
11. Next Rows: Hdc each St (4Sts) for a total of 53 rows or until you have a total tie length of 15 inches or 38cm. Bind off
12. Facing the RS, Insert hook at the top corner row, draw up a loop and Ch 1. *(Sk 1 row, Work 5Dc on the next row, Sk 1, Sc) Rep (*) across until you reach the top of the tie. Bind off
13. Turn work up side down (RS up), and insert hook at the bottom of the same row as the last St, draw up a loop and Ch 1. *(Sk 1 row, Work 5Dc on the next row, Sk 1, Sc) Rep (*) all the way across. Bind off
14. Repeat Step 1 – 11. To create a symmetrical look in color sequence, Start your chain on the same color spot as your 1st piece.
*Working in the opposite direction/mirror image
15. Turn work up side down (RS up), and insert hook at the bottom corner row, draw up a loop and Ch 1. *(Sk 1 row, Work 5Dc on the next row, Sk 1, Sc) Rep (*) across until you reach the 1st 4 St row (tie). Bind off
16. Turn work right side up, and insert hook at the bottom of the same row as the last St, draw up a loop and Ch 1. *(Sk 1 row, Work 5Dc on the next row, Sk 1, Sc) Rep (*) all the way across. Bind off

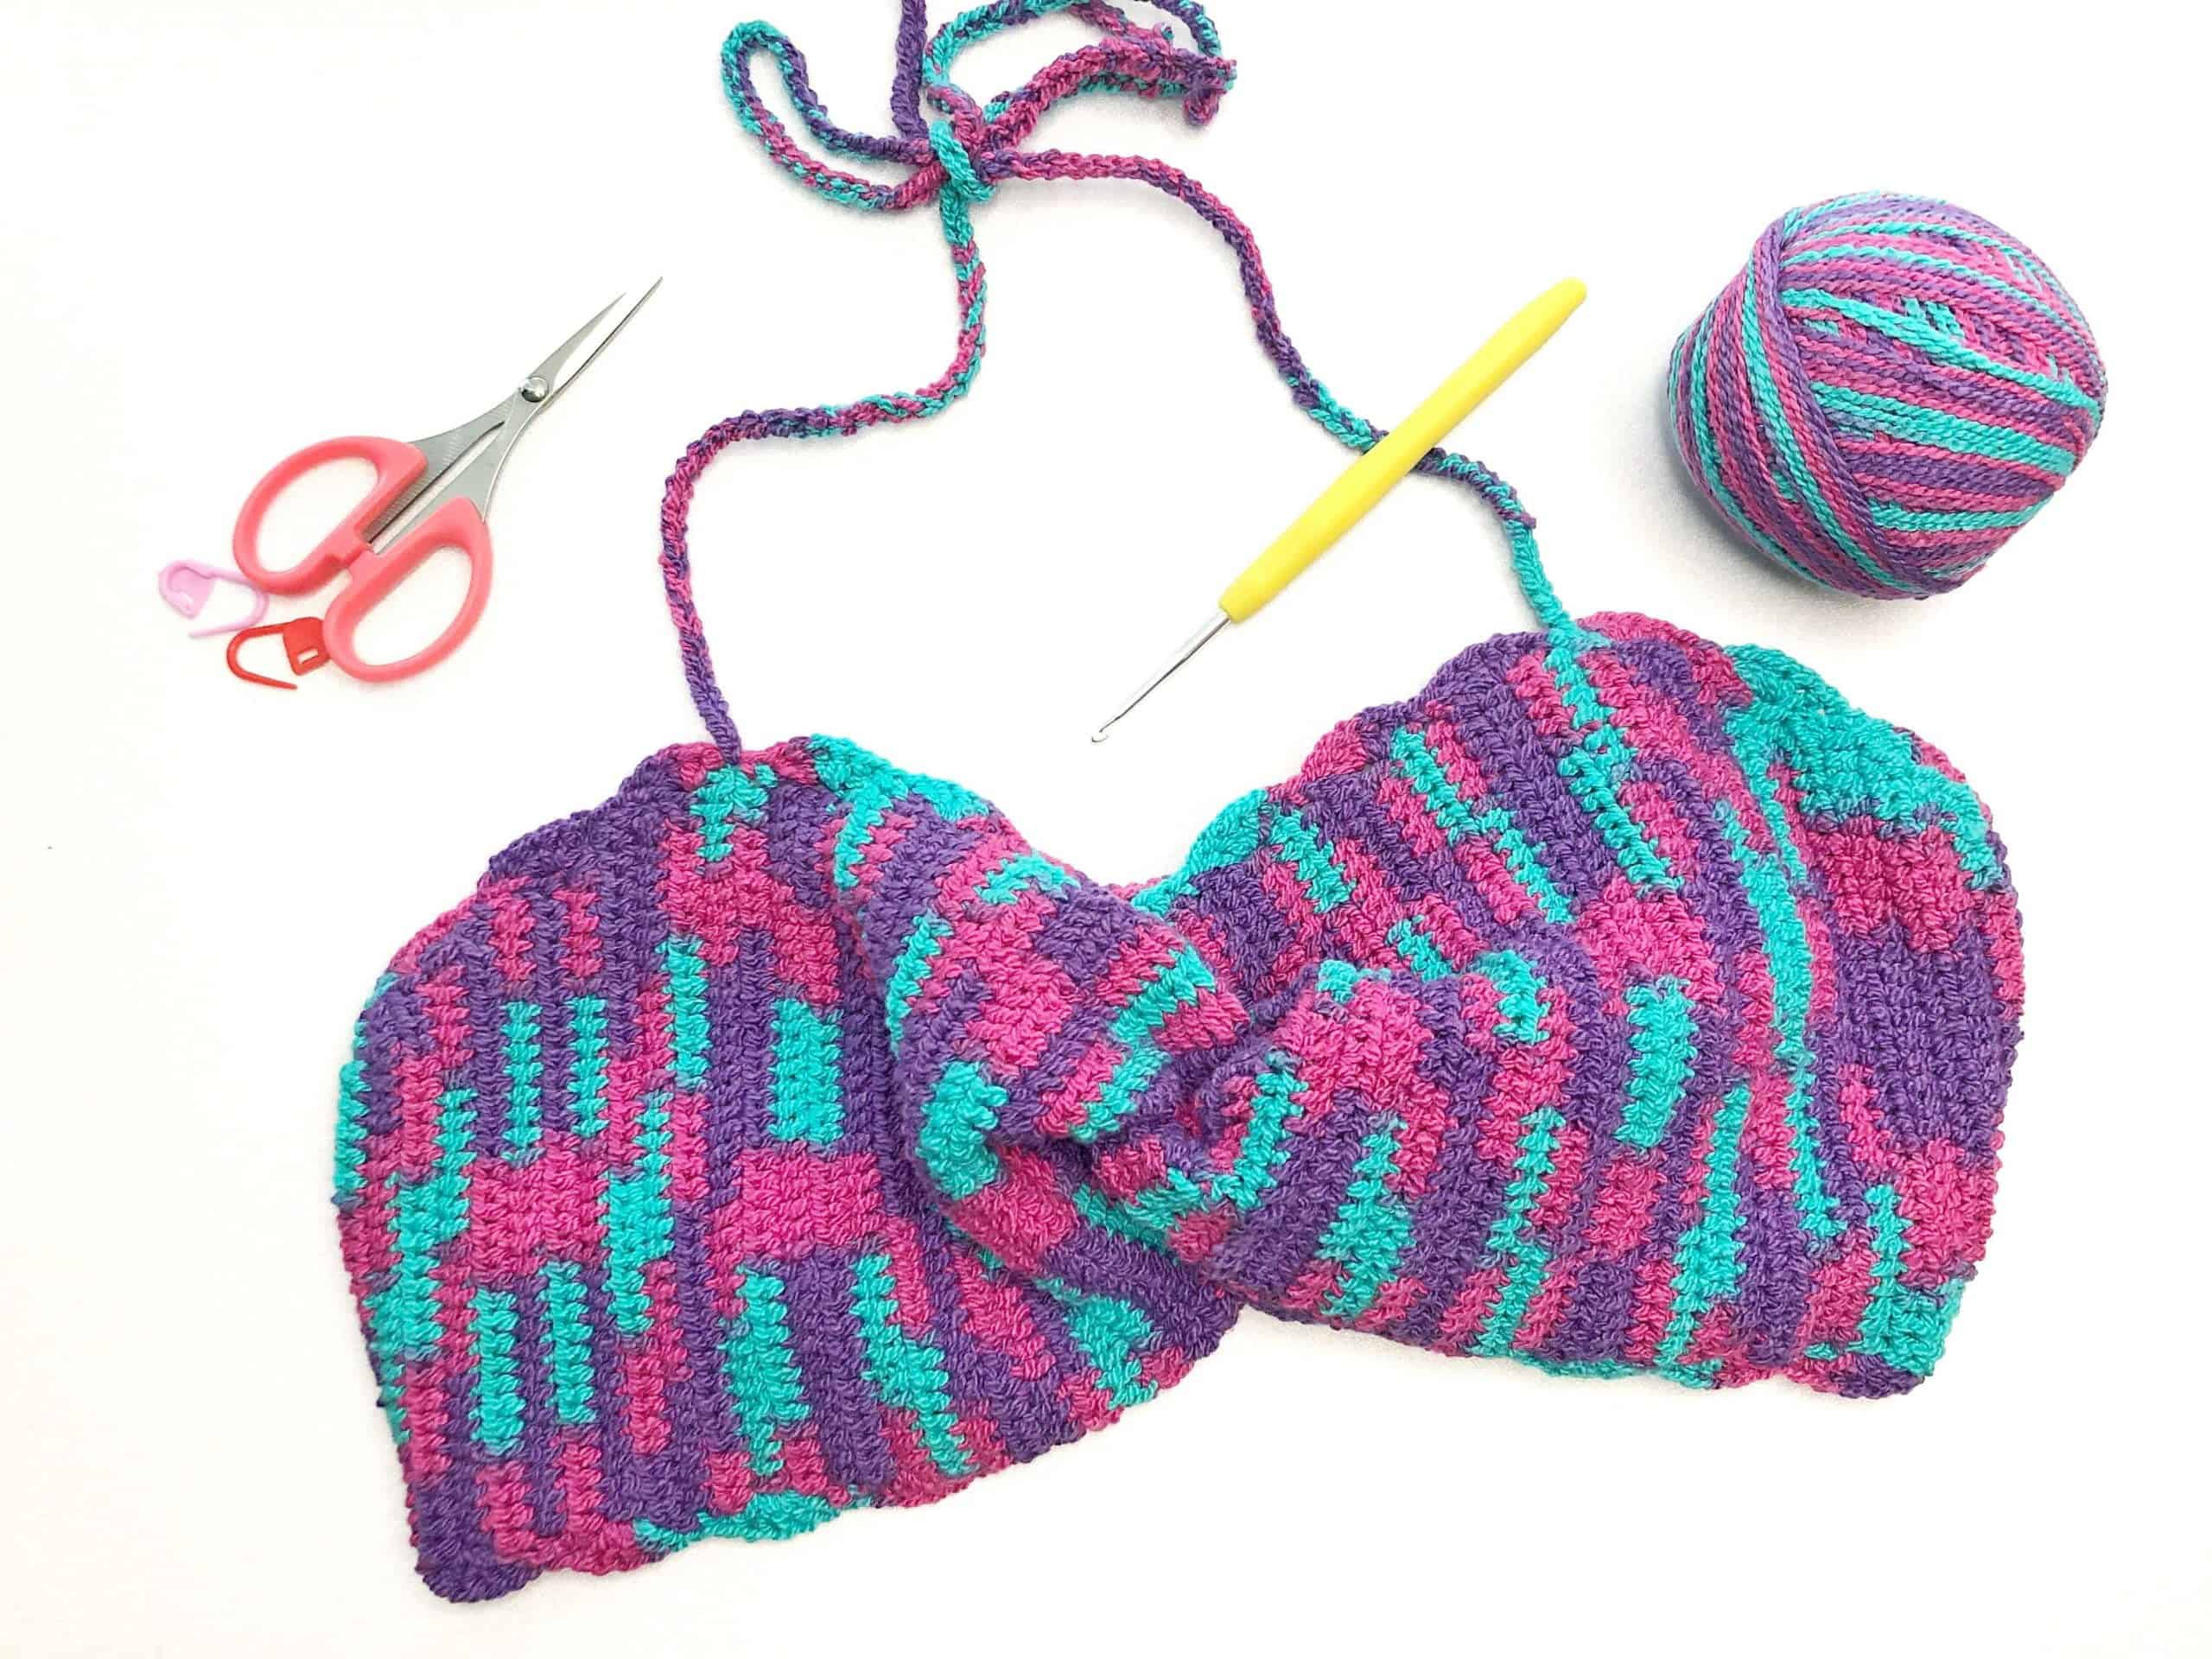
PART 2: JOINING PIECES
1. Place both pieces RS up. Fold in half and pick up the folded pieces. Interlock the “V” shape pieces, sandwiching them together.
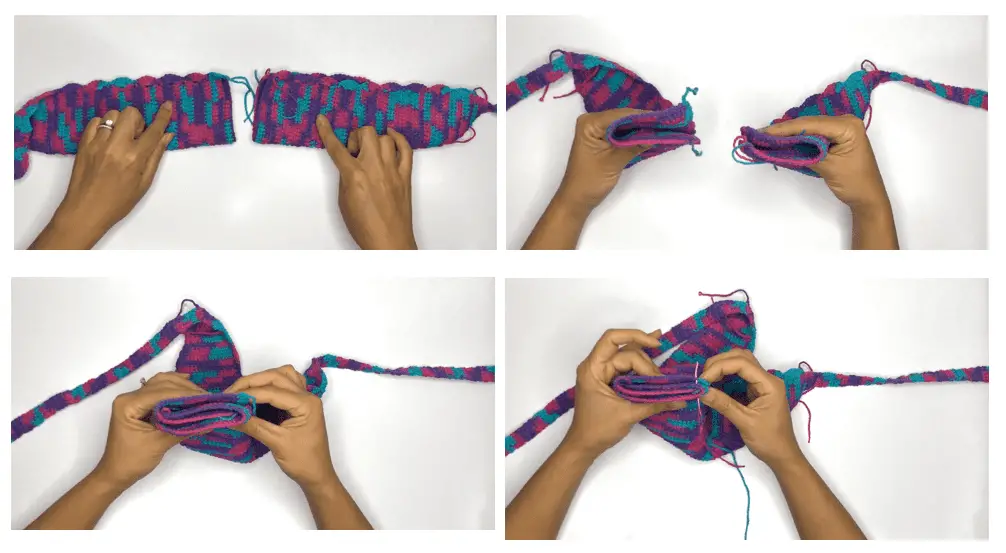
2. Take a tapestry needle with some yarn already threaded, and whip stitch each piece together all the way across. Weave in to secure and bind off.
3. Open and adjust the “twist”.
PART 3: STRAPS/ TIES
1. Place a SM on the last row before decreasing on both pieces. That would be on the 15 [16/ 19/ 20/ 21] [23/ 24/ 25/ 26] row.
2. Next take your yarn and pull 2 arms length worth of yarn. Pull and fold more yarn to double the amount. Snip yarn.
3. Insert hook at the SM, draw up the loop end of the double yarn, and work double chains until the end of the yarn.
4. Work up a knot and snip off any access
5. Rep on the other side.
6. Weave in all loose ends
END
***