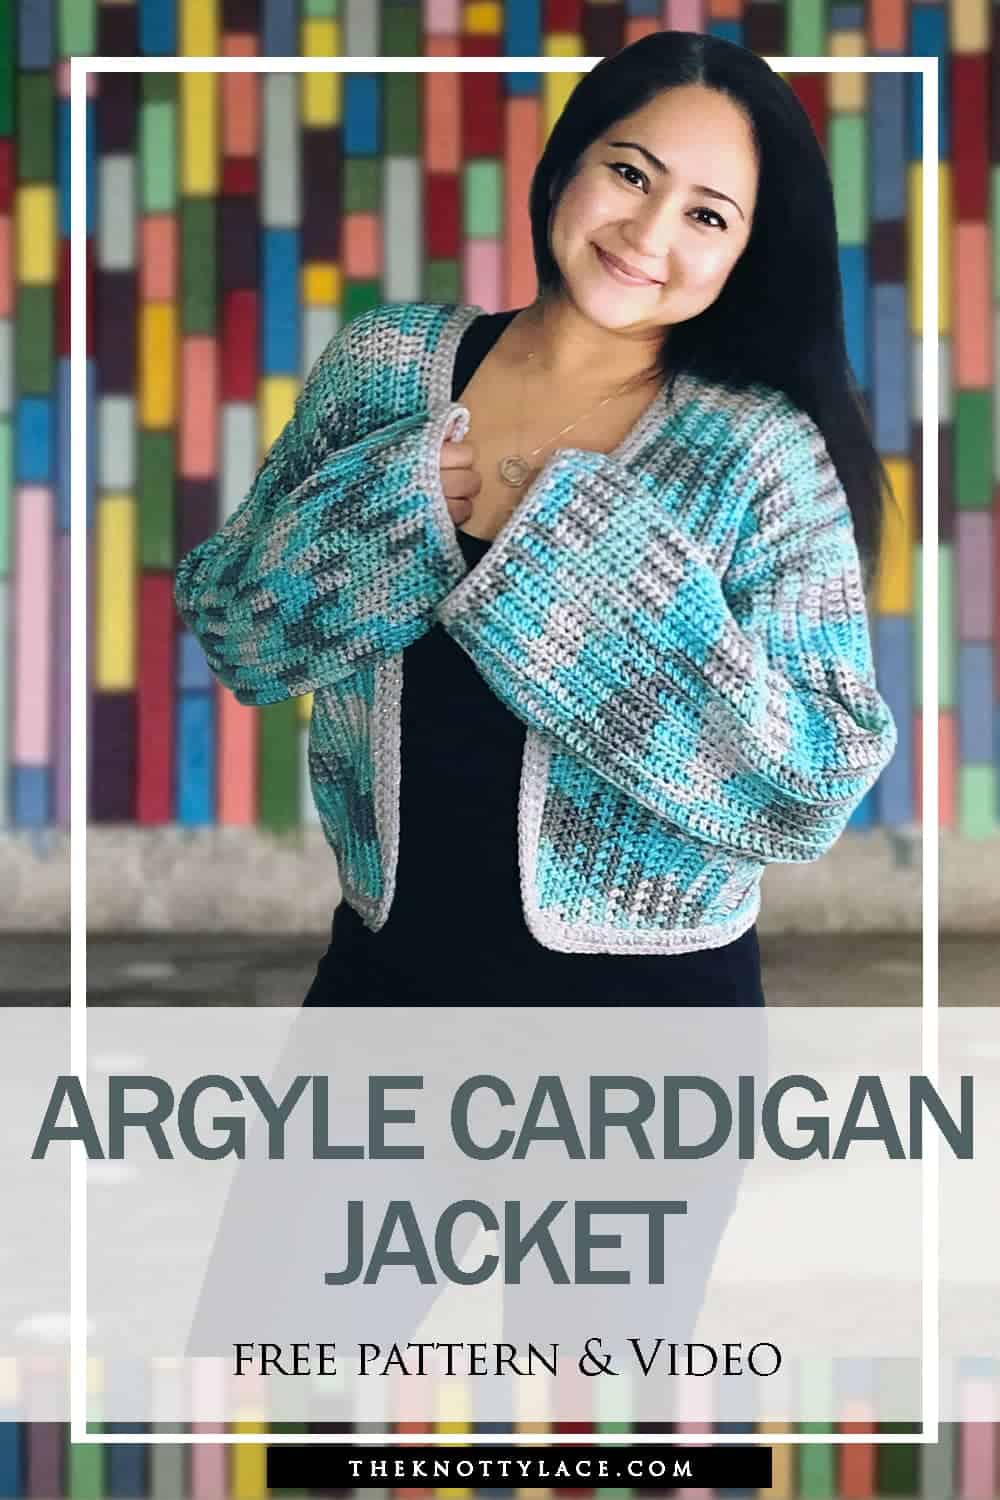
DESIGN INSPIRATION
So, what exactly is Planned Pooling in Crochet?
Well, Planned Pooling is basically a technique where the same number of stitches per color is intentionally repeated using variegated pooling yarn to produce a specific design or color pattern.
The term pooling refers to gathering the same color/s together forming a “pool” to achieve a desired pattern or sequence.
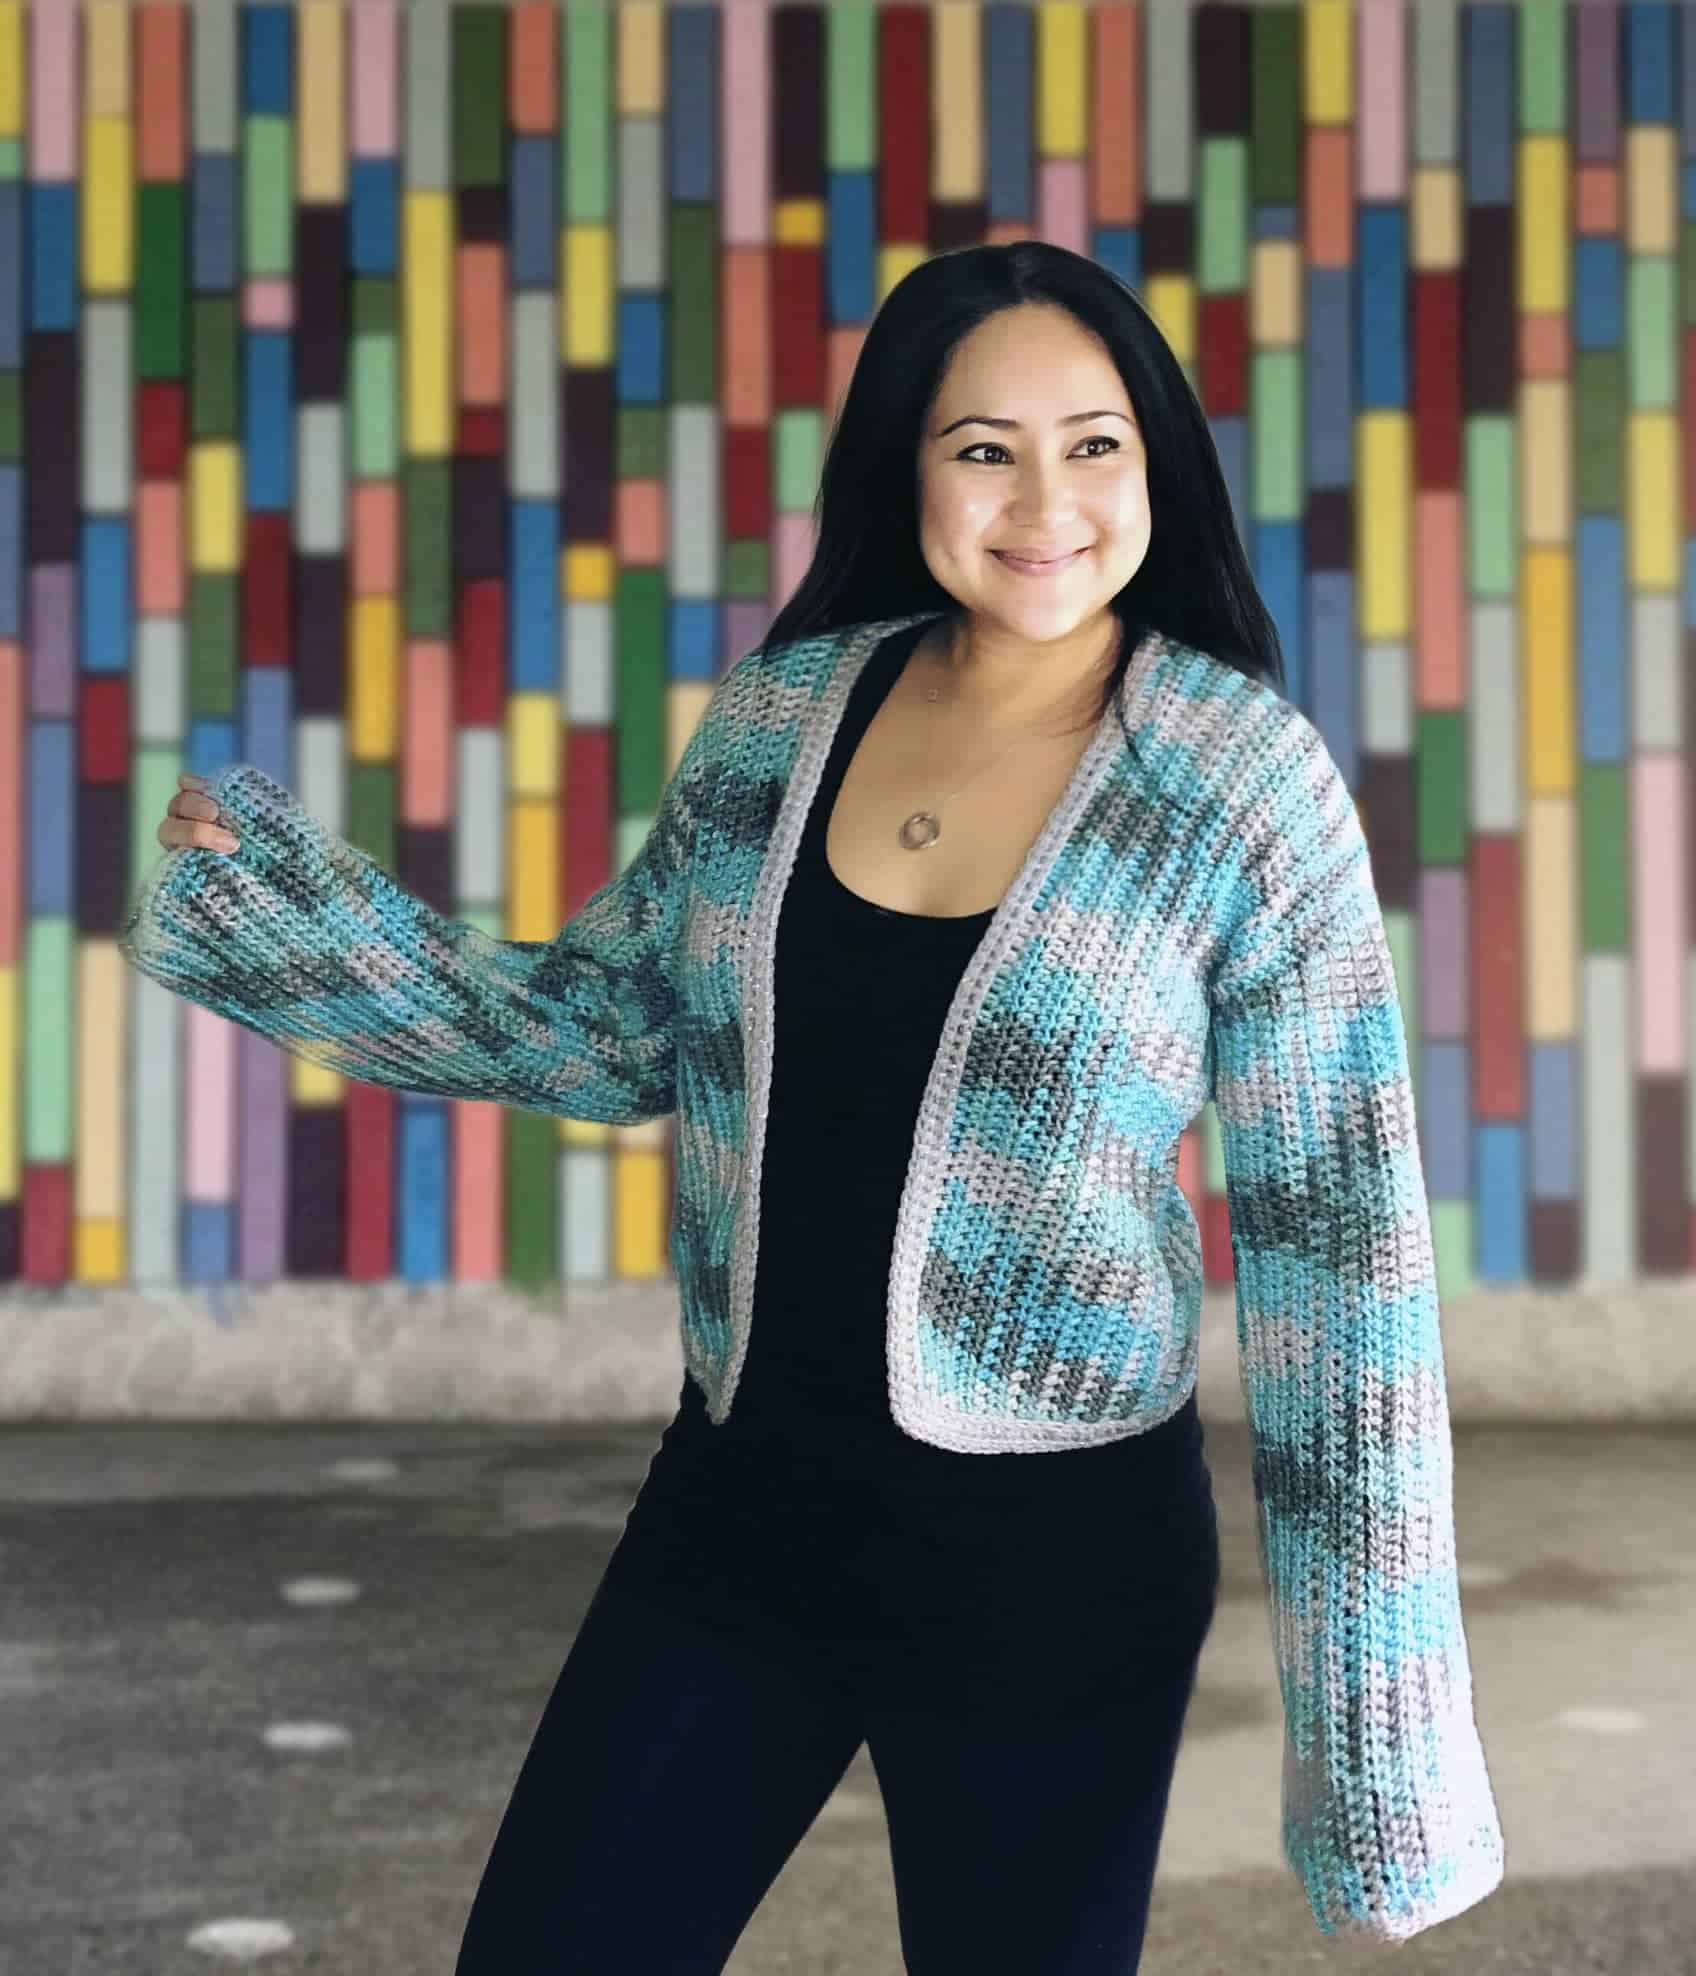
Although this pattern is written for level intermediate, it does come with a separate step-by-step video tutorial to guide you along the way. And I promise, once you have mastered your tension, the rest as they say is a breeze!
It is almost the end of winter over here and I’m already in a Springy mood. And I believe we will be seeing more of these pooling patterns in the coming weeks!
And if you’re looking for more winter wear patterns, you might like to check out these other great Warm Free Pattern Ideas here.
Related Post:
CONSTRUCTION
This pattern uses the very basic Half Double Crochet stitch throughout the entire piece. And while working in multiple sequences, counting each stitch is quite necessary.
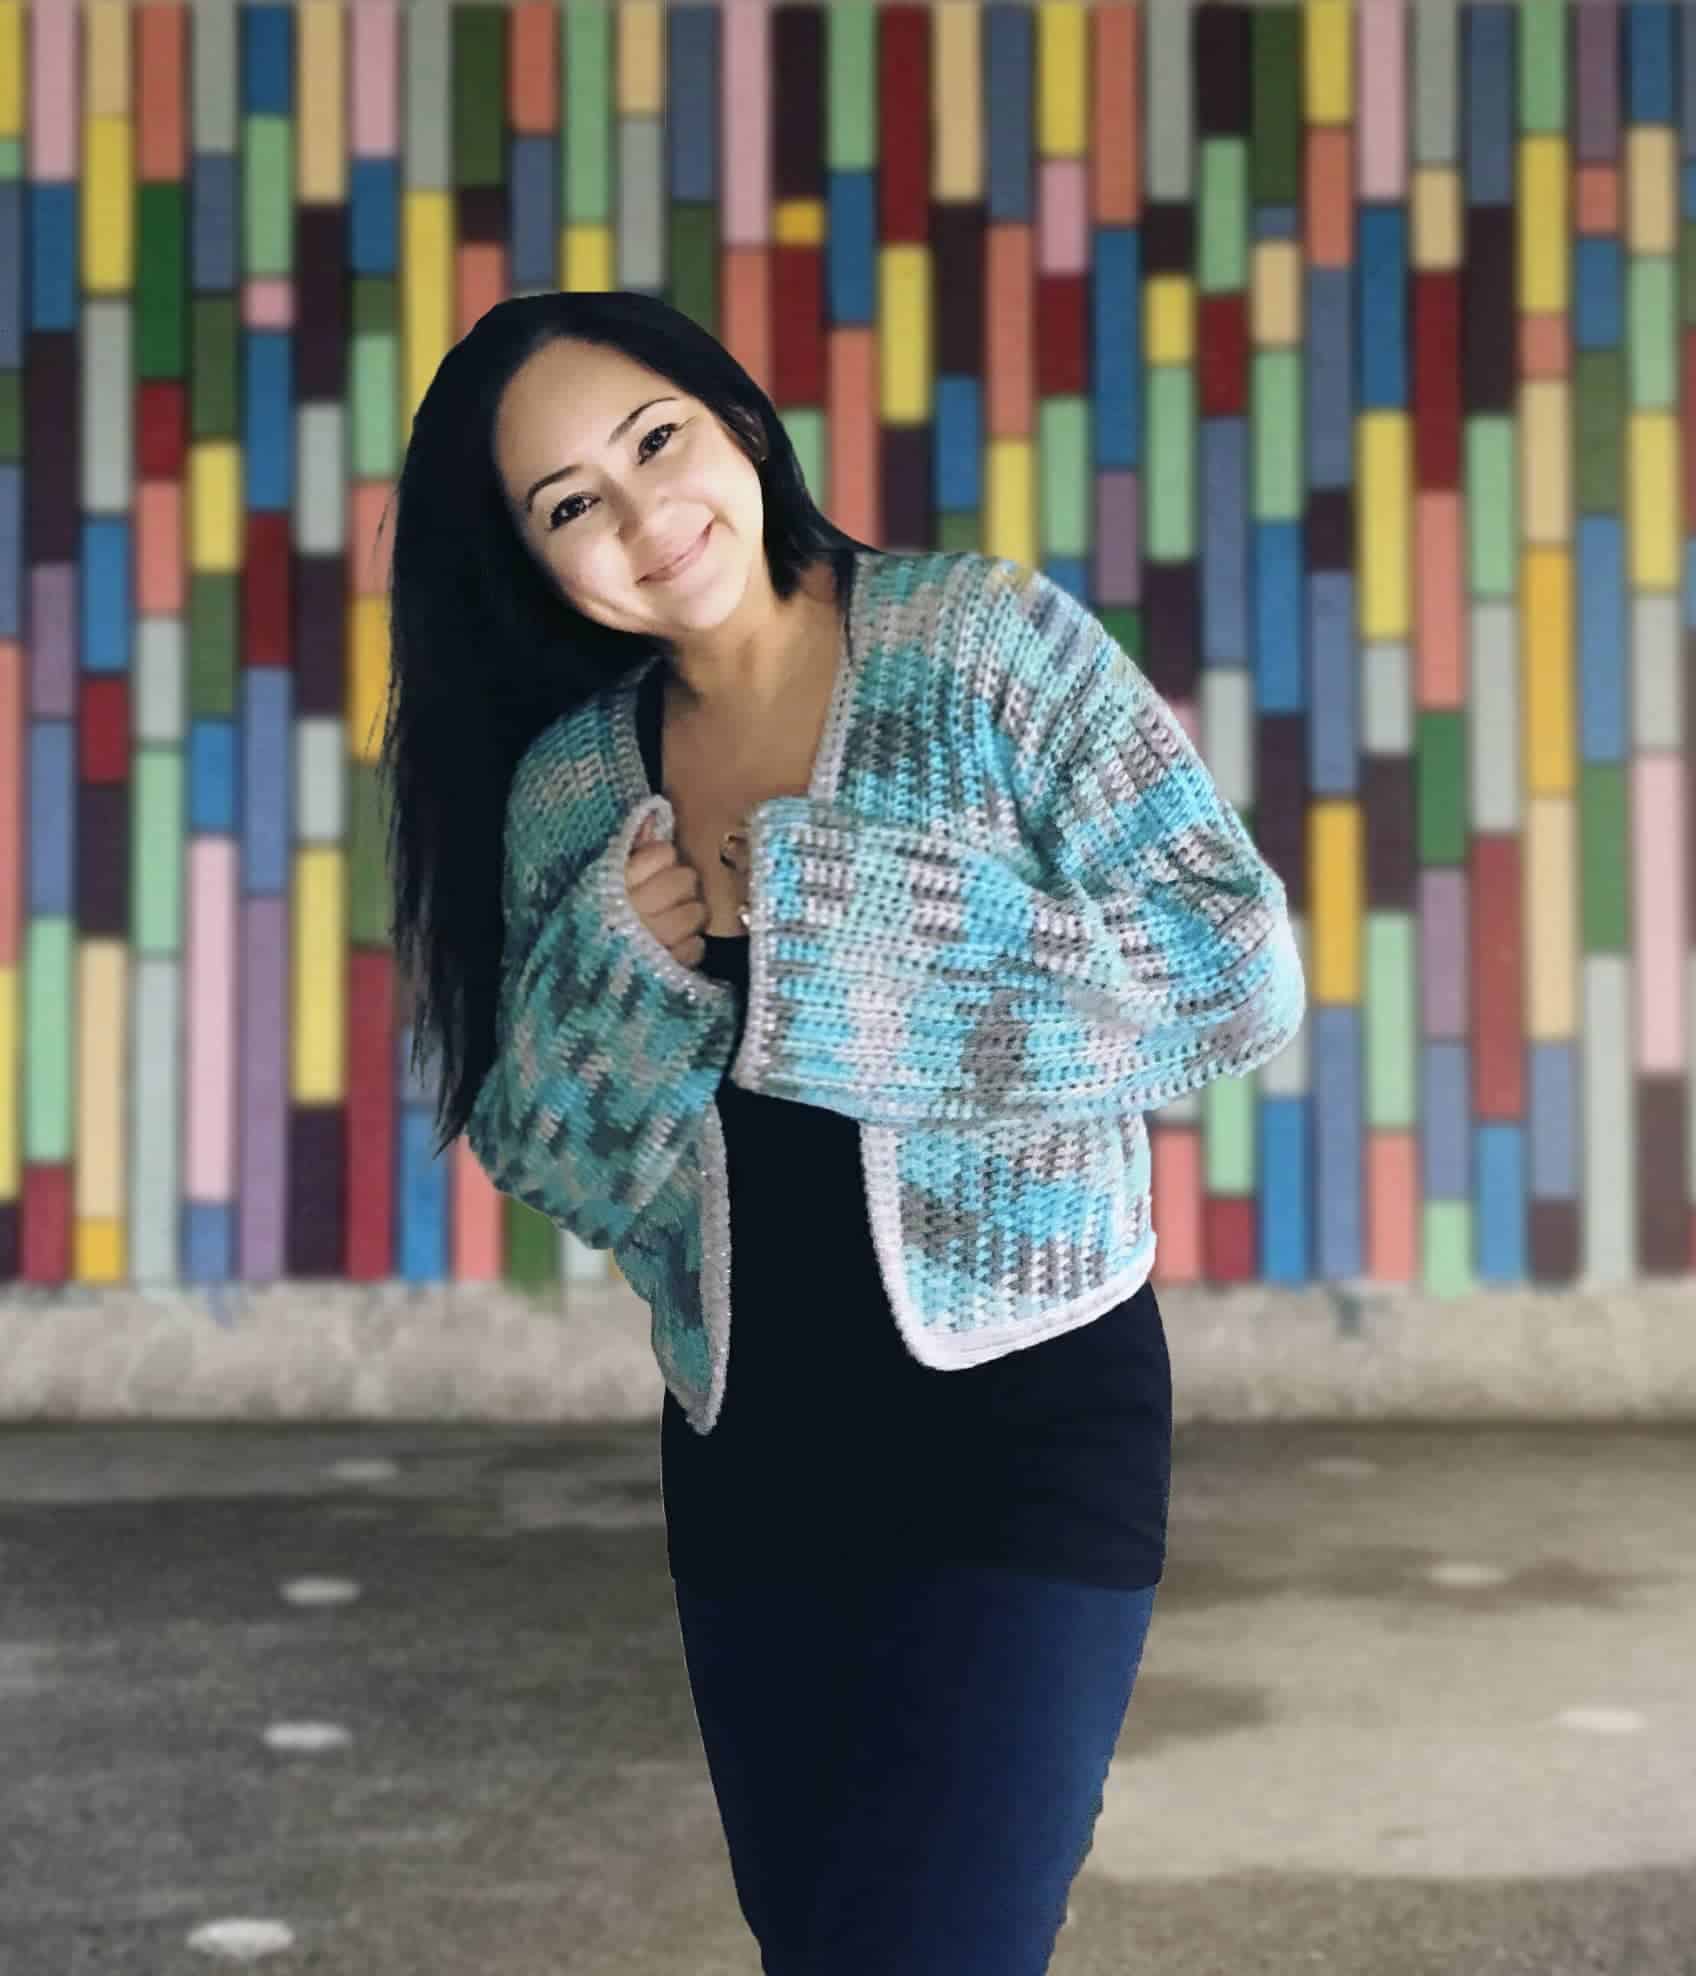
Each piece is worked up in rectangles and squares in order to achieve the Argyle pattern. Nonetheless, I have still managed to produce an XS – 5XL sizing guide, while including some creative proportioning! 
I have a full step-by-step picture and video tutorial here about planned pooling showing you the exact method on how to achieve the desired pattern you want, using any of your preferred stitches!
Starting the first row can be a bit tricky, but with the video tutorial, it should be able to explain each step and guide you throughout the entire process.
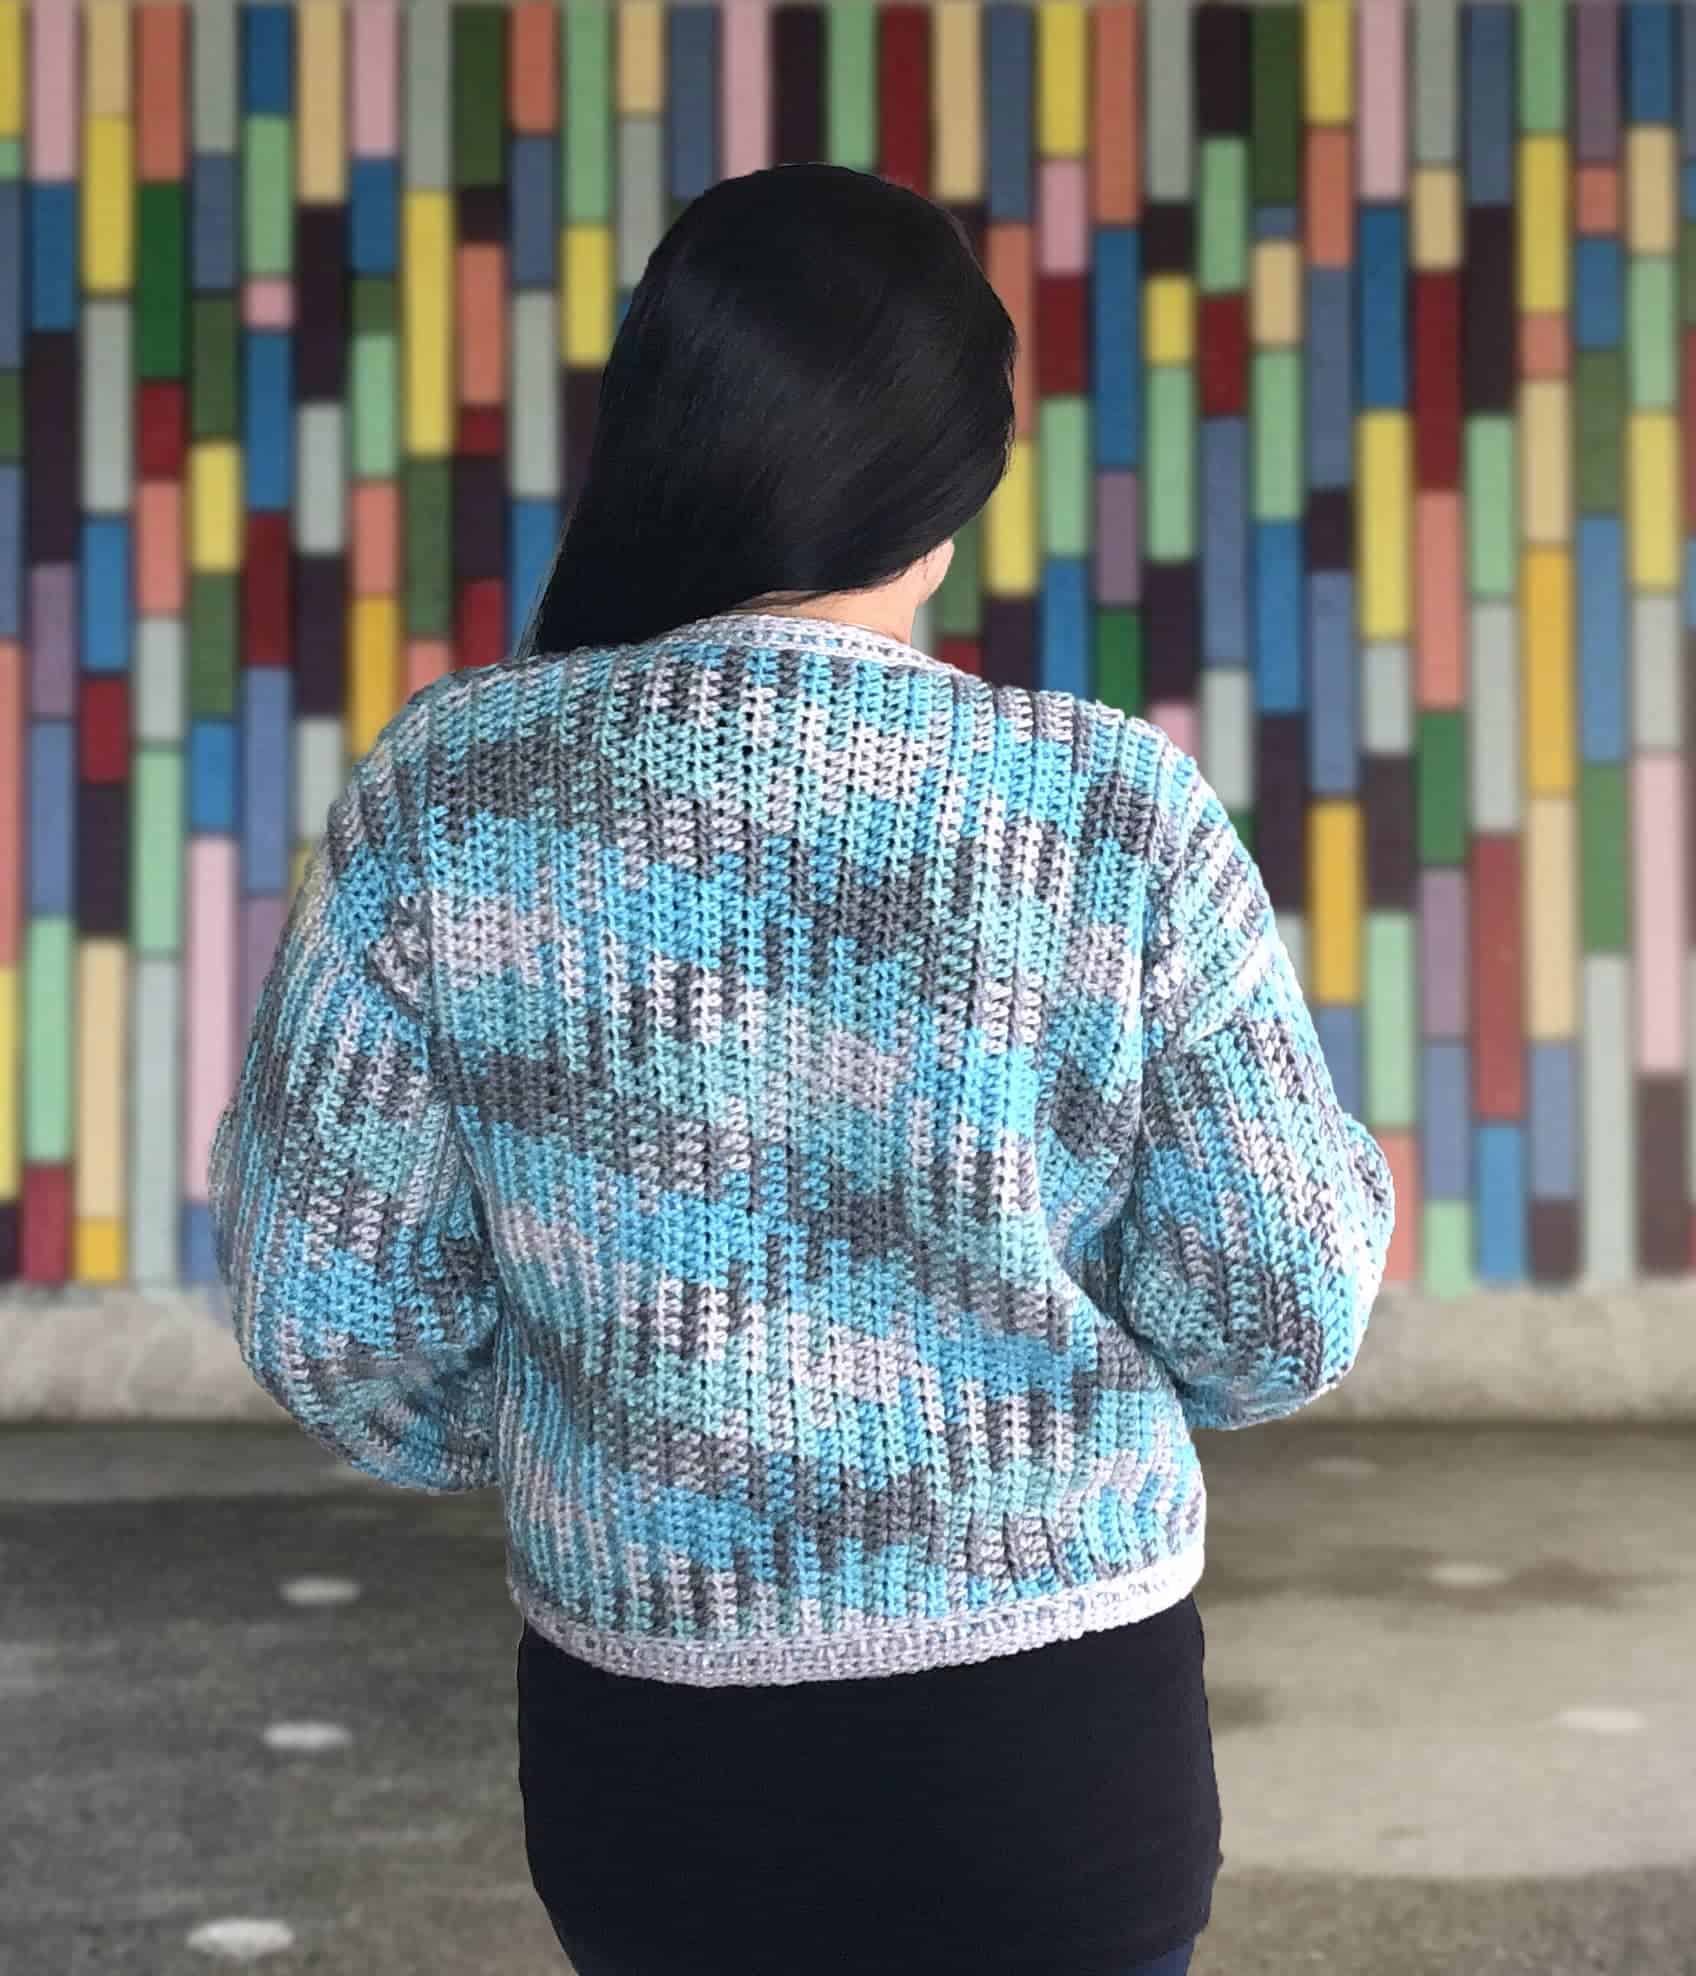
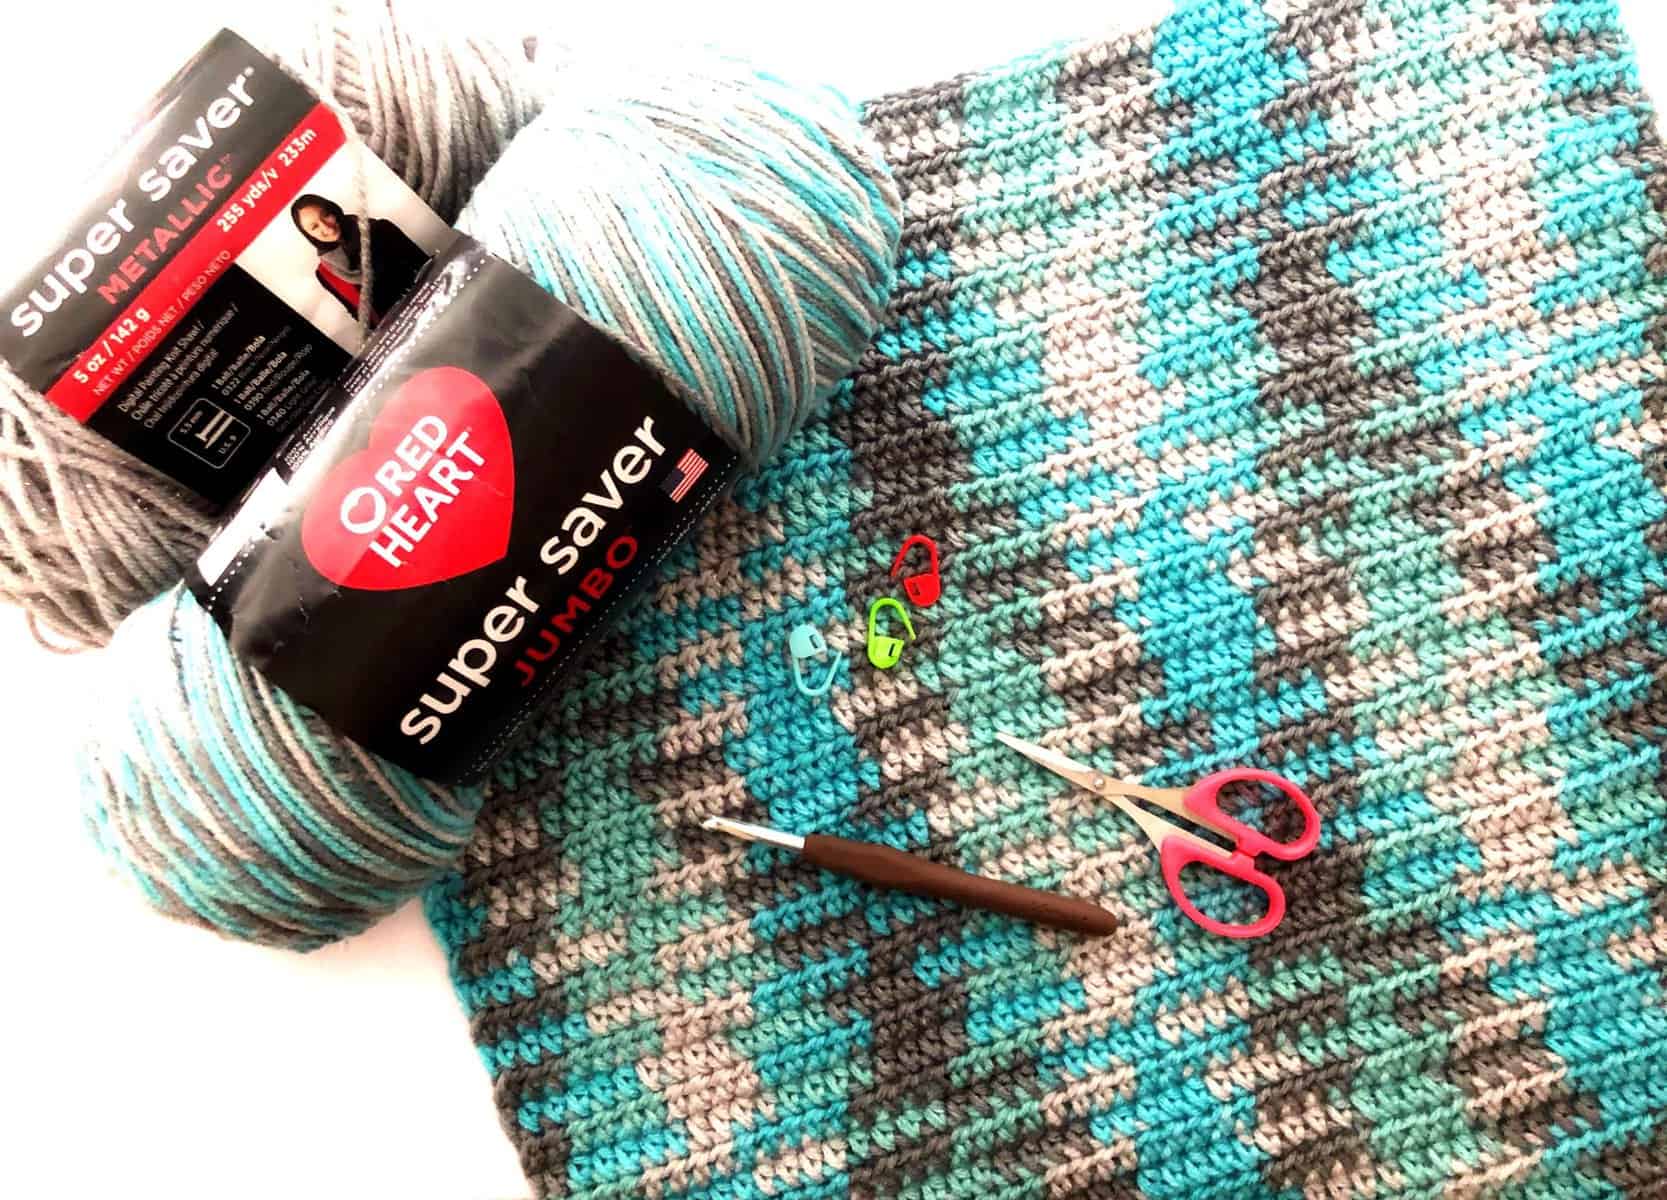
I am using Red Heart Super Saver Jumbo Pooling Yarn in the color Icelandic complimented with the Red Heart Super Saver Metallic Light Gray (Silver) for the finishing touch. Another great option you check out is the Caron Jumbo Pooling Yarns. They have many great color options to choose from!

Things to Note:
§ Prepare pattern gauge to get the right size by working the number of Hdc Sts per
color sequence stated below. You may need to adjust your tension or change hook size to achieve the same gauge.
• Blue – 5 sts
• Dark Gray – 4 sts
• Turquoise – 4 sts
• Light Gray – 4 sts
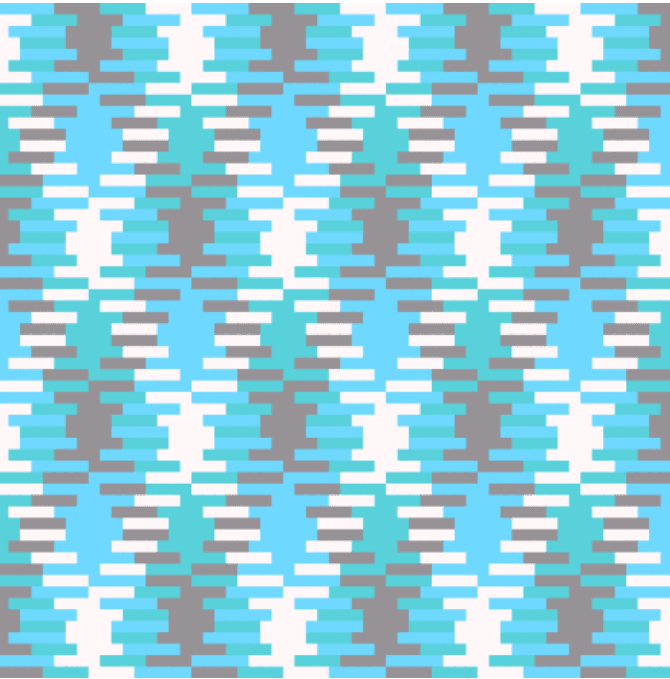
§ Step by step Video Tutorial available here
§ Abbreviation page available in English US format
Your body measurement:
§ Sizes: XS [S/ M /L/ XL] [2XL/ 3XL /4XL/ 5XL]
§ Bust: 30 [34/ 38/ 42/ 46] [50/ 54/ 58/ 60]” or 76 [86/ 96.5/ 106.5/ 117] [127/ 137/ 147/ 152.4] cm
§ These measurements are only estimates, and is best to measure your work/body along the way.
§ Top has a positive ease of 2 in/ 5 cm
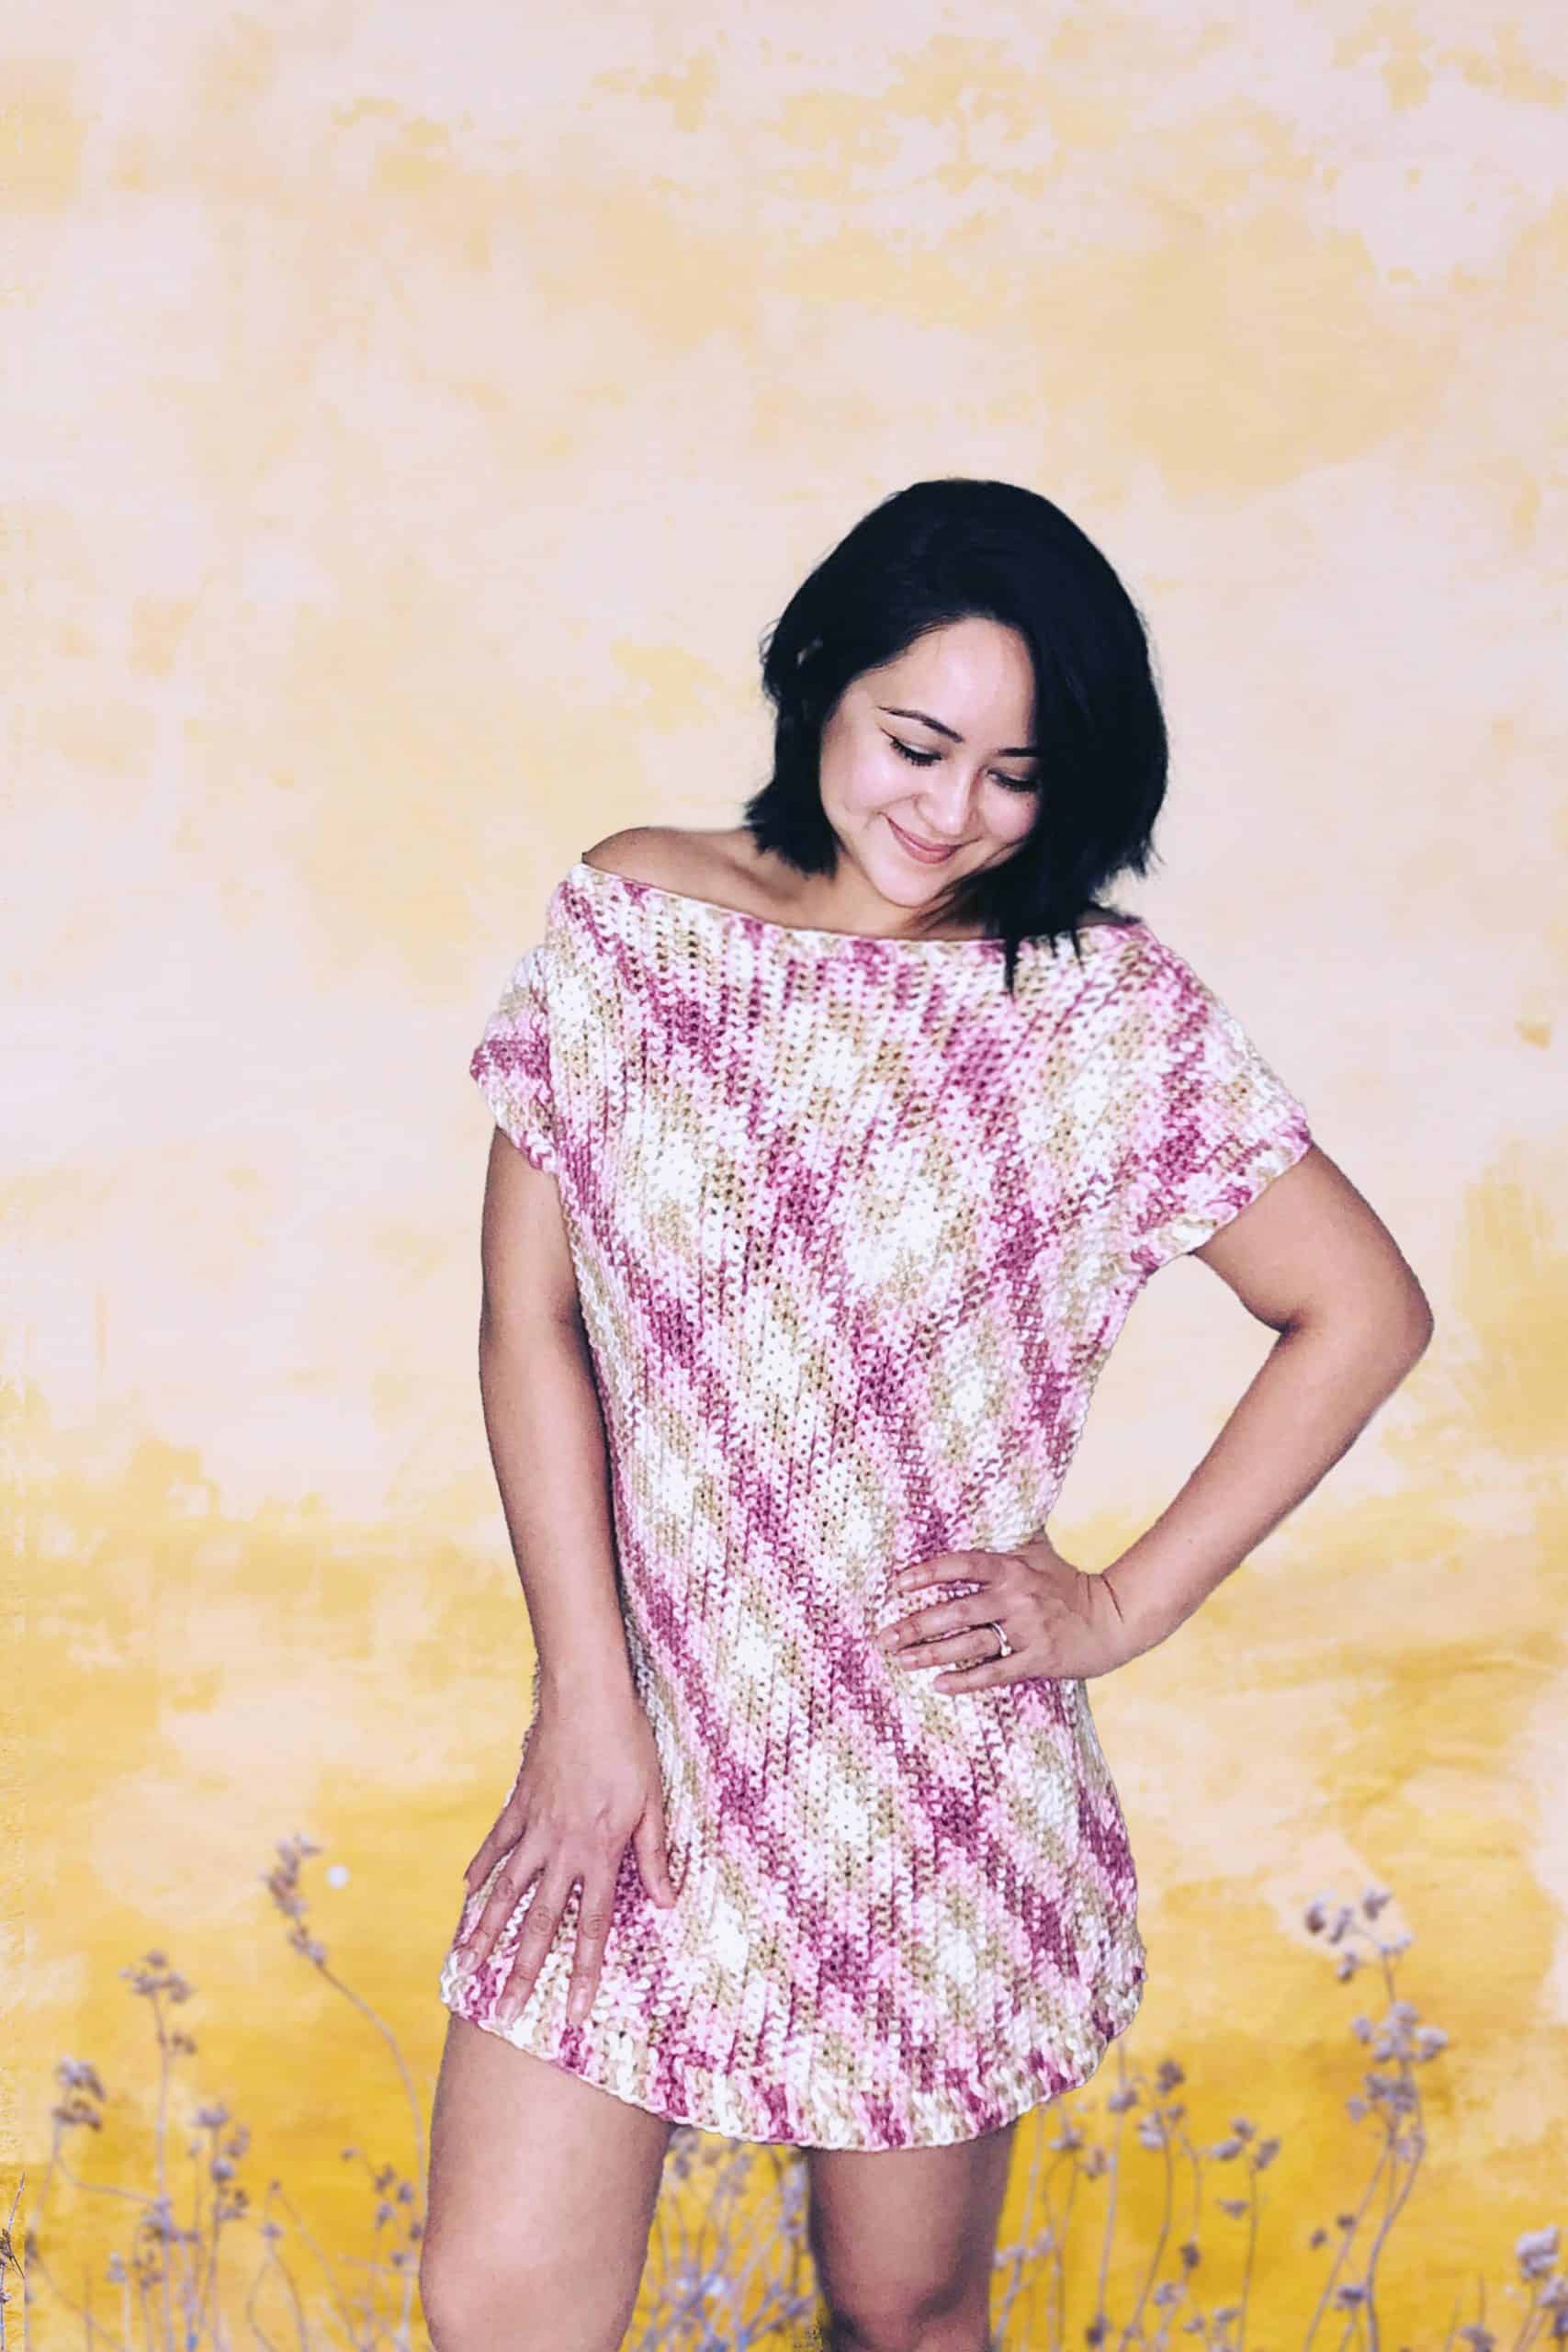
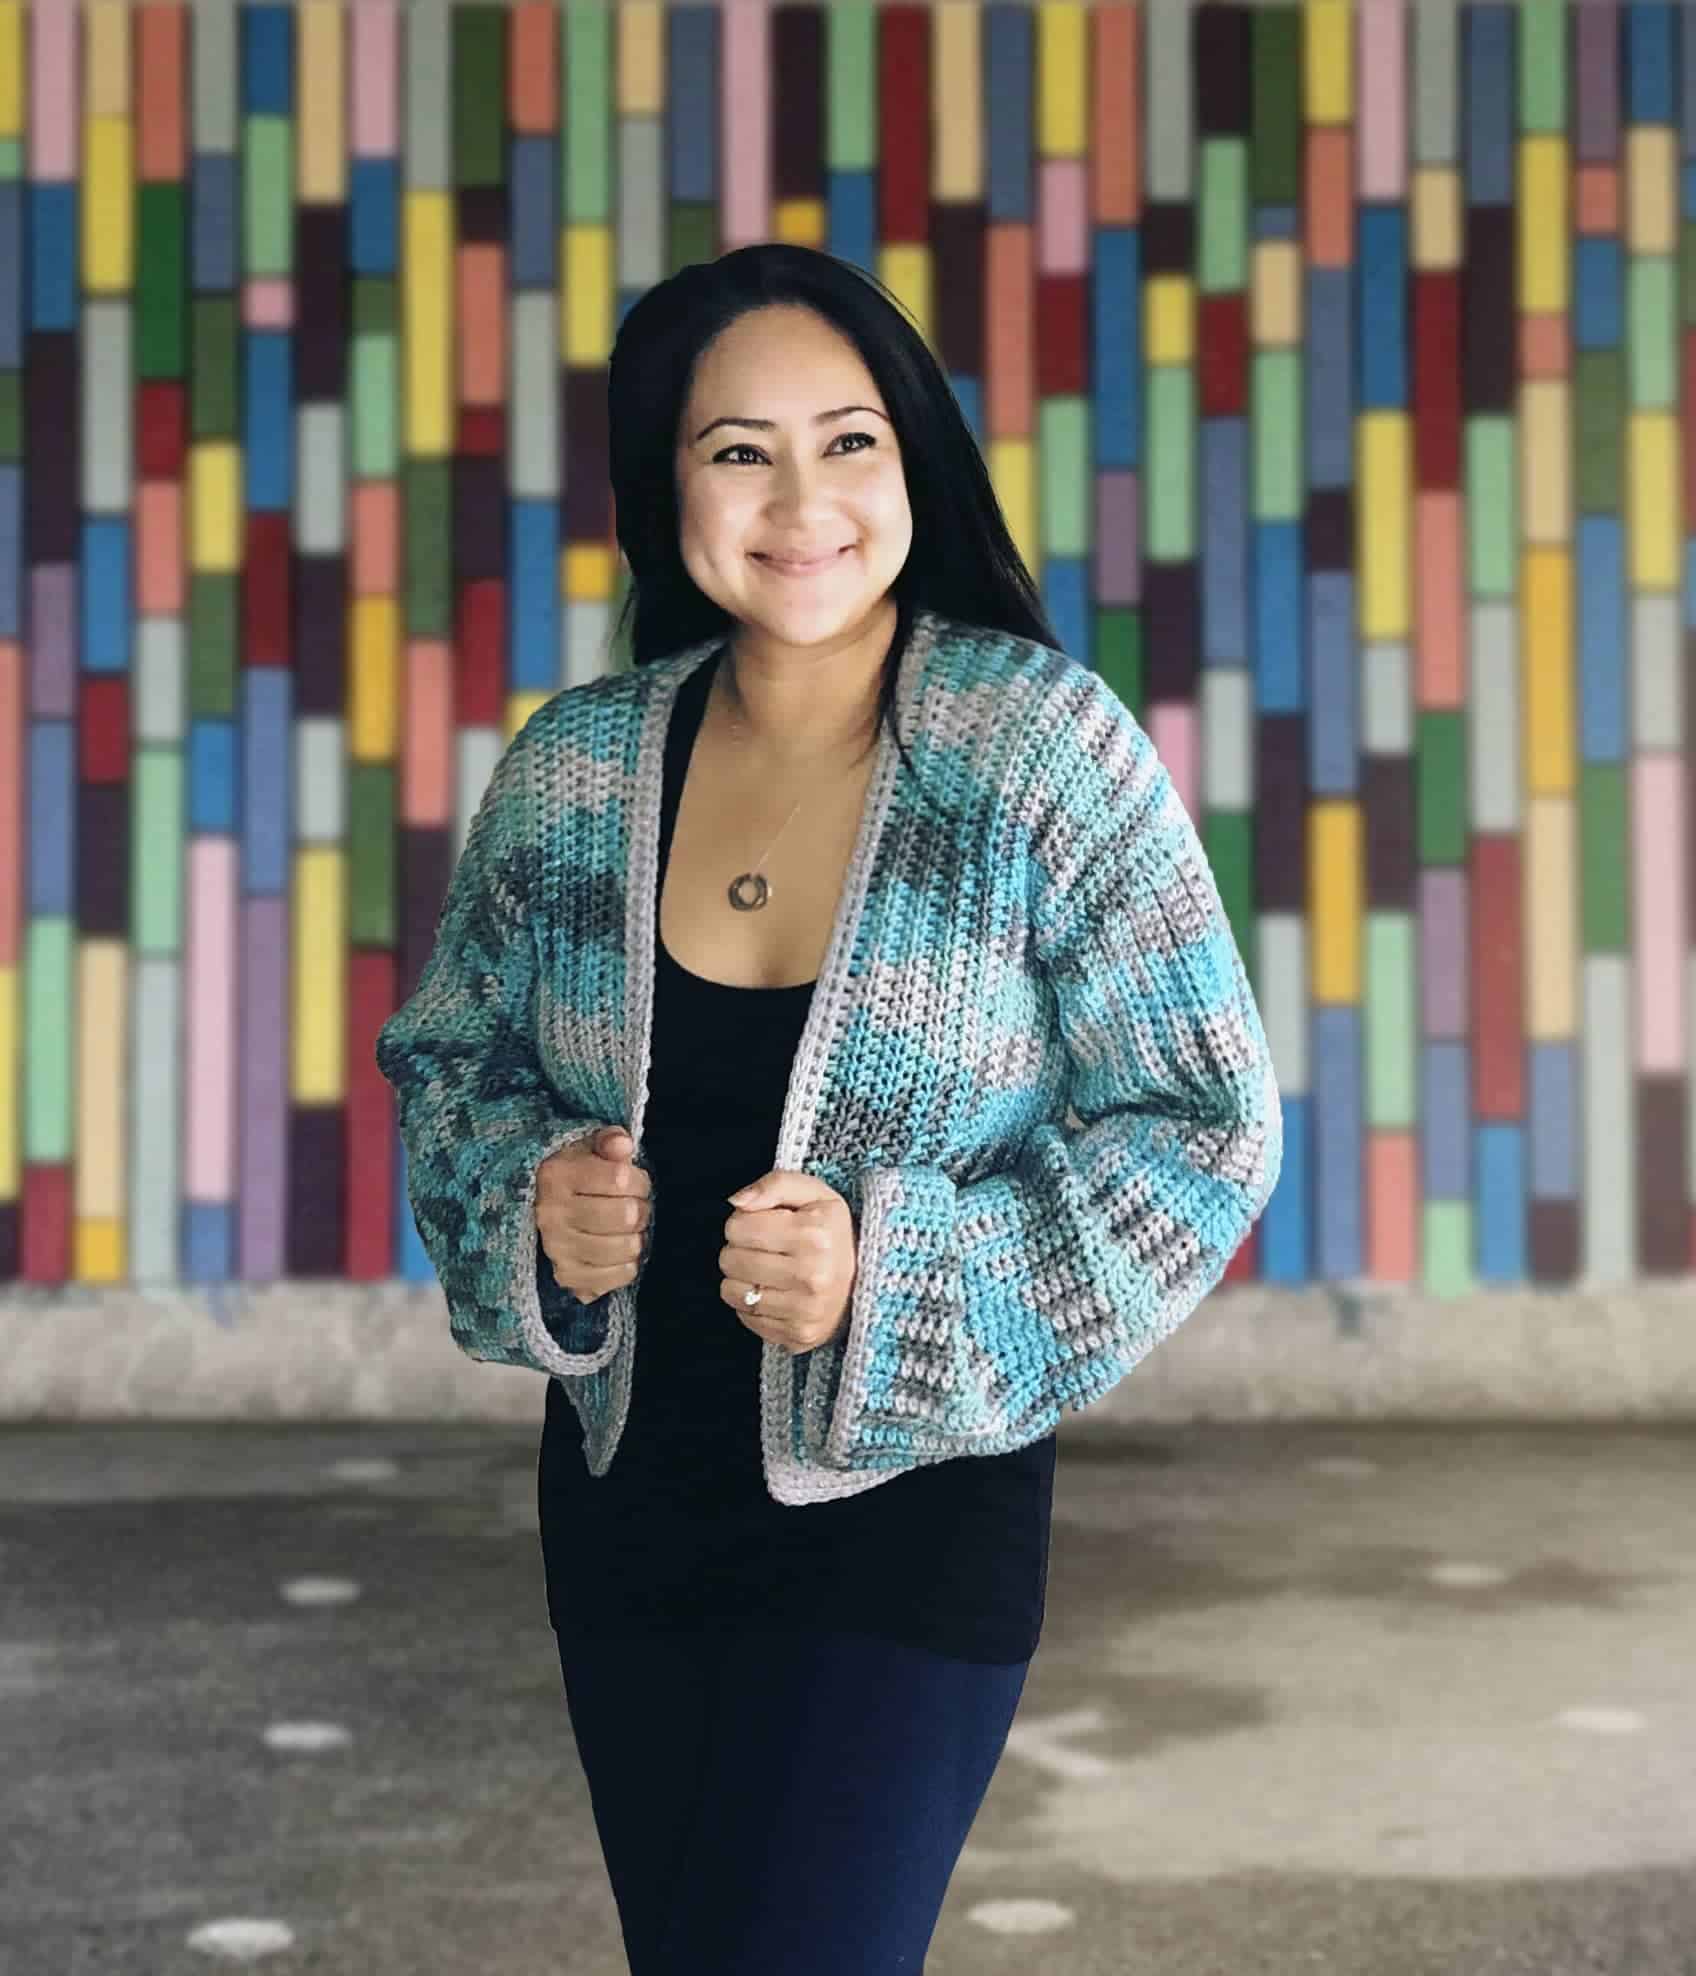
* I am wearing size Medium in these pictures here for reference
***
PART 1: Back Panel
Working from side to side, choose bet these 3 length sizes. 18/ 23/ 28.5 inches or 46/ 58/ 72 cm
Side Note:
Start your slip knot on any color and cont to chain the number of chains called for. Once you have reached the exact no. of chains and if it does not end on a new color, cont to add more chains to end a new color. Your turning chain should be in the next color. (Do this for all pieces)
1. Foundation Row: Chain 59 / 76/ 93, Ch 1 to turn,
2. Row 1: On the 2nd Ch from hook, work a Hdc St. Cont to Hdc as per the No. of Sts per color sequence stated below.
1. Blue – 5 Sts
2. Dark Gray – 4 Sts
3. Turquoise – 4 Sts
4. Light Gray – 4 sts
It doesn’t matter which color you start with, it will still follow the pattern sequence. Be sure to check your gauge before hand. (See Notes)
3. Cont to Hdc across the chain until you have reached 59/ 75 / 93 Sts. You might have extra unworked chains like the image below. Ch 1 (tighten this turning chain) and turn work. Undo any remaining chain(s).
4. Row 2: Work a Hdc on the 1st St by pulling it slightly higher to work a Hdc St. Cont to Hdc across the row making sure that the No. of Sts always match the sequence above, Ch 1 (tighten this turning chain), and turn work.
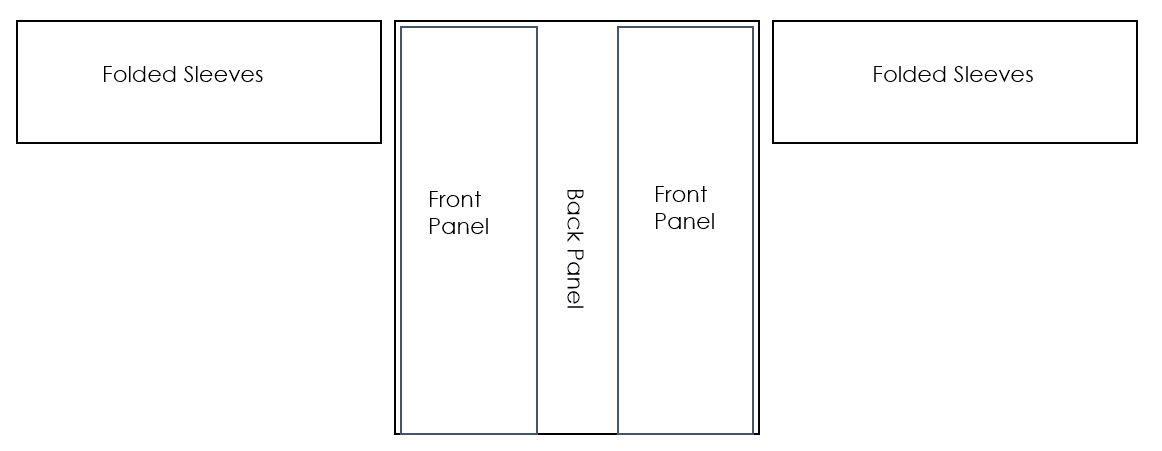
5. Next Rows: Rep Row 2 and cont to Hdc each row following the pattern guide in Image 1 for a total of 38 [43/ 48/ 52/ 57] [62/ 67/ 71/ 76] rows.
6. Bind off
PART 2: Front Panel
1. Foundation Row: Chain 59 / 76/ 93, Ch 1 to start a new row
Ref to Side Notes in Part 1 when starting a new piece.
2. Row 1: On the 2nd Ch from hook, work a Hdc St. Cont to Hdc across the row making sure that the No. of Sts always follow the sequence across. Ch1 (tighten this turning chain), turn work
3. Row 2: Work a Hdc on the 1st St and across the row, Ch 1 (tighten this turning chain), and turn work.
4. Next Rows: Rep Row 2 and cont to Hdc each row following the pattern guide in Image 1 for a total of 12 [15/ 17/ 19/ 21] [24/ 26/ 27/ 29] rows.
5. Leave a long tail for seaming and bind off
6. Rep Step 1 – 5 and make a second piece. (Tip: best to start slip knot at the same color spot as the 1st panel)
PART 3: Sleeves
The sleeves can only be made in one length, which is 18in /46cm. This will fit Sizes XS to L. For sizes XL – 5XL, this might be a few in/cm longer. You have a few options, (a) fold and sew at the cuff, (b) seam higher at the armhole, (c) leave as is and/or roll-up.
1. Foundation Row: Chain 59, Ch 1 to turn
2. Row 1: On the 2nd Ch from hook, work a Hdc St. Cont to Hdc as per the color sequence across. Ch1 (tighten this turning chain), turn work
3. Row 2: Work a Hdc on the 1st St and across the row, Ch 1 (tighten this turning chain), and turn work.
4. Next Rows: Rep Row 2 and cont to Hdc each row following the pattern guide in Image 1 for a total of 31 [33 36/ 38/ 40] [43/ 45/ 48/ 50] rows.
5. On the last row, fold the sleeve in half lengthwise and Sc both sides together
6. Bind off
7. Rep Step 1- 6 to make a second piece.
PART 4: Assembling
Shoulder
1. Place the front body panel on top of the back body panel facing the WS out.
2. Seam shoulders together with Sc Sts
3. Bind off and rep on the other side
Sides
1. Place a SM on the 21 [23/ 24/ 26/ 28] [29/ 31/ 33/ 34] St from the top and Sc both panels together from the SM down.
2. Bind off and rep on the other side.
Sleeves
1. Place (RS) sleeves through the front and back body panel (WS) like image 2 below. (* Pull through 2/ 2/ 4/ 4/ 7 Sts higher for sizes XL – 5XL) – See image 2b
2. Place SM along the sides* and Sc for XS – L or FP Slst for XL – 5XL on both pieces together in the round.
3. Slst to close and bind off
4. Rep Steps 1 – 3 on the other side.


PART 5: Edging
Switch to Silver Yarn for all edging
Cuff
1. Row 1: Turn work RS out, and at the cuff, insert hook (along any edge) and Hdc each Row in the round.
2. Slst to join in the round. Ch 1
3. Row 2: Work FP Slsts in the round.
4. Slst to close or use a tapestry needle and weave in through the bottom of the 1st St, Pt, then into the center of the last St to close the round.
5. Weave in ends and rep Step 1 – 4 on the other cuff.
Front Panel
You may start at any side, but for this tutorial, I will start several sts from the front panel’s corner.
1. Row 1: Insert hook through the front body panels bottom edge, and work a Hdc St. Cont to Hdc each Row across. Once you’ve reached the bottom corner, work 3 Sts on the last St to turn to the St side.
2. Cont to Hdc across. Once you’ve reached the corner towards the neckline, decrease by working 2Hdctog on the joining seam.
3. Rep this dec Sts on the next neckline corner and inc on the next front panel corner.
4. Slst to join in the round. Ch 1
5. Row 2: Work FP Slsts in the round. Slst to close or use a tapestry needle to close the round (see image 3)

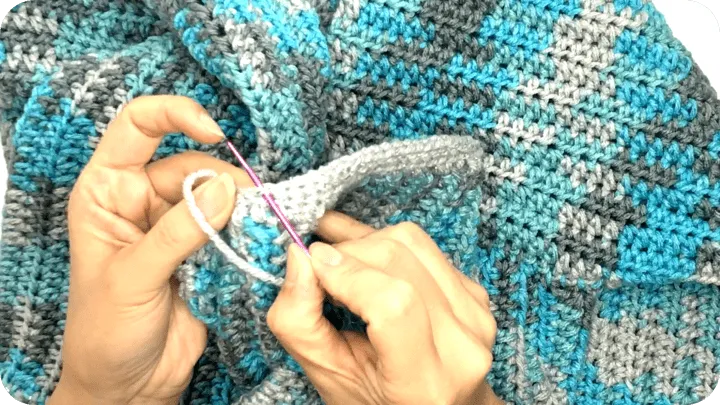
Image 3
6. Weave in ends
7. Row 3: Insert hook through the bottom of the Hdc St post (on any side) and work a FP Slst
8. Cont working the FP Slst in the round. Slst to close or use a tapestry needle to close the round (see image 3)
9. Bind off and weave in all loose ends
END
Great job if you made it this far! If you have any questions about this pattern, do check out the video tutorial or get in touch with me by dropping a comment below.
And don’t forget to tag me on Instagram and Facebook @theknottylace, I would love to see your work!
If you are looking for the entire tools used to make this Argyle Cardigan Jacket pattern, I’ve listed them all right here:
♥ 5.5mm Mdoker Ergonomic Crochet hook
♥ Red Heart Super Saver Jumbo Pooling Yarn (Icelandic)
♥ Red Heart Super Saver Metallic (Silver / Light Gray)
♥ Argyle Cardigan Jacket Printable PDF
By the way, If you would like to receive free written patterns and video tutorials straight into your inbox, you can join our mailing list now.
Enjoying our content? Make us a preferred source on Google.
Add us as a Preferred Source on GoogleHappy hooking,
Shaz 






2 Responses
Absolutely LOVE your creations !!!
Thank you so much Miss Daisy 🥰