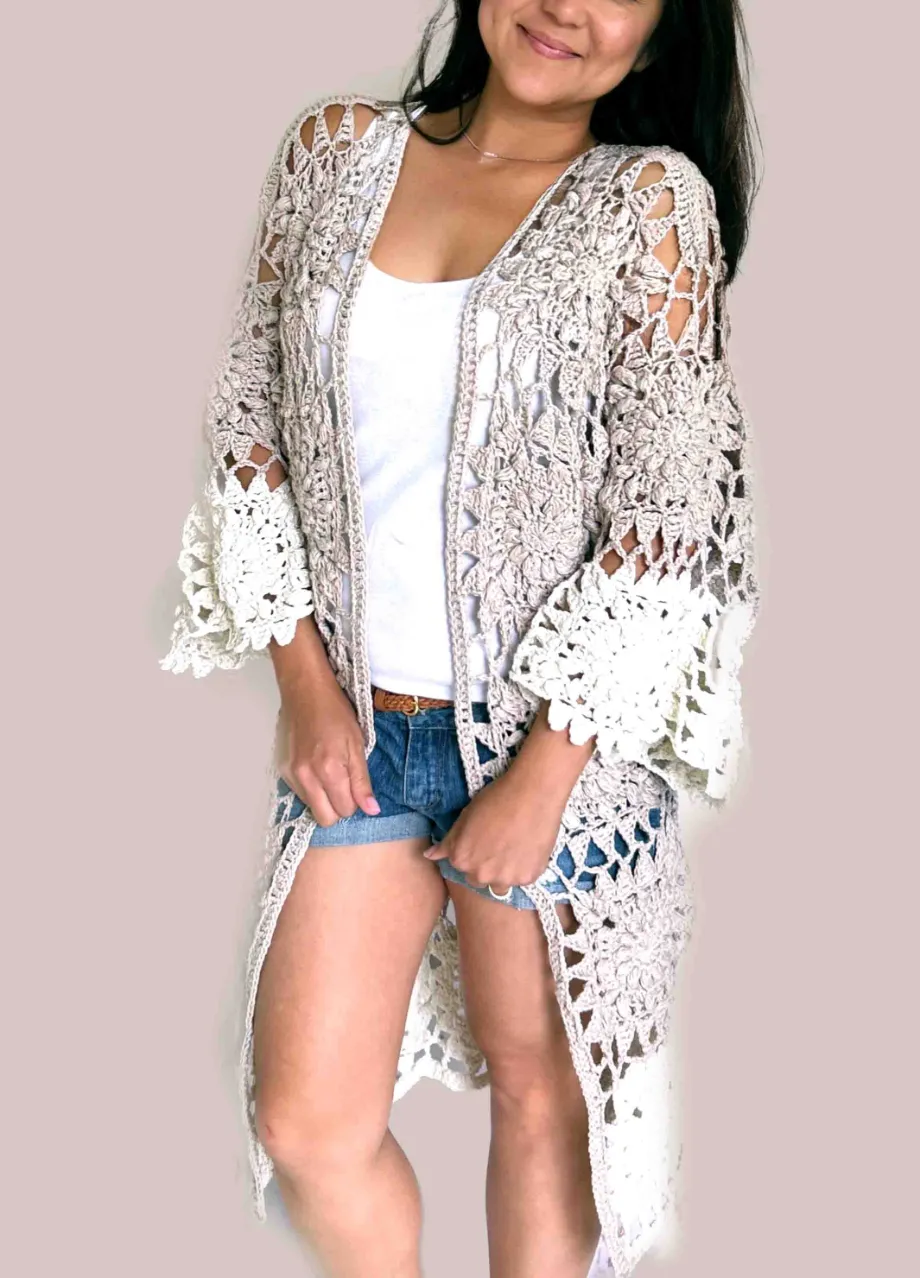
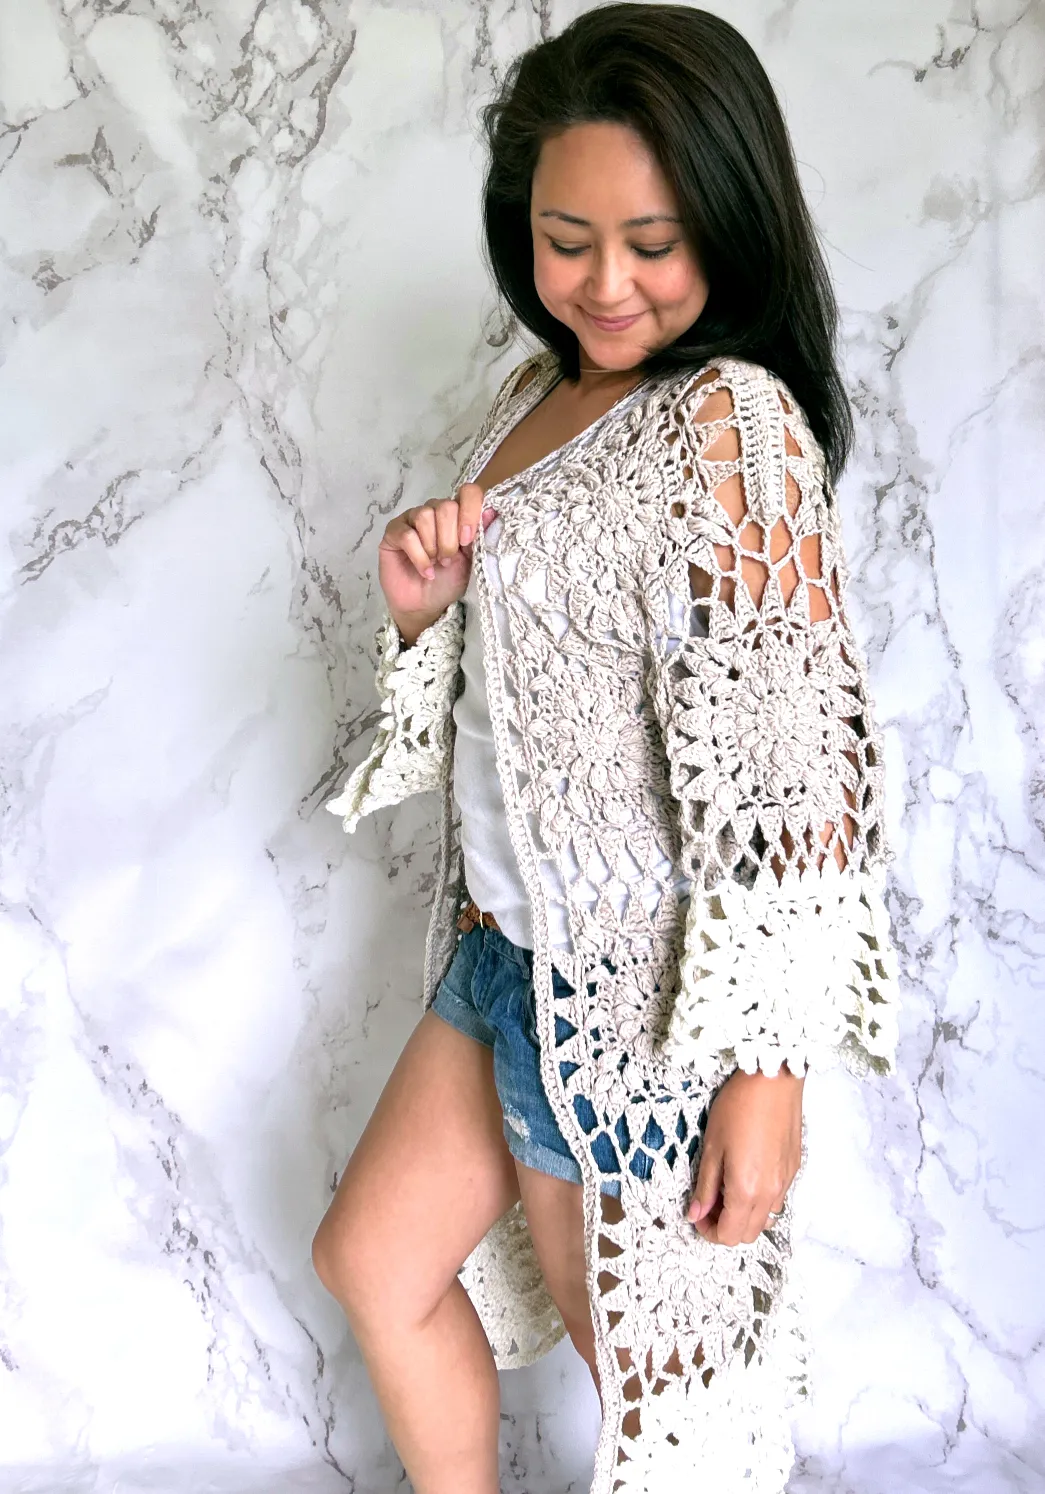
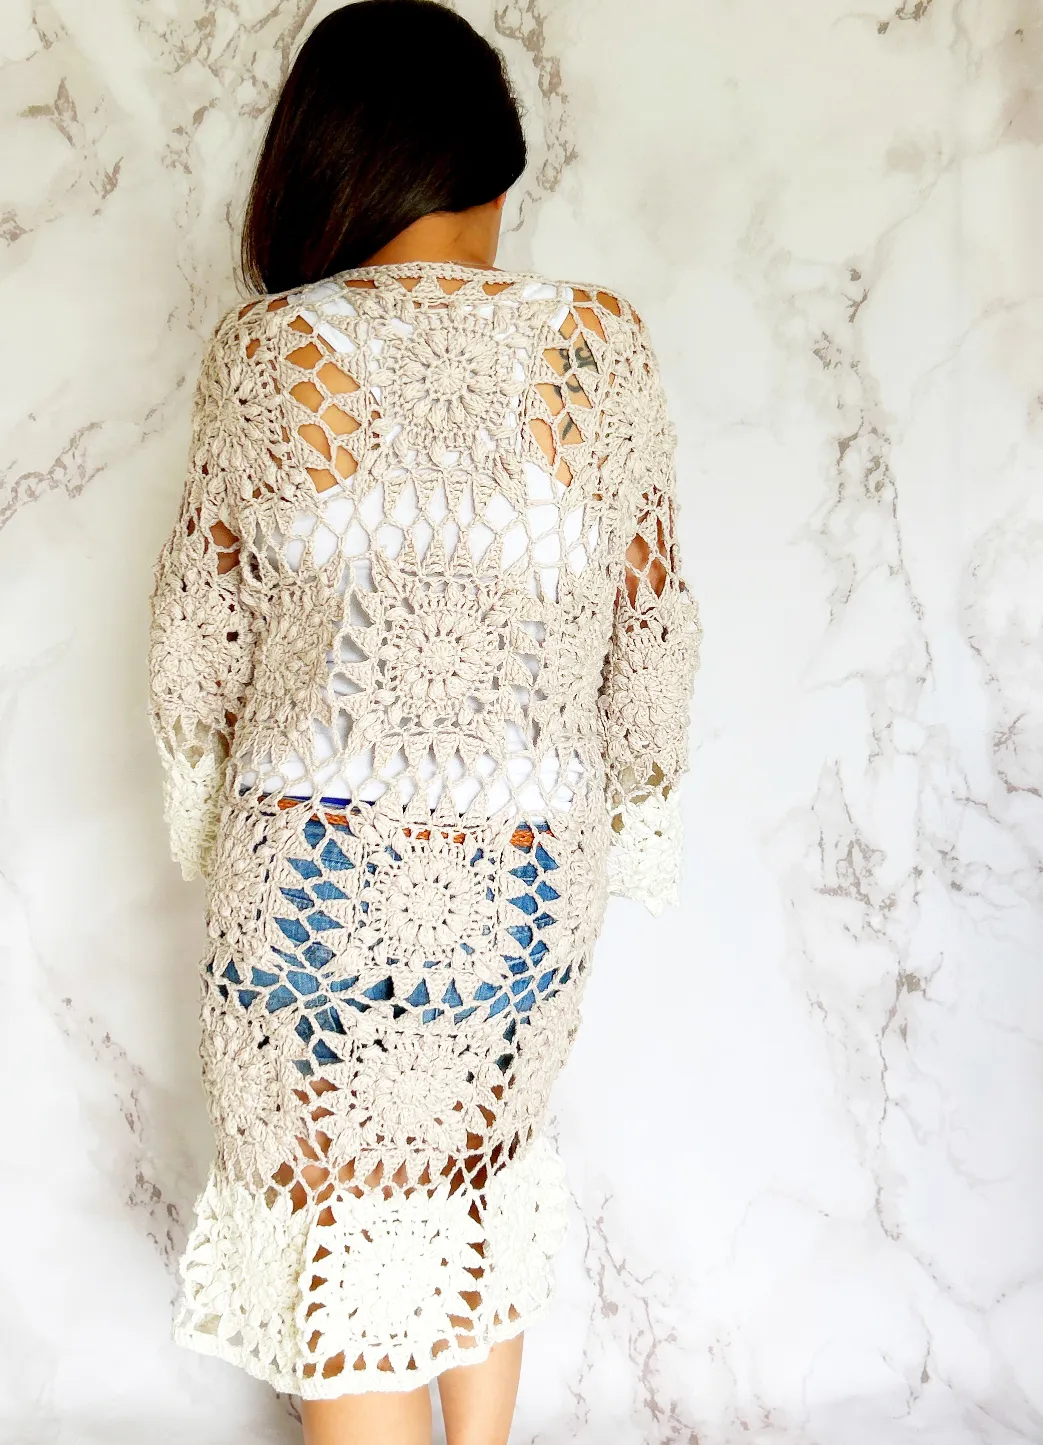
This beautiful crochet kimono made with squares was a lot of fun to make. Not only did it turn out better than expected but it is also so versatile and can be worn over almost anything. It just elevates and completes any simple wardrobe as your everyday wear.
With its lightweight and breathable design, it’s the perfect piece to wear over your bathing suit as you lounge by the pool or on the beach or to layer over a simple tank.
Plus, the intricate crochet squares provide just the right amount of coverage while keeping you cool.
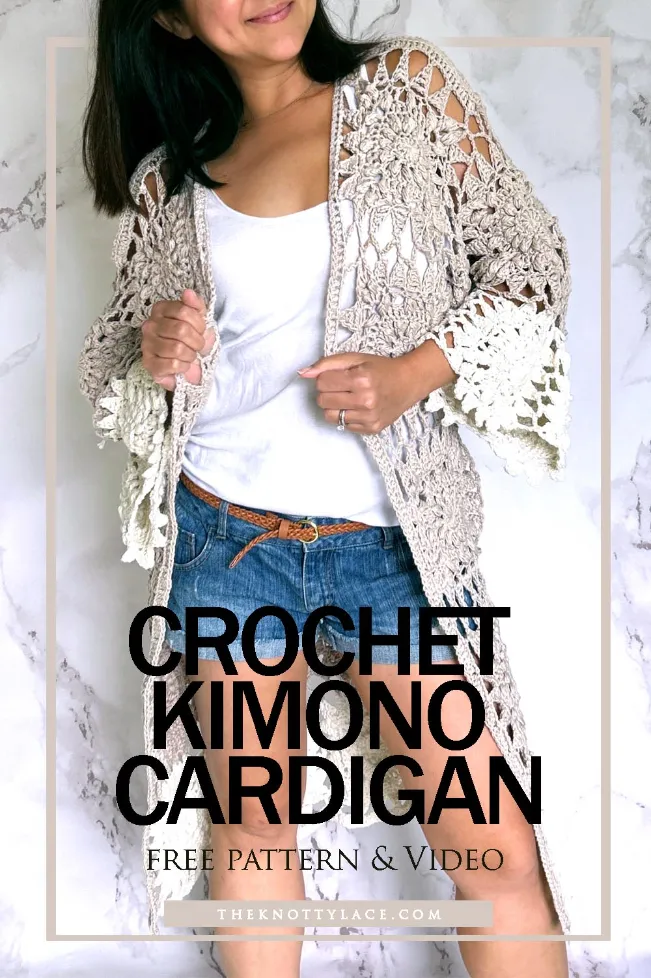
If you’re looking to add a bit of creativity and personal flair to your crochet collection, this free crochet kimono cardigan pattern is the perfect way to do it!
And with other great crochet square patterns available here, you can easily create a collection of gorgeous crochet pieces that you’ll love wearing all season long.
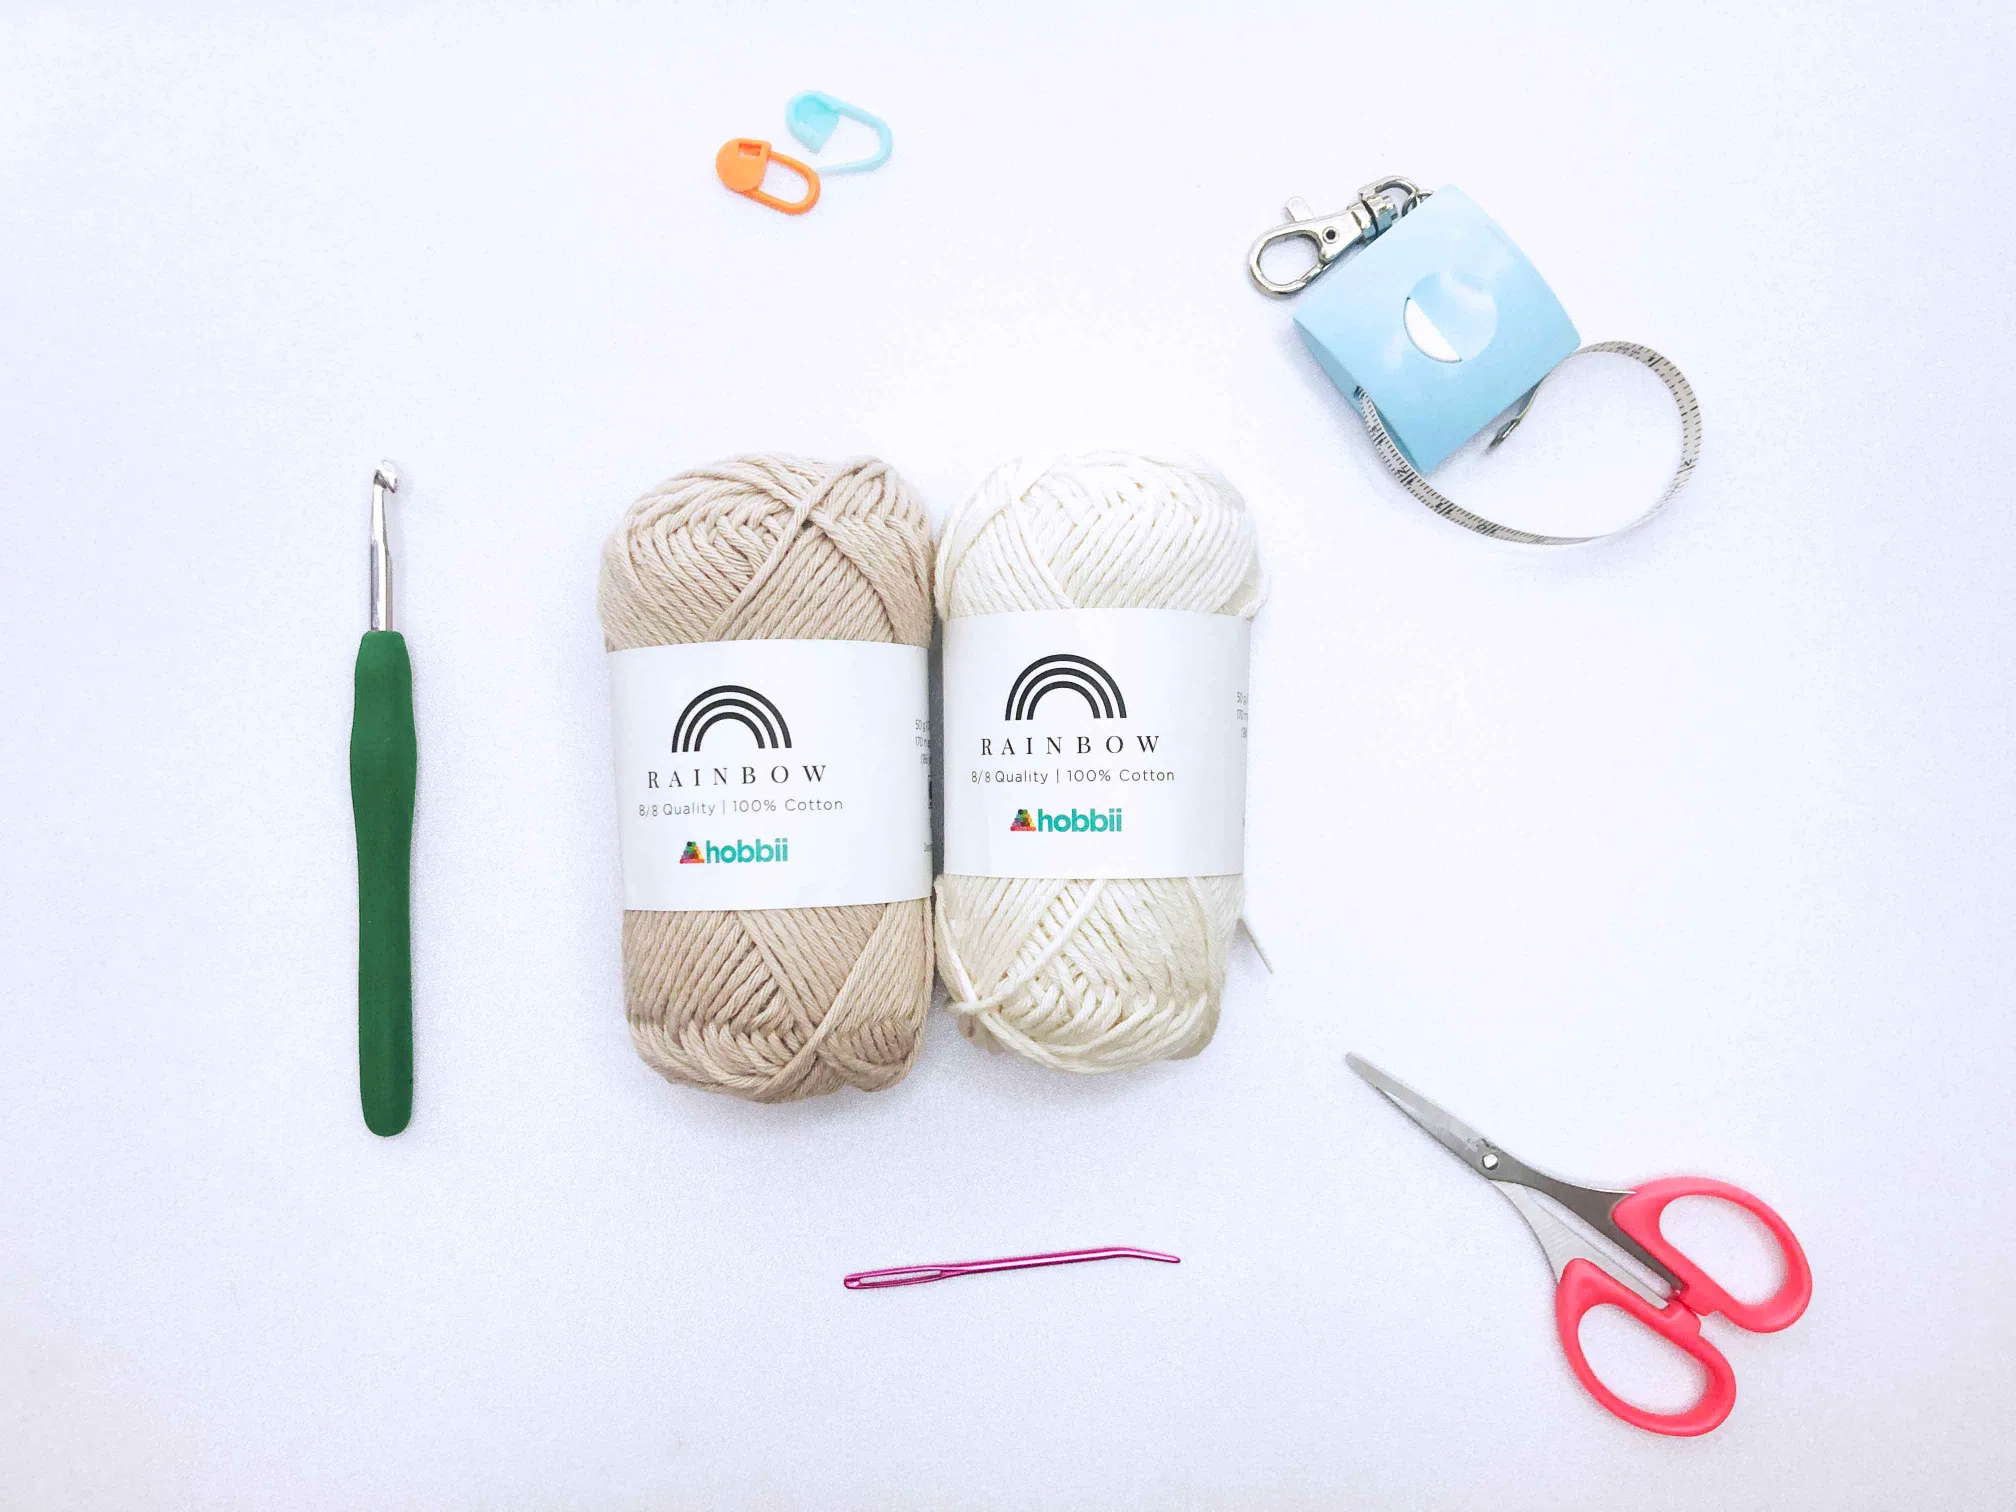
Yarn & Material
Depending on what season you’re planning to wear this for, this pattern is extremely easy to switch up. Think music festivals, beach cover up or just a fancy robe!
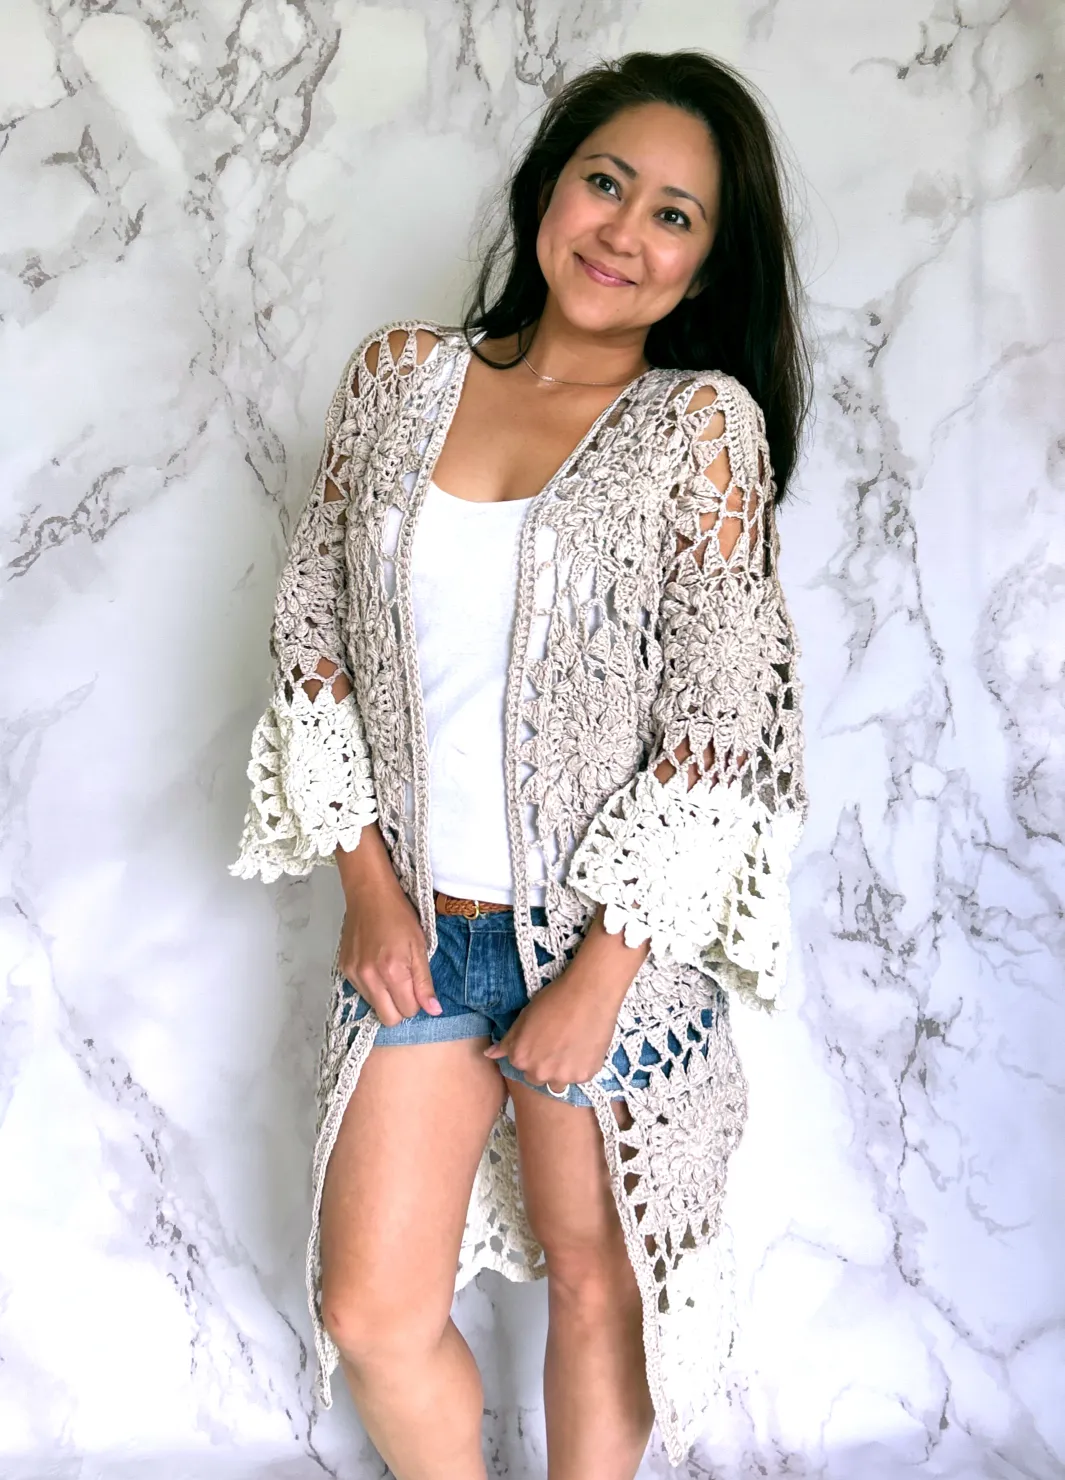
I made this crochet cardigan using Hobbii Rainbow Yarn in the colors Beige and Nude.
This is a 100% cotton yarn that is an 8 ply Category 3 weight yarn. It does offer a solid amount of weight when wearing it, hence making it sturdy and durable.
For a lighter-weight material, you could go for a fingering yarn like this Loops & Lane yarn which I used to make this Crochet Granny Beach Cover.
Don’t be fooled by the fiber. Although it is wool, being a fingering yarn and working with squares, it will turn out extremely lightweight soft, and breezy.
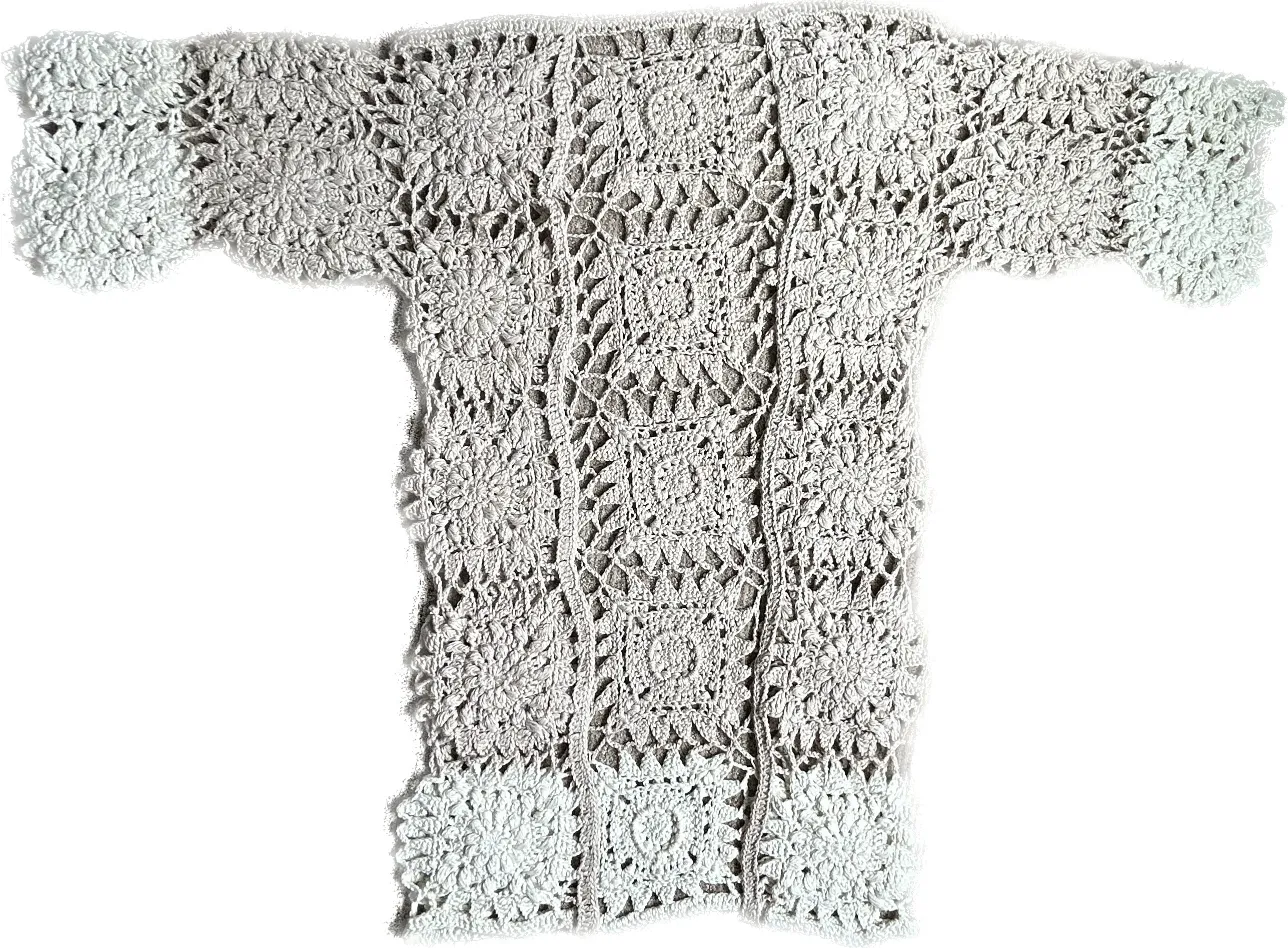
Simple Construction

This crochet kimono was made using one pretty flower square. And with this one square pattern, I was able to create one finished product with wide sleeves in 4 group sizes.
This tutorial was made in size Medium. However, this crochet cardigan is meant to give an oversized fit, which can be adjusted to your preference.
These 4 group sizes are divided amongst XS & S as one group, M, L as a second group, XL & 2XL as the third group. and 3XL & 4XL as the fourth group. Simply tweaking a few stitches and repeating a couple of rows is what I used to allow room for adjustment for the larger sizes.
Starting with the basic Magic ring or magic circle, each row is built to add flower petals in the round using a fancy stitch pattern called the front post bobble stitch. This stitch is worked up simply by working behind and through a post while working 3 double crochet stitches and closing up as one.
I am also using other simple crochet stitches like single crochet, double crochet, and treble crochet stitch as well.
Once you have all the squares made, a good practice would be to steam block them to make it easier to join later on.
Ideas for Customizing
There are many ways you can choose to customize this cardigan from yarn colors to the number of chaining stitches. Let’s have a look at the options below.
The crochet hook you choose can significantly impact the texture, drape, and size of your cardigan. For a tighter and more structured stitch, opt for a smaller hook size.
Alternatively, a larger hook will create more open and airy stitches for a lightweight and larger-fit cardigan. To adjust the width of this cardigan, you can choose to increase or decrease the number of chains used for each join.
Yarn choice plays a pivotal role in customizing your crochet cardigan. If you’re planning on making this for a cozy winter cardigan, consider a warmer, bulky yarn.
For a lightweight, airy design, choose a lace-weight or fingering yarn. This will also affect the drape and size of the overall fit.
And if this duster cardigan is too long for your liking, don’t be afraid to cut back on the number of squares and just make a shorter one. This is absolutely a great way to experience a different look and style.
Colors are where your personality can truly shine through in your crochet cardigan. Experiment with color changes when joining each square, or combine different colors for each solid color square or round.
Don’t be afraid to mix solids with variegated yarns for a striking effect. You just never know what an amazing outcome it could be. – And if you do – you must share those photos with me!
Elevate your crochet cardigan with embellishments like buttons, a belt, or beads. Consider adding pockets, fringes, or tassels for extra flair. Personalize your creation to suit your style.


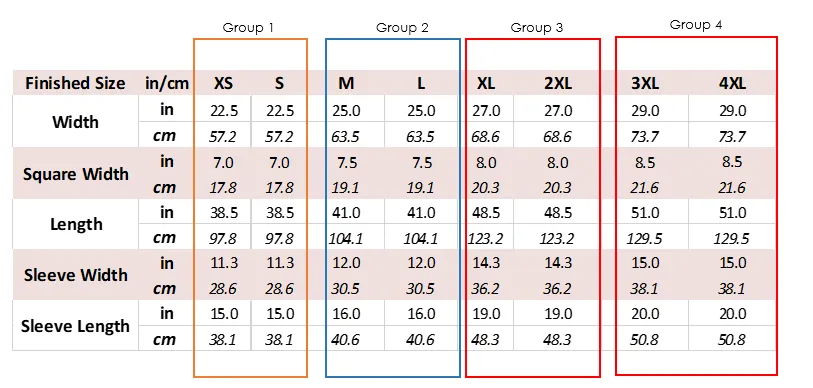
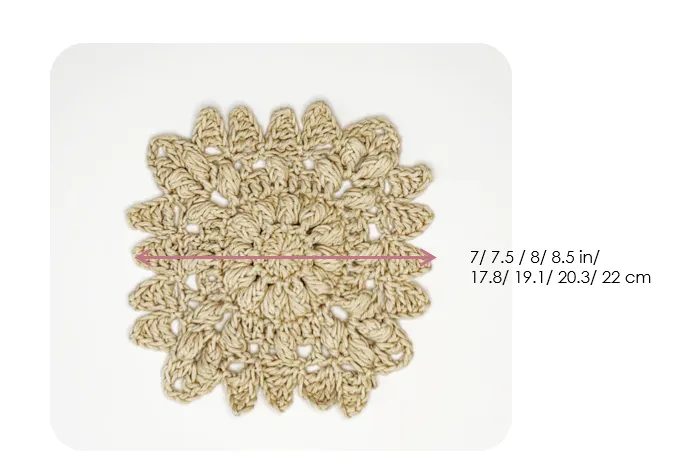
- Pattern consists of 4 group sizes.
- Measurements above are for the finished garment and not the actual body size
- Length and sleeve length can be adjusted to your liking
- The main color used is Nude and the accent color is Beige.
- For reference, I usually wear a size M and am wearing a Group size 2 and is 5’3” / 160cm in height.
- 37 squares in total or 15 squares for the back panel, 5 squares for each front panel and 6 squares for each sleeve
- Special Stitch: Front Post Bobble Stitch – FpB St
PART 1: Granny Square – All sizes start here (Video Tutorial)
- Foundation Rnd: Work a Magic Ring / Magic Circle, Ch 1 to secure, Ch 2, Dc 11, Slst to join [12 Dc Sts]
2. Rnd 1: Ch 3, *(Dc, Ch 1), Rep (*) in the round, Slst into the 3rd ch to join [12 Dc Sts]
3. Rnd 2: Work a *(Front Post Bobble Stitch (FpB St) through the 1st post, 2 Dc on Ch Sp), Rep (*) in the round, Slst to join
4.Rnd 3: Ch 5, *(Dc 9, Ch 3), Rep (*) 2 more times, Dc 8, Slst to join.
5. Rnd 4: *(Work a FpB St through the next post, *(2 Dc on Ch Sp, Ch 3, 2 Dc on Ch Sp, FpB on the next post. Ch 1, Sk 1, Dc, Ch 1, Sk 1, FpB, Ch 1, Sk 1, Dc, Ch 1, Sk 1), Rep (*) 3 more times, Slst to join. Slst 1.
Group 3 will rep Rnd 3a followed by Rnd 5. Group 4 will rep Rnd 3a & 4a for another set followed by Rnd 5. Other sizes can proceed straight to Rnd 5.
Rnd 3a: *(Work a FpB St through the next post, 2 Dc on Ch Sp, Ch 3, 2 Dc on Ch Sp, FpB on the next post, Dc 11), Rep (*) 3 more times, Slst to join, Slst 1.
Rnd 4a: *(Work a FpB St through the next post, 2 Dc on Ch Sp, Ch 3, 2 Dc on Ch Sp, FpB on the next post. Ch 1, Sk 1, Dc, Ch 1, Sk 1, FpB, Ch 1, Sk 1, Dc, Ch 1, Sk 1, FpB, Ch 1, Sk 1, Dc, Ch 1, Sk 1, FpB, Ch 1, Sk 1, Dc, Ch 1, Sk 1), Rep (*) 3 more times, Slst to join, Slst 1.
6. Rnd 5 (For Group 1): Work a FpB St through the next post, 2 Dc, Ch 3, 2 Dc, FpB on the next post. *(Slst, Ch 4, Sc in the 2nd Ch from hook, Hdc, Dc, Sk 2,) Rep (*) 3 more times, Slst. Cont to Step 8.
7. Rnd 5 (For Group 2, 3 , 4): Work a FpB St through the next post, 2 Dc, Ch 3, 2 Dc, FpB on the next post. *(Slst, Ch 5, Sc in the 2nd Ch from hook, Hdc, Dc, Tc, Sk 2,) Rep (*) until Group (2 / 3/ 4) has (4 /5 /6) triangles per side. Slst.
8. Rep Rnd 5 for another 3 more times. Slst to join in the round.
9. Bind off
Group 1 & 2 has 4 triangles per side, Group 3 has 5 and Group 4 has 6 triangles per side
Proceed to make 37 more squares of the same color or 26 beige and 11 cream
PART 2: Assembling
- Once you have all the squares, a good practice would be to block them to make it easier to join later on.
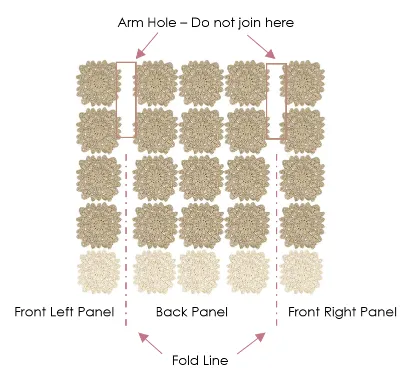
2. Assemble each square according to the diagram below.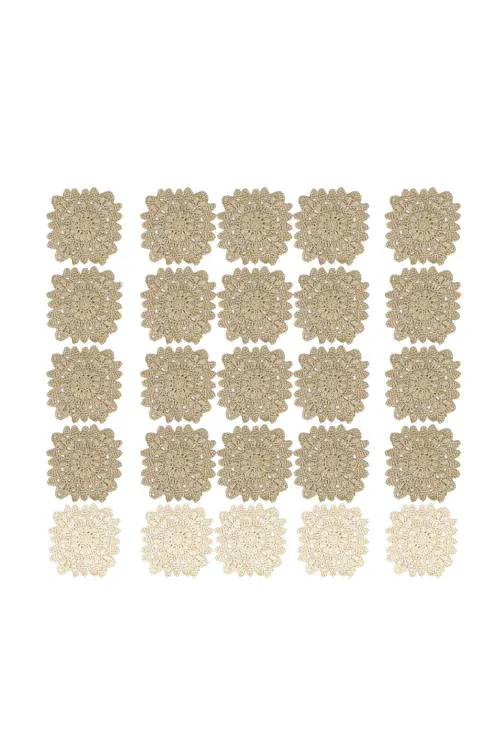
PART 3: Joining Squares
To join, place 1 square on top of another (RS out) and insert hook through the front squares corner Ch Sp, and Ch 4 [ 3/ 5/ /5]. Sc into the back squares’ corner Ch Sp. Ch 4 [ 3/ 5/ /5], Sc into the front squares’ 1st triangle top St, Ch 4 [ 3/ 5/ /5], Sc into the back squares’ 1st triangle top St.
2. Rep these alternating chains onto each triangle on both squares across until the 2nd Squares corner Ch Sp. Bind Off
3. Rep steps 1 & 2 on each square making 3 squares per row.
4. Make 5 Rows in total (ref to earlier diagram)
5. Next join the connected squares row by row.
6. To join, place 1 row on top of another (RS out) and insert hook through the front squares corner Ch Sp, and Ch 4 [ 3/ 5/ /5]. Sc into the back squares’ corner Ch Sp. Ch 4 [ 3/ 5/ /5], Sc into the front squares’ 1st triangle top St, Ch 4 [ 3/ 5/ /5], Sc into the back squares’ 1st triangle top St.
7. Rep these alternating chains onto each triangle on each square across until the end of the last corner square at the back.
8.Bind Off
Front Panel:
9. Rep Steps 1 & 2 on each square making 5 squares per row. Make 2 sets
10. Next join the connected 5 squares’ row by placing 1 row next to the back body panel (RS out) and insert hook through the front squares corner Ch Sp, and Ch 4 [ 3/ 5/ /5]. Sc into the back squares’ corner Ch Sp. Ch 4 [ 3/ 5/ /5], Sc into the front squares’ 1st triangle top St, Ch 4 [ 3/ 5/ /5], Sc into the back squares’ 1st triangle top St.
Note: Remember not to connect along the armhole. Leave 2 squares on each side open.
11.Bind off
Sleeves:
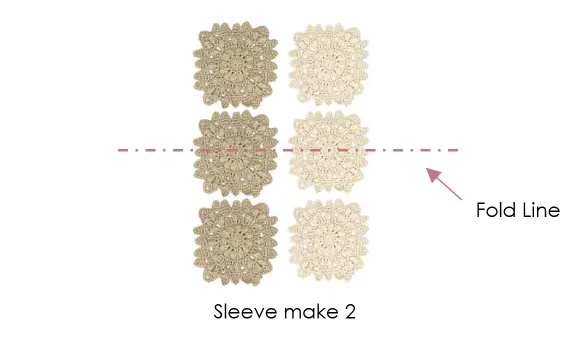
12. Rep Steps 1 & 2 on each square making 3 squares per row and 2 rows. Make 2 sets (ref to earlier diagram )
13. Next join the connected squares’ row by placing 1 row on top of another (RS out) and insert hook through the front squares corner Ch Sp, and Ch 4 [ 3/ 5/ /5]. Sc into the back squares’ corner Ch Sp. Ch 4 [ 3/ 5/ /5], Sc into the front squares’ 1st triangle top St, Ch 4 [ 3/ 5/ /5], Sc into the back squares’ 1st triangle top St.
14. Bind off
15. Fold the Sleeve in half width-wise and join both pieces together the same way.
PART 4: Edging
Bottom Edging
Once all pieces are connected (leaving the sleeves for last), start working on the bottom edging.
From the bottom corner WS, insert hook at the corner Ch Sp and Ch 3, ** [ *(Ch 5, Sc into the next triangle). Rep (*) 3 more times, Ch 5, Tc into the next corner Ch Sp. Ch 4 [ 3/ 5/ /5], Tc into the next squares corner Ch Sp]. Rep [** ] across, Ch 1 turn
3. Dc each St and Ch across.
4.Bind off
Side Edging
- From the bottom front panel, facing the WS, insert hook at the corner Ch Sp and Ch 7, Tc, **[*(Ch 5, Sc into the next triangle). Rep (*) 3 more times, Ch 5, Tc into the next corner stitch. Ch 3, Tc into the next corners Ch Sp]. Rep [**] across until the end of the row.
2. At the top corner Ch Sp of the front panel, work 2 Tc, Ch 3, 2 Tc, Rep [**] pattern across.
3. Rep step 2 on the other side of the 2nd front panel and work your way down. Ch 1 turn
4. *(Dc each Ch and St across. At the corner St, work 5 Dc in the Ch Sp) Rep (*) across.
5. Bind off
PART 5: Shoulder
- Fold front panel forwards (RS up) and place SM along the sides. Make sure the front and back pattern matches.
2. Next, take a tapestry needle and thread through some yarn
3. Insert needle from the back to the front through the inner loops of both sides and pull through
4. Insert needle diagonally through the 2nd St towards the back – inner loop only.
5. Rep until the end of the front panel’s row.
6. Weave in ends and bind off
7. Rep on the other side.
PART 6: Sleeves
- Place Body Panel and Sleeve RS up and adjust the sleeves’ position along the arm openings.
2. Place a SM on the body panel to mark the end of the sleeve.
3. From the SM on the body panel, insert hook and Ch 3 and Sc into the next sleeves corner St.
4. Rep the Chains and Sc in a zig zag pattern alternating between the body panel and the sleeves until the top of the shoulder.
5. Work a Tc into the middle (3rd St) of the 5 Dc group St at the shoulder.
6. Ch 3, Sc into the last Dc St of the 5 Dc group St. – It should look symmetrical on both sides.
6. Cont to join each triangle and corners in the round.
7. Bind off and rep on the other sleeve.
Weave in a million loose ends. I promise it is worth it in the end 😁
END
** Looking for guided images and tutorial pictures? I have the full PDF file available here on the pattern store.
What’s next?
If you like this free pattern so far, don’t forget to pin this to Pinterest, share them on social or just save them to your Ravelry queue for later.
And if you would like a printable PDF file copy of this pattern with no distracting ads, and loads of guided images, it is also available for purchase on my pattern store here.