
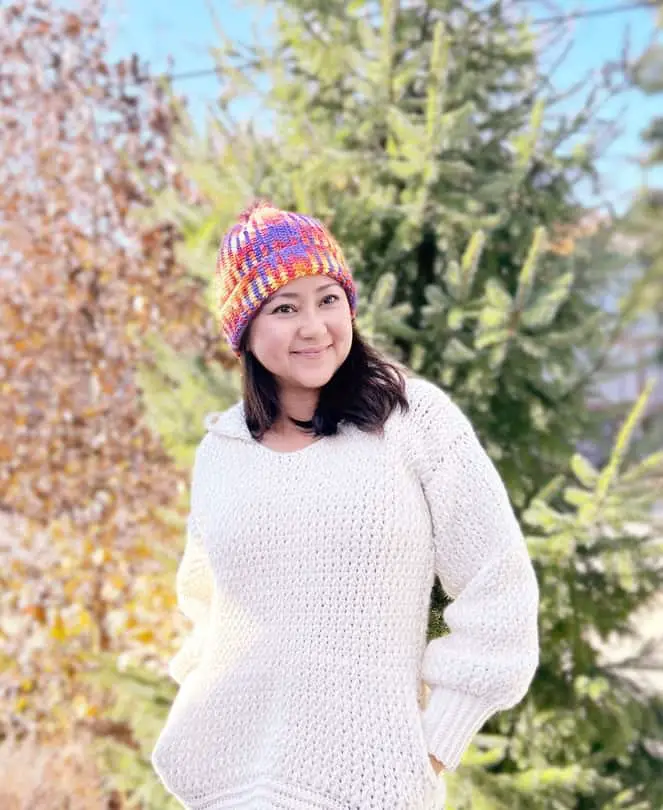
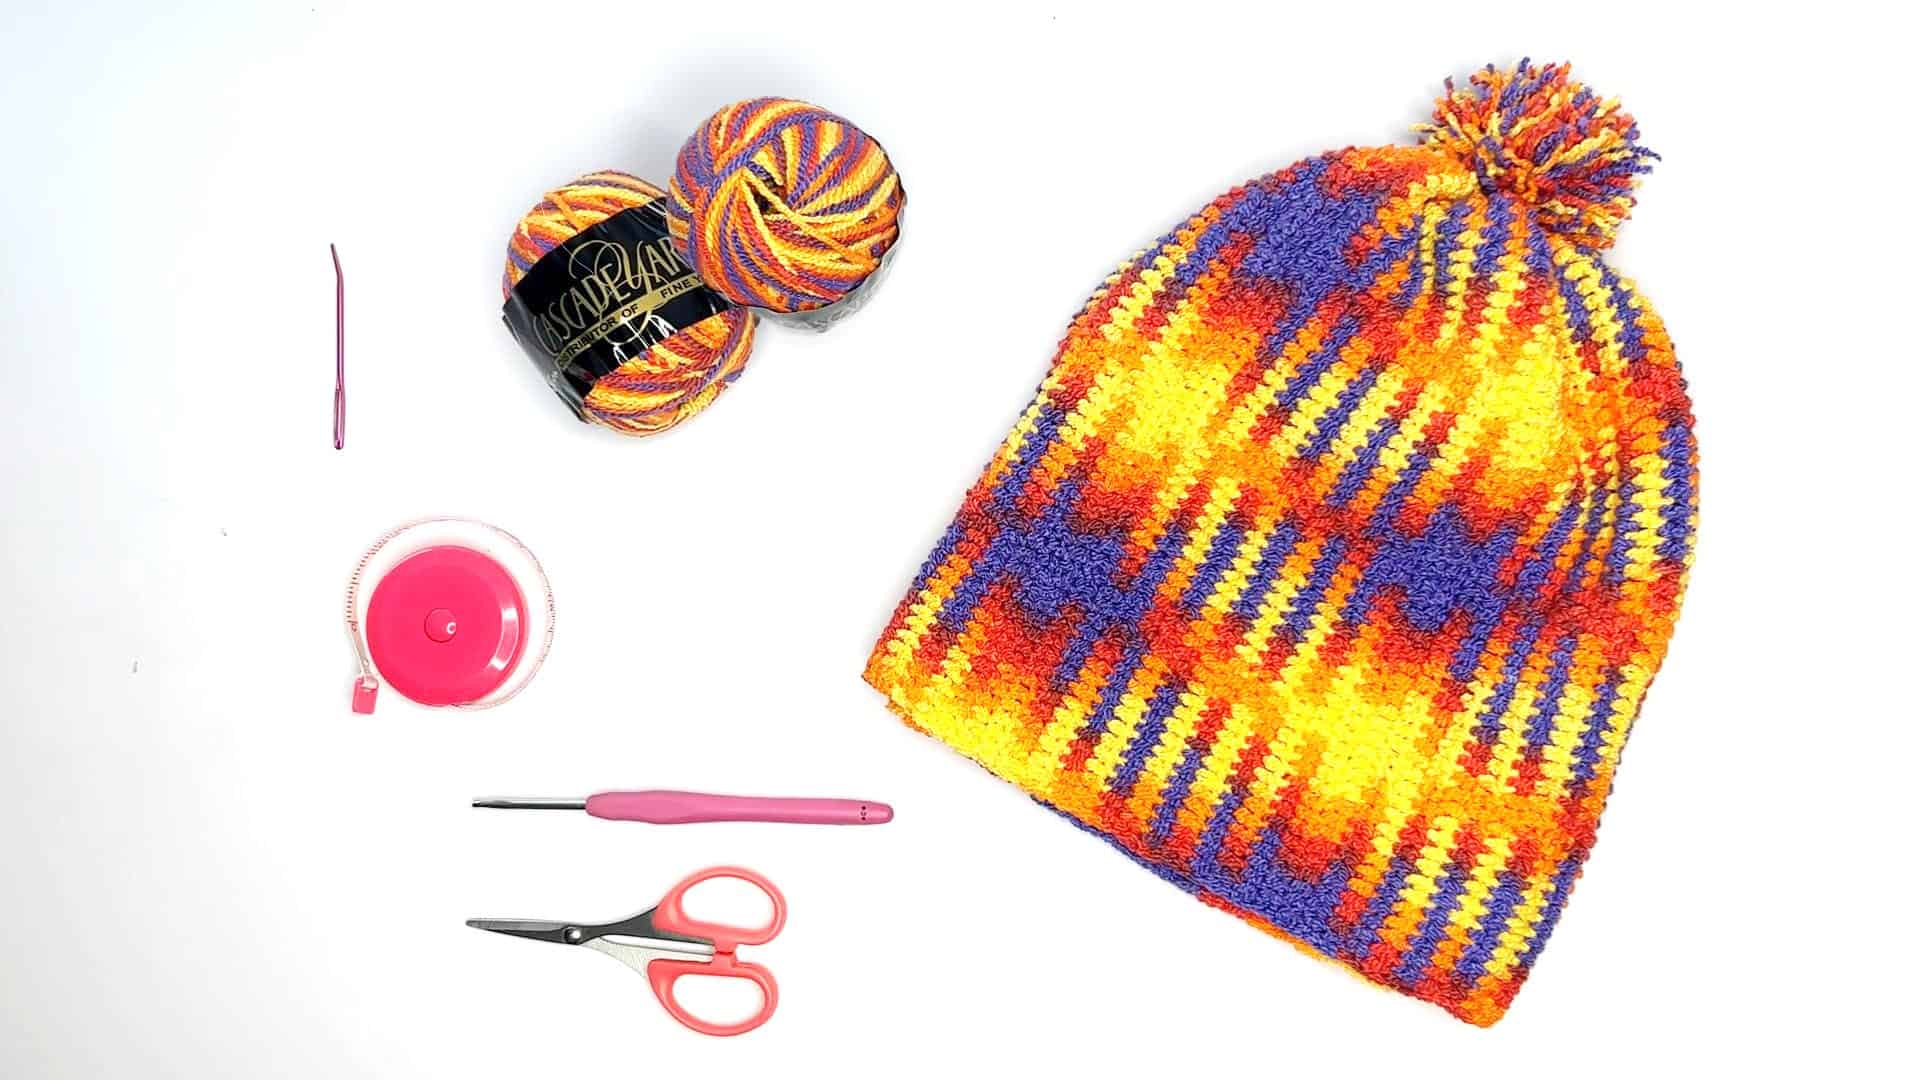
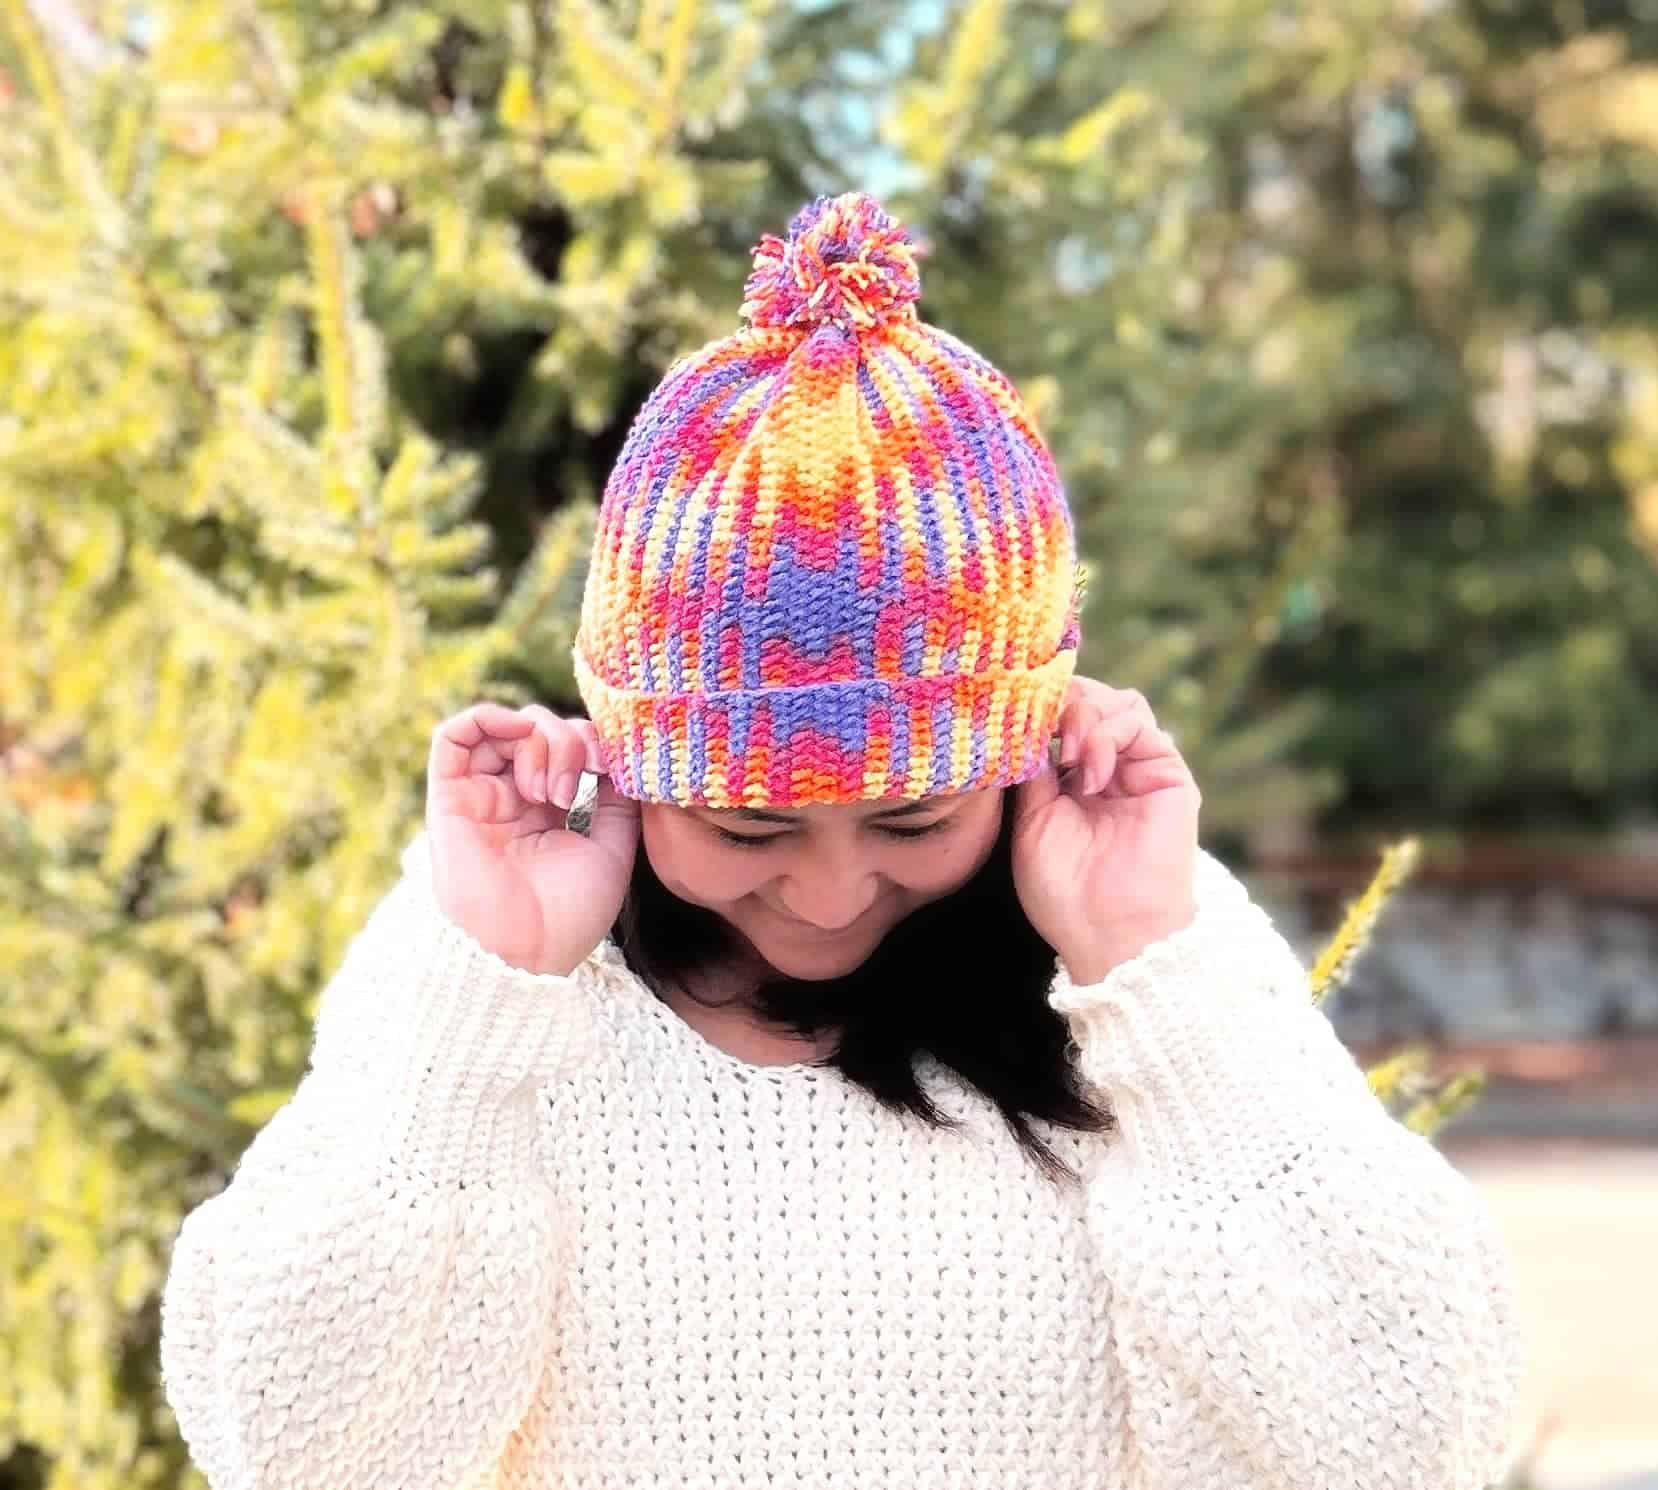
This fun argyle planned pooling beanie pattern is spruced up in a classic style. It features a classic diamond pattern in a variety of colors. This hat is made of a lightweight cotton blend, making it comfortable to wear while still keeping you warm.
This pattern comes in 6 sizes from child to adult. You can also find the full Video tutorial on my YouTube channel where it is worked up in size Small Adult.
If you would like a printable PDF copy of this pattern with no distracting ads, and loads of guided images, it is available for purchase on my pattern store here. Or just add this to your Ravelry queue for later.
DESIGN INSPIRATION
The argyle pattern is an iconic look that has been around since the 18th century. It was originally a type of Scottish tartan that was used in men’s clothing and accessories. The pattern has been modernized over the years and via crochet, it is still popular today. Check out my other Argyle patterns here.
This pattern is timeless and versatile, perfect for those who like to switch up their look. It is sure to add a unique touch of style to your wardrobe.
Related Post:
How to make pom poms
Planned Pooling for Beginners
Step-by-step guide on how to Crochet a Beanie for beginners

Construction
Planned Pooling is a technique where the same number of stitches per color is intentionally repeated using a multi-colored pooling yarn to make a specific design or color pattern.
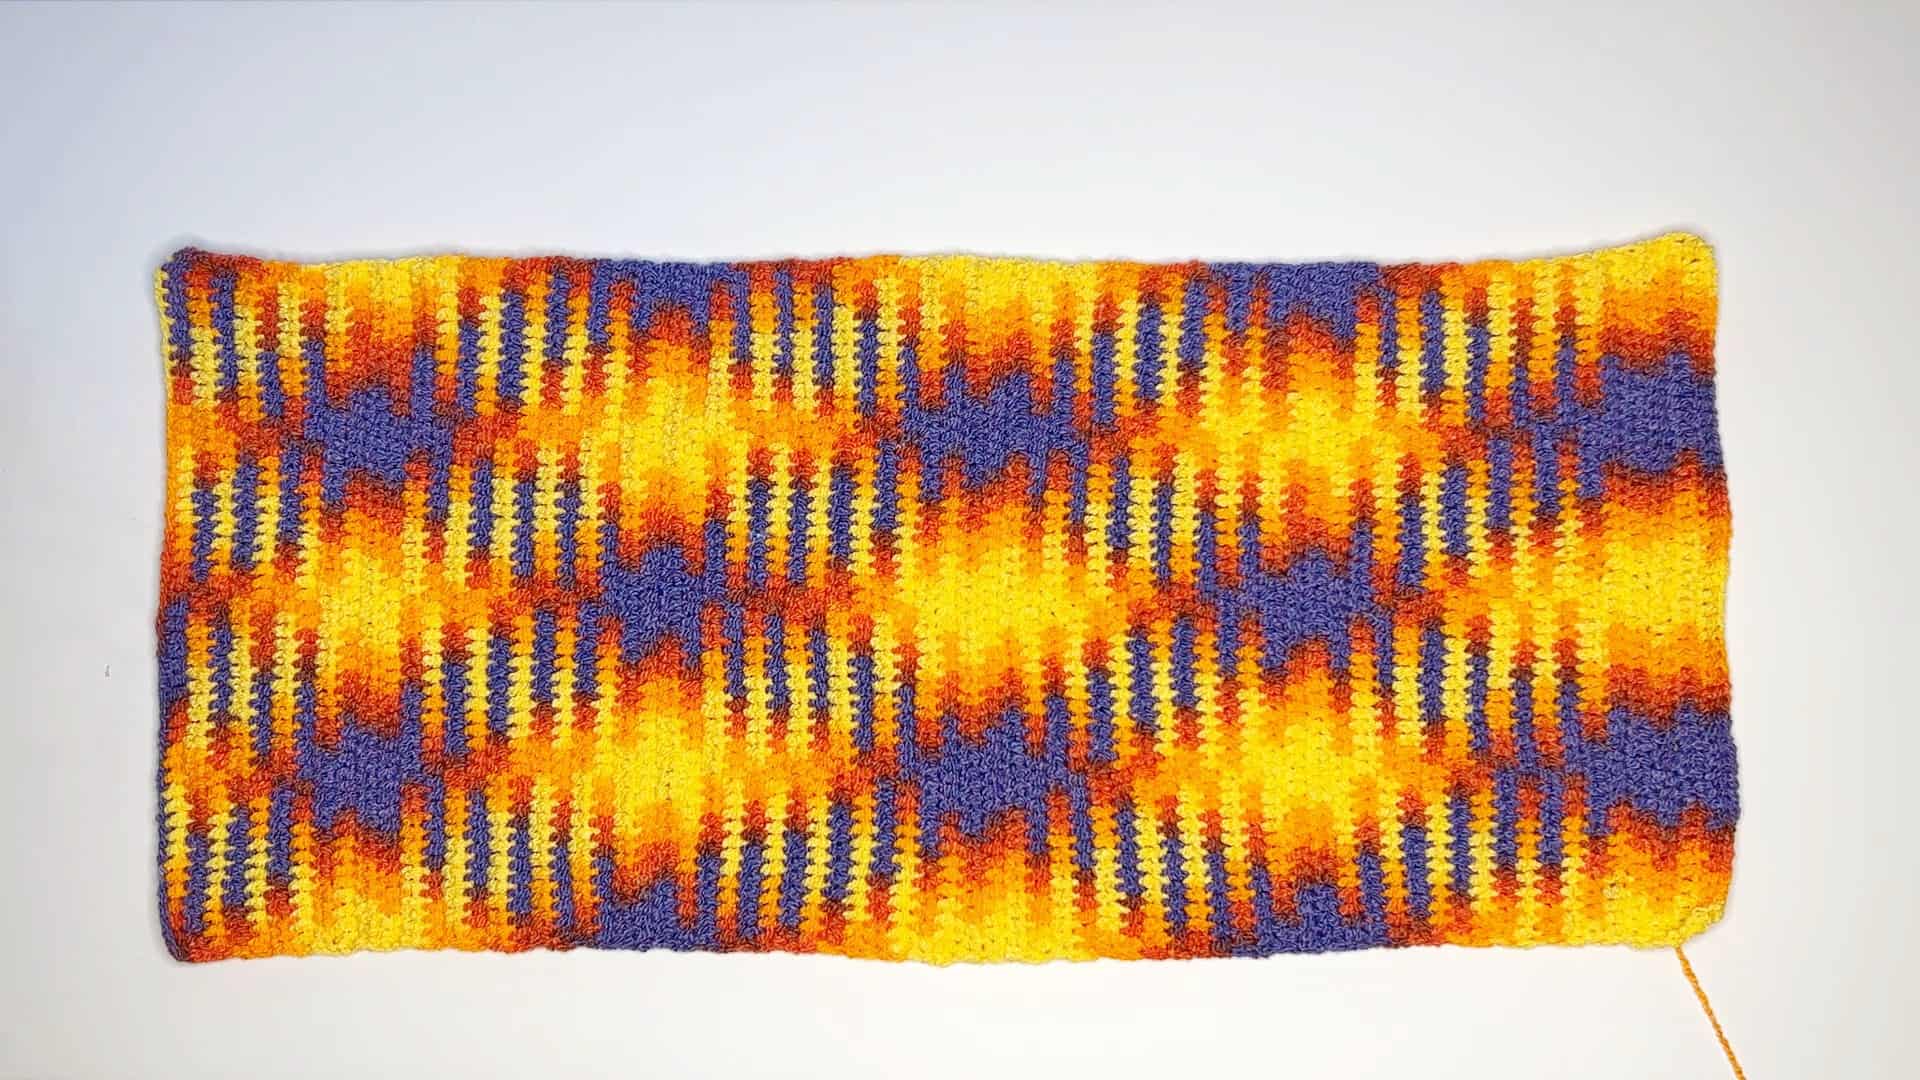
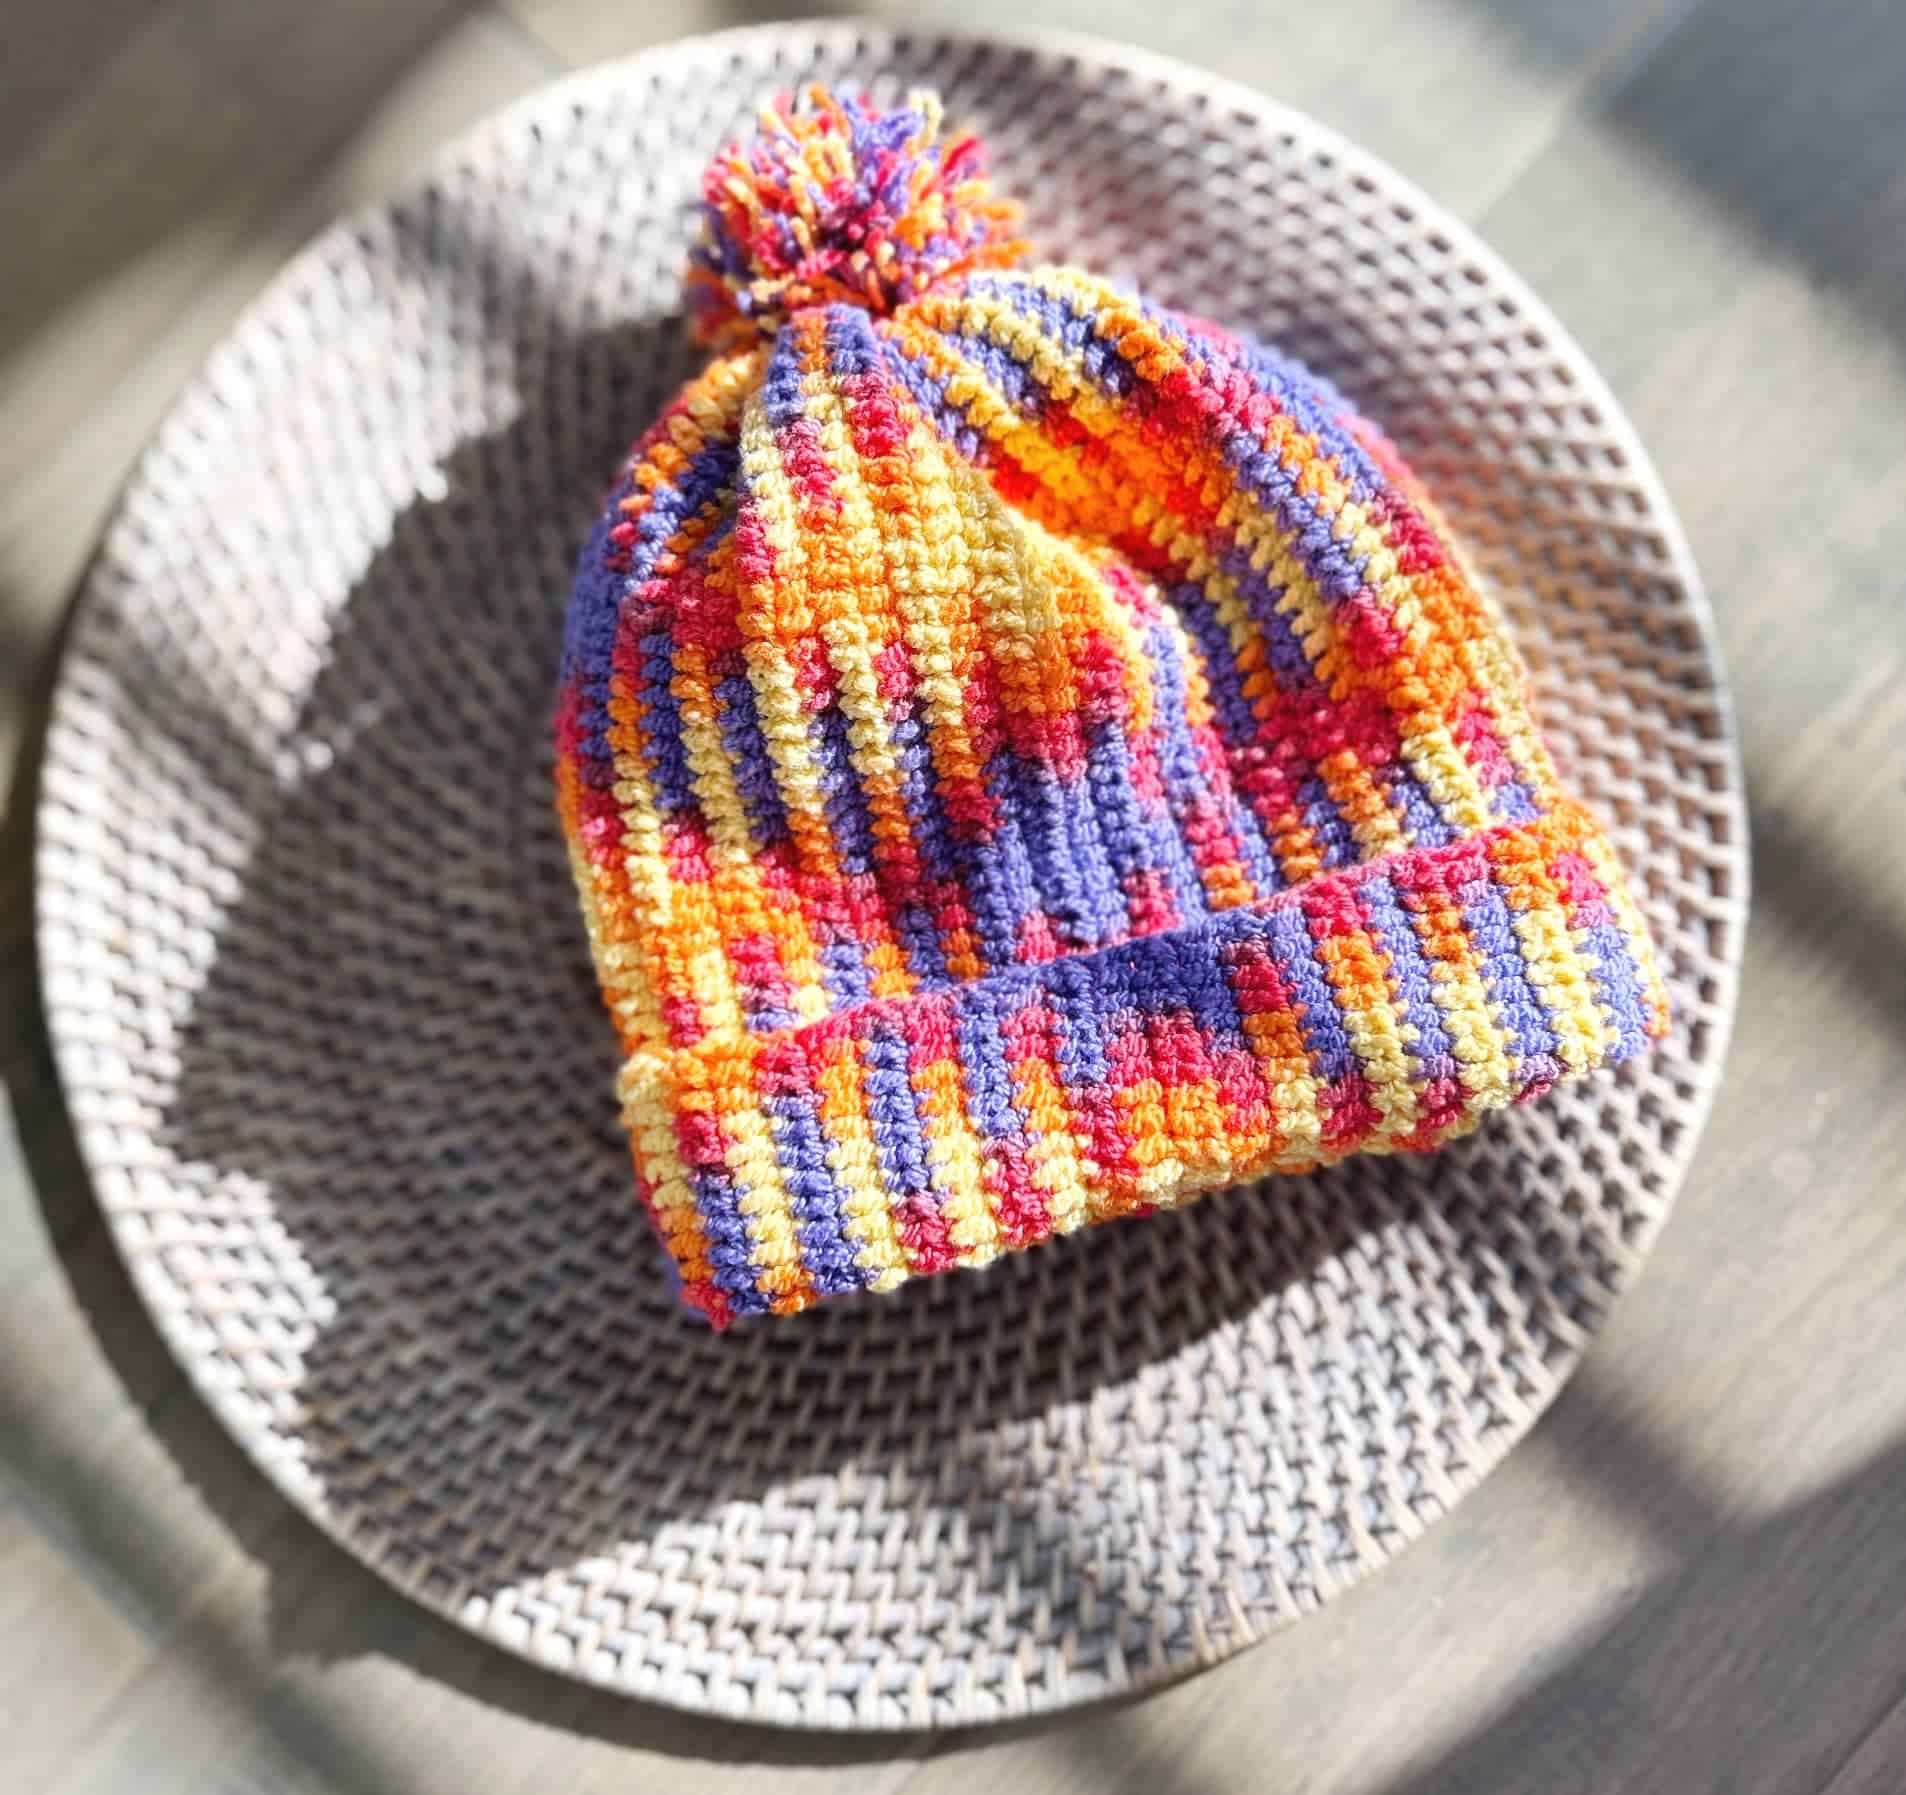
For this pattern, I only had to use half-double crochet stitches for the entire project. This hat was worked up in a large rectangular piece and seamed at the side to form the hat. And a pom pom was added to finish off the look. Check out how I made this pom pom with my pom pom maker
For this pattern, I am using Cascade Fixation spray dyed yarn in the color tequila sunrise. But any pooling yarn will work such as the Red Heart super saver or the Caron pooling yarn. Check out my beginner-friendly tutorial on how to do planned pooling with any stitch here.
This Crochet Planned Pooling Hat also comes Ad Free with a full step-by-step picture-guided PDF file and video tutorial to guide you throughout the entire process.
And if you like this style, then you might also like to check out these other free related patterns below:


Yarn Weight: Category 3
Brand: Cascade Fixation
Color: Tequila Sunrise
Hook: 3.5mm
Gauge: 13 Rows x 20 Hdc = 4 x 4” / 10 x 10 cm
No. Yarn: [A -A/ Y – Y/ K – K/ T – T]= [2- 3/ 2-2/ 1-1/ 1-1] balls / skeins
Tools: tapestry needle, measuring tape, scissors, stitch markers, pom pom maker (Optional)
Skill: Easy3
Things to Note:
- Prepare the pattern gauge to get the right size by working the number of Hdc Sts per color sequence stated below. You may need to adjust your tension or change hook size to achieve the same gauge. (This is only applicable if you are using the same yarn color)
- Red – 3
- Orange – 3
- Yellow – 6
- Orange – 3
- Red – 3
- Purple – 7
- If you are using a different pooling yarn, refer to my tutorial here.
- Turning chain does not count as a stitch unless mentioned otherwise
- Step by step Video Tutorial available here
Sizes for Adult/ Youth/ Kid/ Toddler:

Head Circumference:
(A)Adult: 21 – 23in/53 – 58.5cm
(Y)Youth: 20 – 22in/51 – 56cm
(K) Kid: 18 – 20in/45.5 – 51cm
(T) Toddler: 17 – 19in / 43.2 – 48.3cm
- These measurements are only estimates and are best to measure around your head’s circumference to get the best fit.
- The abbreviation is available in English US format here.
**
Instructions
PART 1: Making a Swatch (Watch Video Tutorial)
1. Work up approx. 50 – 60 chains and Hdc each chain using the same tension throughout.
2. Find your color set and count the number of Sts per color.
3. In this example below I have 3 Red Sts, 7 Purple Sts, 3 Red Sts, 3 Orange Sts, 6 Yellow Sts, and 3 Orange Sts in my color set per sequence.

4. The No. of Sts per color sequence should match every sequence. Otherwise, adjust your tension accordingly.
5. Once you have the No of Sts per color, log on to plannedpooling.com to get the number of chains for your hat height.
6. If you have the same yarn color and Stitch count as mine, then go ahead and proceed to the foundation row below.
PART 2: Pooling
Start your slip knot on any color.
1. Foundation Hat Height Row: Ch [57-69/ 43/ 29/ 27] + Ch 1 – if your turning Ch is not a new color, cont to Ch and count the number of “extra” chains you made until your last loop is a new color. Minus the “extra” chains from the bottom of the row and place a SM there.
2. Row 1: Work a Hdc St into the 2nd Ch from your hook (while making sure your turning chain does not consume your next color count. Adjust your tension accordingly), and Hdc across while ensuring that each St is always the same as your gauge.
3. Row 2: Cont to Hdc each St across and maintain the same number of Sts per color.
4. Next Rows: Rep Row 2 for a total of [68- 75/ 65-72/ 59-65/ 55-62] or until you have achieved your preferred head circumference.
Part 3: Seaming
1. Fold the hat in half length-wise and Sc both panels together.
2. Leave a long tail for weaving around the top
3. Thread yarn through a tapestry needle and weave through the top of the hat in the round. Rep 1 more time in the round. Tie 2 knots and weave in the ends.
4. Turn hat RS out
5. Attach a pom pom to the top of the hat. (See how to make a pom pom tutorial)
END

If you are looking for the entire tools used to make this Crochet Argyle Hat pattern, I’ve listed them all right here:
♥ 3.5 mm Clover Crochet Hook
♥ Cascade Fixation in the color Tequila Sunrise
♥ Argyle Planned Pooling Crochet Hat Printable PDF (Ad Free & Picture guided!)
♥ Full Video Tutorial

Great job if you made it this far! If you have any questions about this pattern, do check out the video tutorial or get in touch with me by dropping a comment below.
And don’t forget to tag me on Instagram and Facebook @theknottylace, I would love to see your work!
By the way, If you would like to receive free written patterns and video tutorials straight into your inbox, you can join our mailing list now.
Happy hooking,
Shaz 


