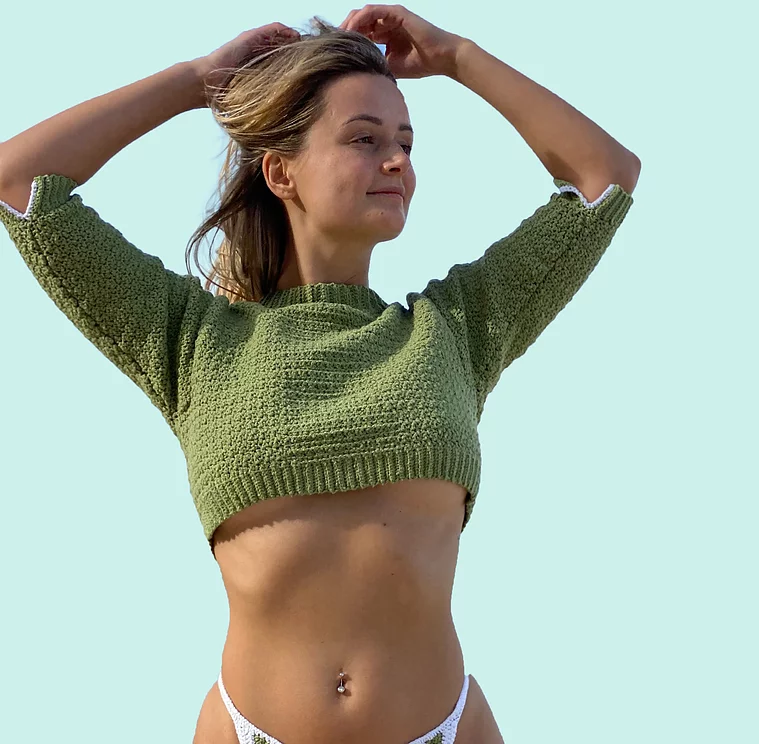
This fun and easy Remy half sleeve Crochet Cropped Sweater pattern is a must-have this Spring available in All Sizes, perfect for cooler days or chilly summer nights.
Have you ever considered the unique combination of a crop top sweater paired with bikini bottoms? It’s a fresh and innovative direction we’re exploring!
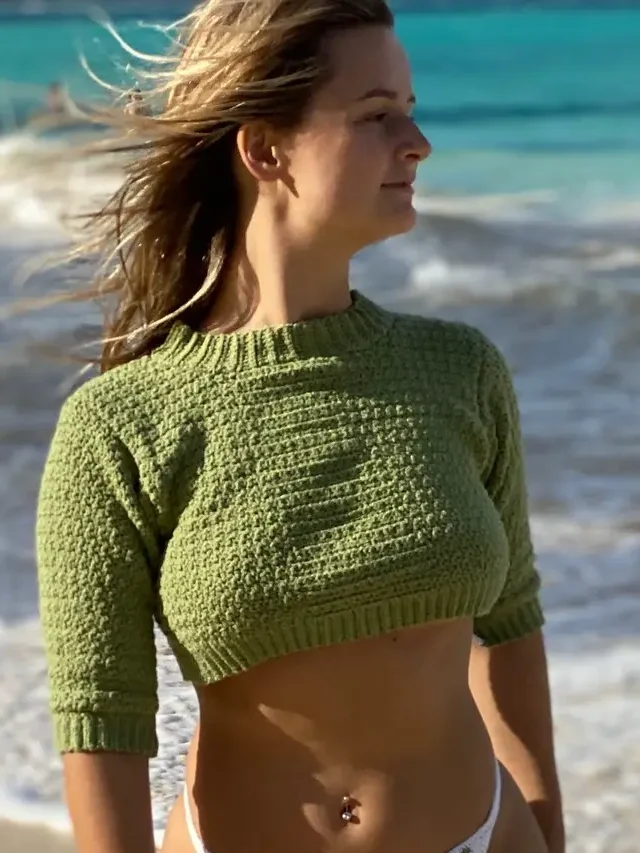
Our crochet crop top sweater is part of our expanding “Spring/Summer” collection and is designed to be worn all year round, seamlessly transitioning from Spring to Summer with ease.
This versatile wardrobe essential offers the perfect balance of flexibility and comfort, providing just the right amount of warmth and breeziness for any occasion.
DESIGN INSPIRATION
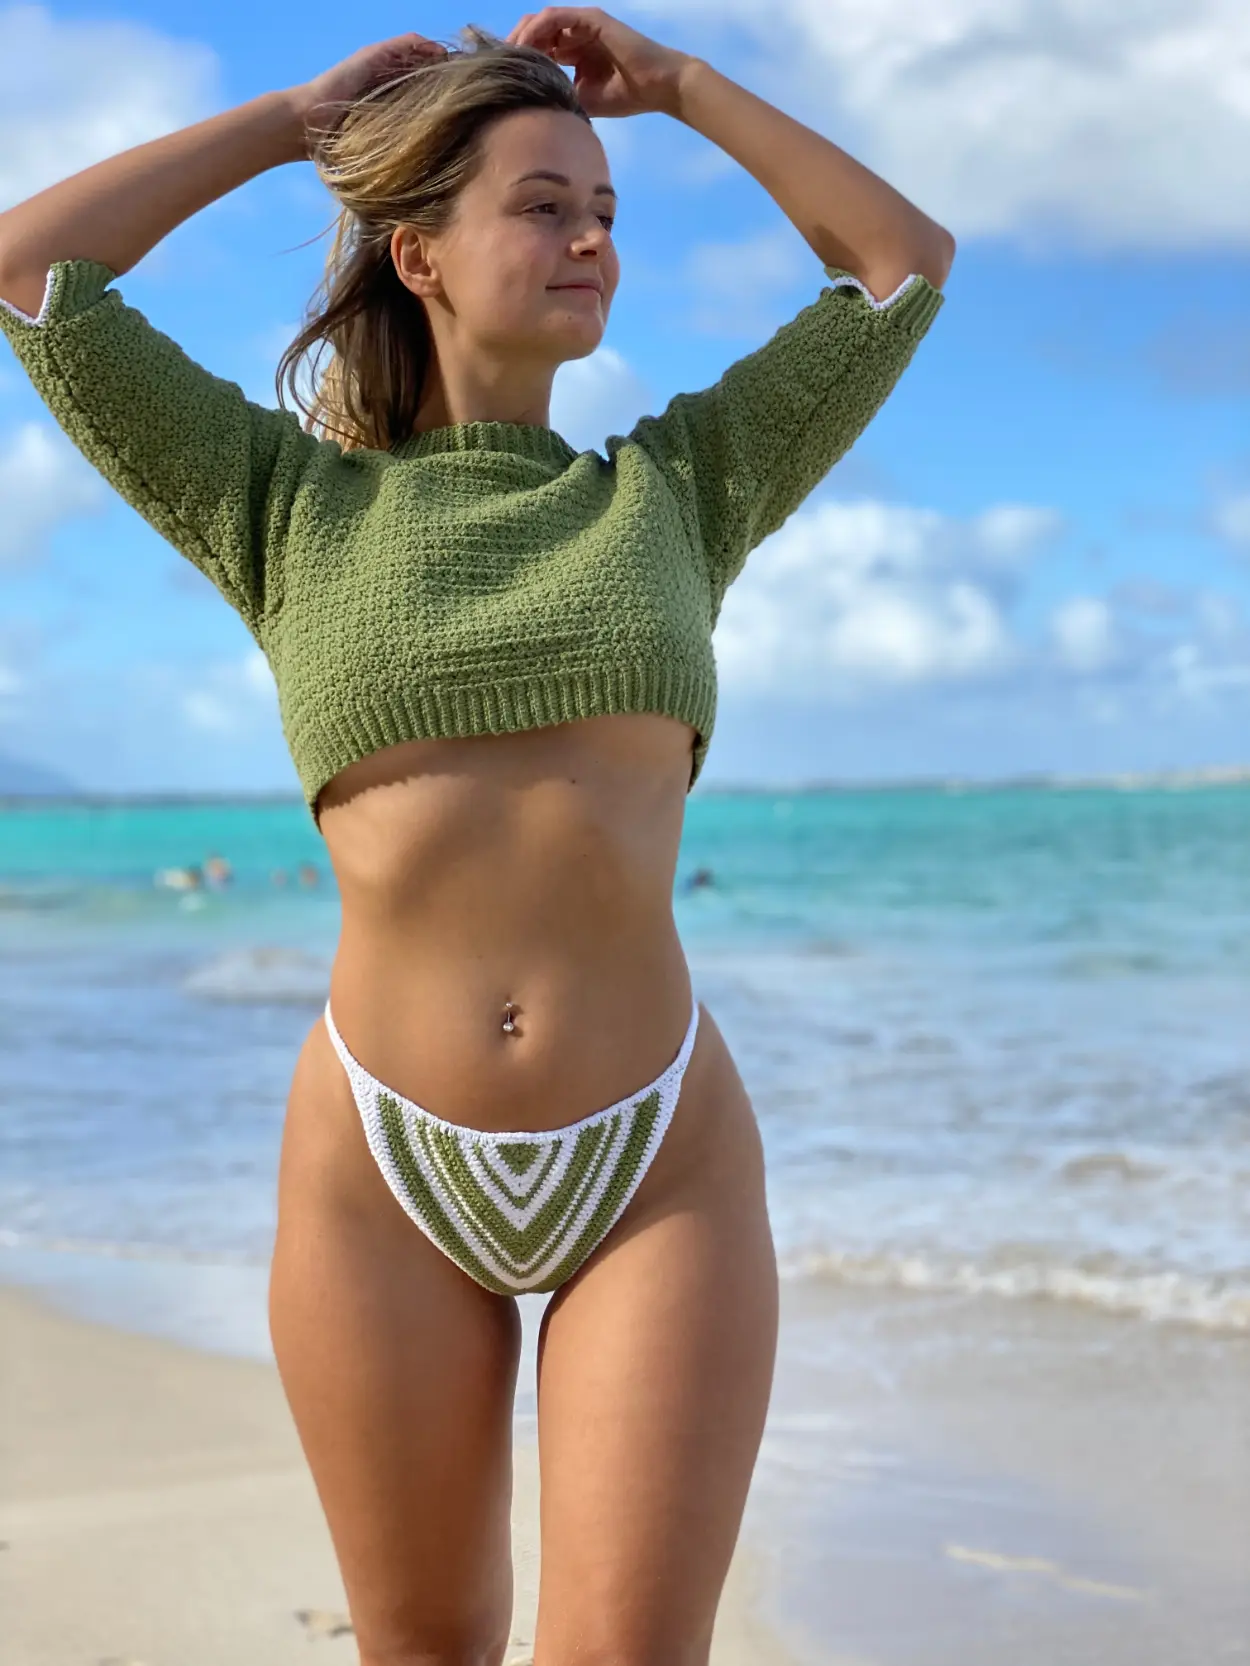
Imagine yourself spending a day at the beach, basking in the sun until dusk, or attending a breezy boating event where the temperatures can drop unexpectedly. That’s where the idea for the bikini crop top sweater came to life! (Check out the matching bottom pattern here )
While it pairs seamlessly with shorts or jeans, what sets it apart is the choice of yarn. Crafted with a special yarn blend, this piece is not only fashionable but also functional. It’s designed to withstand water activities like waterboarding or paddleboarding without losing its shape or sagging.
And if you’re eager to get your hands on the pattern, I’ve made it available for purchase in my pattern store. Alternatively, you can add it to your Ravelry queue for easy access to an ad-free, printable version. Don’t miss out on this versatile and chic addition to your wardrobe!”
CROP TOP DESCRIPTION
This stunning crochet crop top sweater is crafted in three sections: the front and back panels, and the sleeves. Starting from the ribbing and working upwards, the entire pattern features the timeless Seed Stitch pattern.
The Seed Stitch pattern holds a special place in my heart because it effortlessly eliminates the appearance of individual rows, creating a beautifully uniform texture. Plus, once you get the hang of it, it’s a breeze to work up!
To enhance the drape and comfort of this DK-weighted yarn, I’ve opted for a larger hook size. The combination of a larger hook with a finer yarn results in a looser stitch, providing the perfect balance of stretch and breathability.
It’s all about creating a garment that not only looks exquisite but also feels amazing to wear.
CHECK OUT MY LATEST VIDEO


If you would like to receive free written patterns and video tutorials straight into your inbox, just click Subscribe to get into our mailing list.
Things to Note:
- Prepare pattern gauge to get the right size
- Turning chain does not count as a stitch unless mentioned otherwise
- Do note this top is stretchable when using specified yarn
- Abbreviation page available in English US format
- Your body measurement:
- Bust Size: S [M/L/ XL] [2XL/ 3XL/ 4XL/ 5XL] – 30[34/ 38/ 42/ 46] [50/ 54/ 58/ 62] inches or 76 [86/ 96.5/ 106.5/ 117] [127/ 137/ 147/ 158] cm. Size up if you are in between sizes

Remy Crochet Crop Top Sweater Free Pattern

PART 1: Bottom Ribbing
- Foundation Ch: With the 2.5mm hook, Ch 13
- Row 1: Insert hook through the second Ch from hook and work a Sc. Cont to Sc across remaining Chs, you should have 12 Sc sts. Ch 1 turn
- Row 2: On the first St, insert hook through the back loop (BLO) and work a Sc. Cont to Sc BLO the remaining Sts, Ch 1 turn
- Row 3: Repeat Row 2 for a total of 75 [85/ 95/ 105/ 115] [125/ 135/ 145/ 155] rows. You should have 15[17/19/21/23] [25/27/29/31] inches or 38.1[ 43.2/ 48.3/ 53.3/ 58.4] [63.5/ 68.6/ 73.7/ 78.7] cm in total length when slightly stretched.
- Row 1 of Body panel: Ch 1 and turn to the edge on top of the rows and work a loose Sc on each rows post, Ch 1 turn
- Switch to your 5.0mm hook

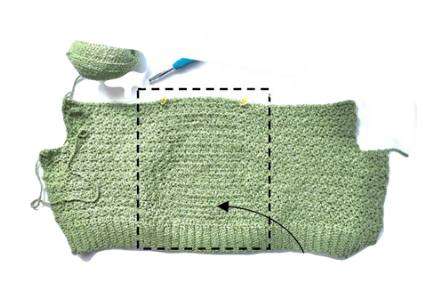
PART 2: Back pattern
*Prepare gauge before starting, the Seed Stitch pattern below

- Row 2: On the first st work a Sc, Dc on next st. Rep Sc and Dc intervals on each st. The last St should end with a Sc St, Ch 1 turn
- Row 3: Dc on first Sc St, Sc on next Dc St. Rep Dc and Sc intervals on each St. The last St should end with a Dc St, Ch 1 turn
- Row 4: Rep Rows 2 and 3 (Seed Stitch Pattern) for a total of 20[20/ 22/ 22/ 24] [24/ 26/ 28/ 30] rows. See chart for size. You can adjust the length by adding or removing rows by measuring 1 in or 2.5cm for every 4 rows.
- Bind off and proceed to shape the armhole.
PART 3: Shaping Back Panel Armhole
- Next row: On the next row, skip 6 Sts, insert hook through the next St, and work a – Sc St (if the bottom St is a Dc) or work a Dc St (if the bottom st is a Sc St), Next, Rep Sc and Dc intervals (Seed St) on each St until the last 7th St, ch1 turn
- Next rows: Work the Seed St across the row for a total of 30 [32/ 34/ 36/ 38] [40/ 42/ 44/ 46] total rows. Bind off.
End of Back Panel. Proceed to make the Front Panel
PART 4: Front Body Panel
- Repeat Part 1: Bottom Ribbing instructions
- Row 1 of Body panel: Ch 1 and turn to the top of the rows and work a loose Sc on each rows post, Ch 1 turn
- Switch to your 5.0mm hook
- Row 2: Insert hook through the first St and Sc, Dc on second St. Rep Sc and Dc intervals on each St until you’ve done 25[ 30/ 35/ 37/ 42][ 47/ 50/ 55/ 60] total Sts. Now work a Sc the BLO on next St, place a stitch marker, cont with a Dc BLO on the following St, Rep for a total of 25[25/ 25/ 31/ 31] [31/ 35/ 35/ 35] Sts, place stitch marker on the last BLO St and repeat Seed St pattern until the end, Ch 1 turn
- Row 3: Work the Seed Stitch until you’ve reached the first stitch marker. On the next St Dc FLO, on next work a St Sc FLO. Repeat back and front loop intervals until the last stitch marker. Repeat Seed Stitches, until the end, ch 1 turn
- Row 4: Rep Row 2 & 3 for a total of 20[20/ 22/ 22/ 24] [24/ 26/ 28/ 30] rows. If you have adjusted the length of your back panel, follow the same number of rows made. Bind off
PART 5: Shaping Front Panel Armhole
- Next row: On the next row, skip 6 Sts, insert hook through the next St, and work a – Sc St (if the bottom St is a Dc) or work a Dc St (if the bottom st is a Sc St), Next, Rep Sc and Dc intervals (Seed St) on each St until the last 7th St, ch1 turn
- Next rows: Rep Seed Stitch Pattern for 20 [22/ 24/ 26/ 28] [30/ 32/ 34/ 36] total rows.
PART 6: Shaping Collar

- Row 21 [23/ 25/ 27/ 29] [31/ 33/ 35/37] : Rep Seed Stitches until the first stitch marker, ch1 turn
- Next Row: Sc2tog, rep Seed St until the end, ch1 turn
- Next Row: Rep Seed Stitches until the last 3rd St, Sc2tog, ch1 turn
- Next 4 Rows: Rep Step 2 and 3 for 7 rows total
- Next 3 Rows: Stop decreasing and work same number of Sts for 3 rows. Bind off
- On the opposite side, insert hook after the last stitch marker , rep steps 1 – 5. Bind off
PART 7: Sleeves + Ribbing
Ribbing:
- Row 1: With the 2.5mm hook, Ch 11 and Sc in the second Ch from hook. Work 9 more Sts, Ch 1 turn. You should have 10 Sc Sts.
- Row 2: On the first St, insert hook through the back loop (BLO) and work a Sc St. Sc BLO for the remaining Sts, Ch 1 turn
- Next Rows: Repeat Row 2 for 46 [51/ 56/ 56/ 57] [62/ 62/ 67/ 72] total rows. Do not bind off.
Sleeves:

- Row 1 of Sleeve: Ch 1 and turn to the top of the rows and work a loose Sts on each row post, ch 1 turn. Switch to your 5.0mm hook
- Row 2: Sc on the first st, Dc on second St. Rep Seed St for the entire row, ch 1 turn
- Row 3: Dc on first Sc St, Sc on next Dc St. Rep Seed St for the entire row, ch 1 turn
- Row 4: Rep Row 2 for one more row
- Row 5 Increase: Work a Sc and Dc on the first St, Sc on the 2nd the St, Dc on next St. Rep Seed Sts until the second last St. Increase with a Dc and Sc St on the last St. Ch 1 turn
- Next Rows: Repeat Rows 3 -5 for a total of 52[52] [56] row total *[ ] refers to your size in that group
- Next 3 Rows: Work an even number of Seed St for 3 more rows. Start with a Sc St (if the bottom St is a Dc) or Dc St (if the bottom St is a Sc st). Bind off and make another sleeve.
PART 8: Neck Ribbing
- Row 1: With the 2.0mm hook, Ch 11 and Sc in the second Ch from hook. Work 9 more Sts, Ch 1 turn. You should have 10 Sc Sts.
- Row 2: On the first St, insert hook through the back loop (BLO) and work a Sc St. Sc BLO for the remaining Sts, Ch 1 turn
- Next Rows: Repeat Row 2 for 84[84/ 84/ 84/ 84] [96/ 96/ 96/ 96] total rows. Do not bind off.
- Fold work in half and align the ends together
- Slst through the first St on the first row and for the remaining Sts. Bind off
PART 9: Connecting Pieces
- Always connect pieces on the WS
- Shoulder: Connect the shoulder pieces by aligning the top shoulder together and sew each St together. You can use any method you prefer ie Sl sts or Sc Sts.
- Collar: Mark where the collar folds and attach that side to where the should join. Join collar to the body with several stitch markers. You will have to stretch slightly to fit.
- Slst through the collar rows post on to the body’s Sts while gently stretching to fit each side. Complete in the round. Bind off
- Armhole: Align the sleeves to the armhole them and attach with several stitch markers. Slst each st together.
- Body + Sleeves: Place front and back panels together (WS) and Sl St from the bottll the way to the end of the sleeves but just before the cuffs. Bind off
- Rep on the other side.
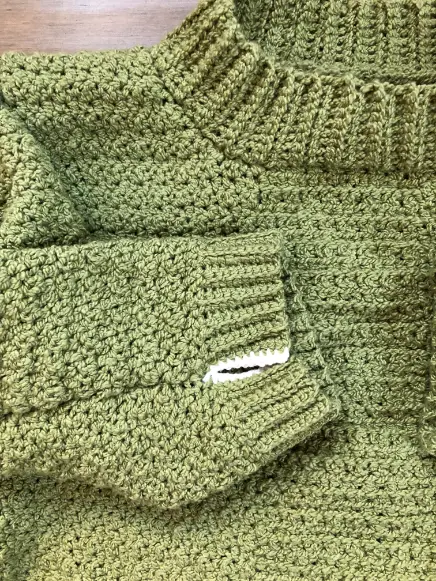
Part 10: Final Touch (Optional)
- Prepare a white yarn and insert hook through the St of the cuff. Sc each St on both ends and bind off. Rep on the other side.
- Weave in all loose ends
END
If you are looking for the entire tool used to make this Remy Crop Top crochet pattern, check them out here below: