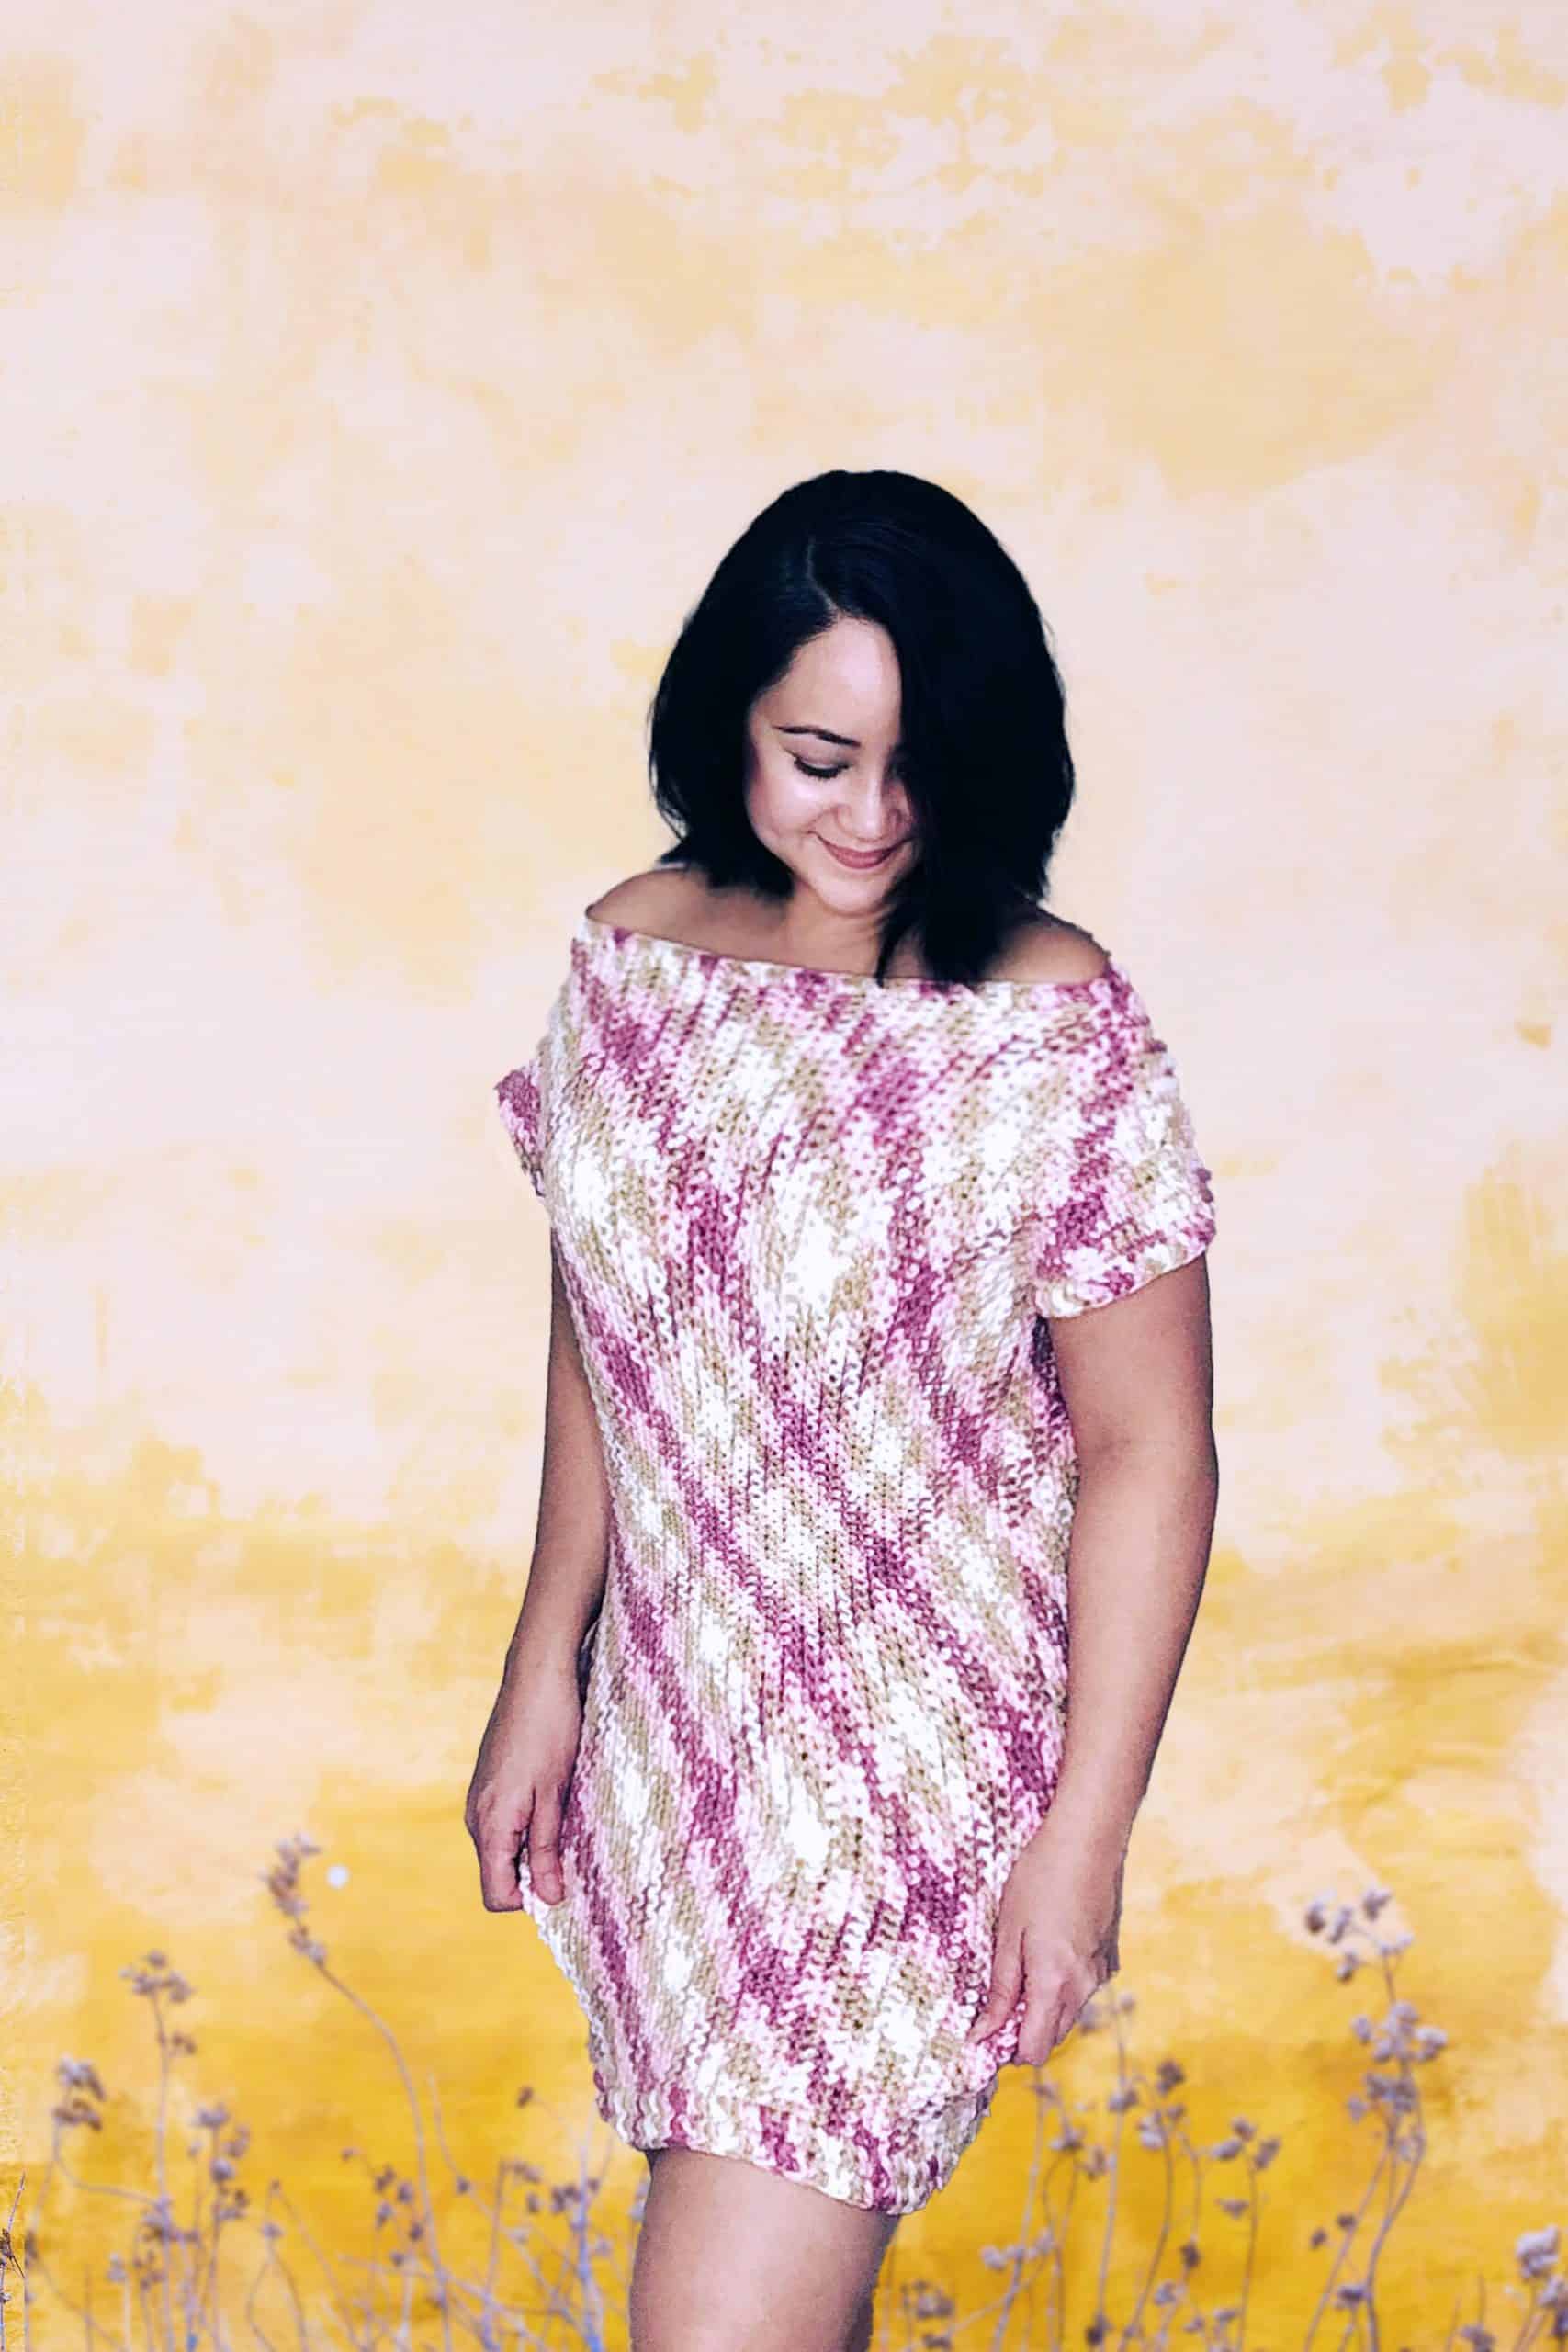
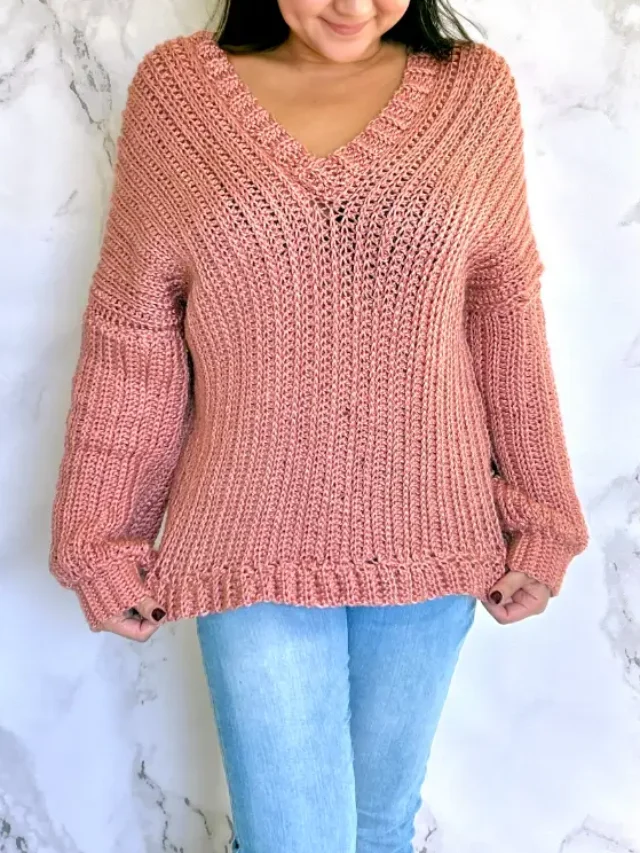
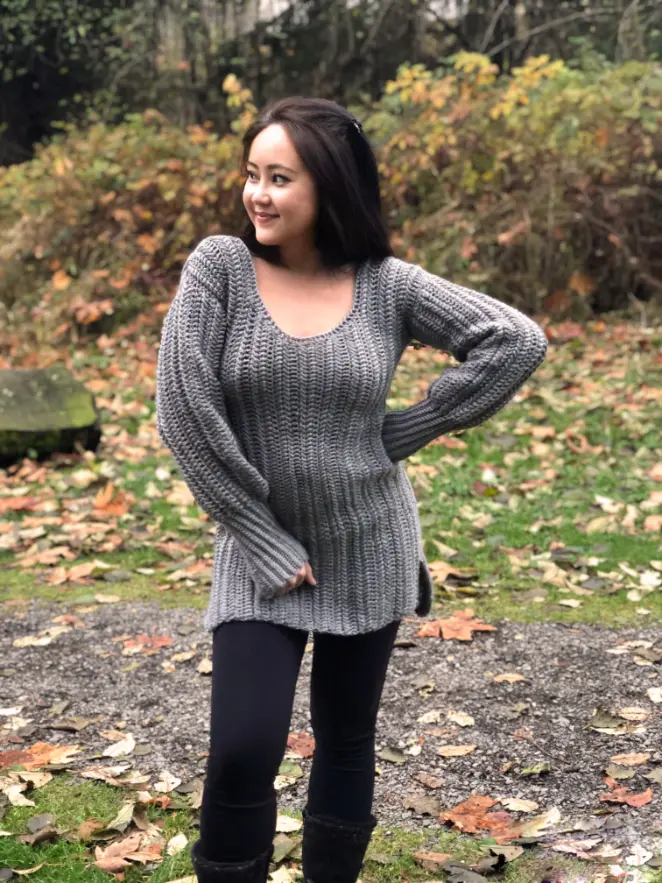
A simple and fun crochet tunic sweater that doubles up as a crochet dress perfect for leggings. What better way to enjoy the cold weather than with the comfort of your own handmade Crochet Tunic Sweater dress.
When the weather takes a turn for the cold and rainy, my wardrobe becomes a haven of comfort, with long sweaters being the ultimate go-to. There’s something incredibly soothing about wrapping oneself in layers of warmth during those brisk days. But, imagine not just staying cozy but also looking effortlessly fun and stylish. This Heather crochet tunic is the perfect fusion of comfort and trendiness.
It’s a statement of warmth and style. What makes it even better is that it is a free crochet pattern that I’m thrilled to share with you. which also comes with a step-by-step video tutorial made in size Medium.
And if you prefer a physical hard copy instead, a printable ad-free PDF copy of this pattern is available for purchase in my pattern store here. Or just add this to your Ravelry queue for later.
DESIGN INSPIRATION

Here in the Pacific Northwest, where it rains a lot, especially this time of year, I find myself wearing leggings all the time – they’re like my everyday go-to! I practically live in them.
But, you know, leggings come with a little problem – what to wear on top? It’s always a struggle to find something long enough to go with them.
So, I thought, why not make a super comfy and long sweater that goes perfectly with all my leggings? Plus, I wanted to create something nice and pretty that I could wear on to any occasion.
Funny story, I was playing around with this unique stitch, and truth be told, I have no idea what it’s called but Im calling it the Paddle Stitch! 😄 If you happen to know the name of this stitch, drop me a comment below.
You might also like to check out these other great Free Fall Crochet Pattern Ideas:

Related Post:
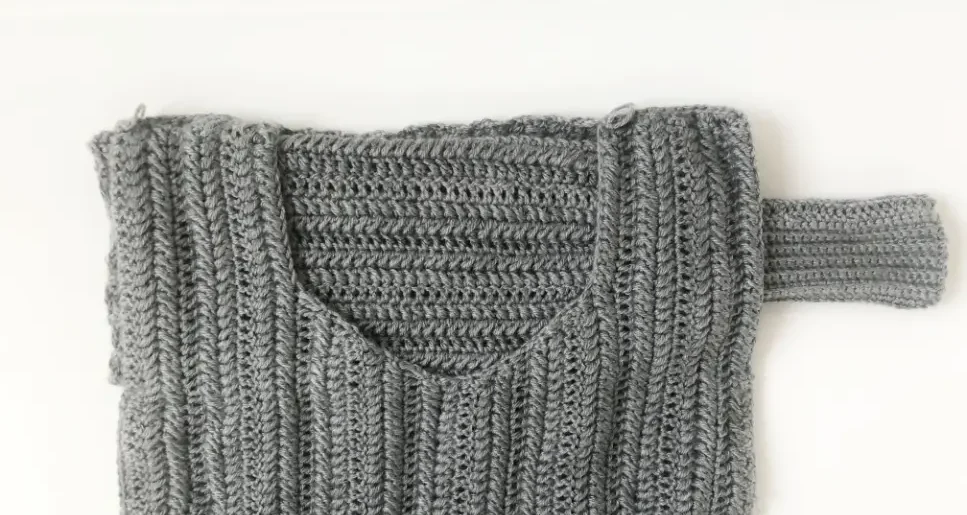
CONSTRUCTION
This pattern uses easy crochet stitches such as the single crochet and half double crochet stitch. Curious about the fancy stitch I used for this sweater?
Well, I was just playing around with some new ideas and stumbled upon this pretty stitch! It’s a combo of two half-double crochets worked separately, giving it a cute “bobble / herringbone” texture.
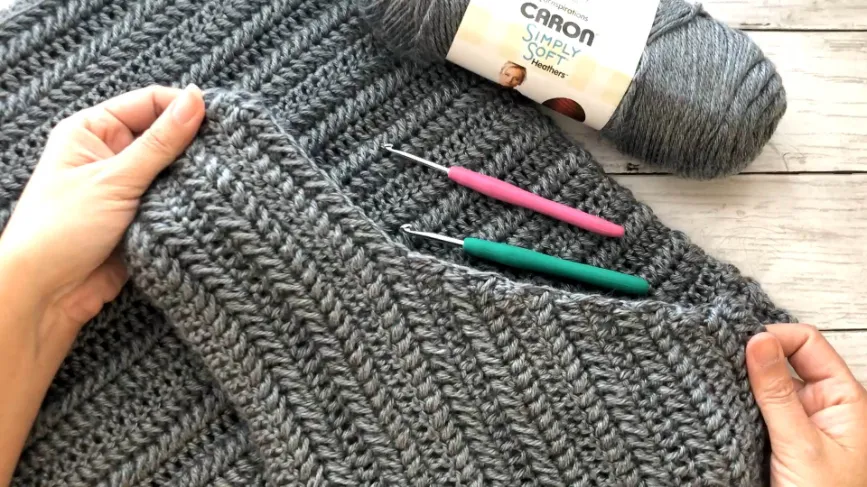
I’m calling it the Paddle Stitch because it reminds me of paddles on a rowing boat! 🙈 Check out the Paddle Stitch tutorial.
While creating this top, I aimed for a trendy, modern look that could also double as a dress. I made it a bit snug, but don’t worry – you can easily adjust the length and width to your liking.
For those who like to measure as they go, check out this free yarn calculator to get the exact number of skeins you need.
Choosing the right yarn is like picking the perfect ingredient for a recipe, and for this sweater, I opted for Caron Simply Soft Heathers in the delightful shade of Heather Gray (hence the name).
This yarn has won my heart not only for its beautiful color but also for the subtle sheen it gracefully reveals in the light. It’s like a touch of elegance woven into every stitch, adding a charming glow to the finished piece.
However, the beauty of crafting is the freedom to make it uniquely yours! Feel free to explore a world of colors and textures by using any medium-weight yarn that captures your imagination.
Yarn and materials
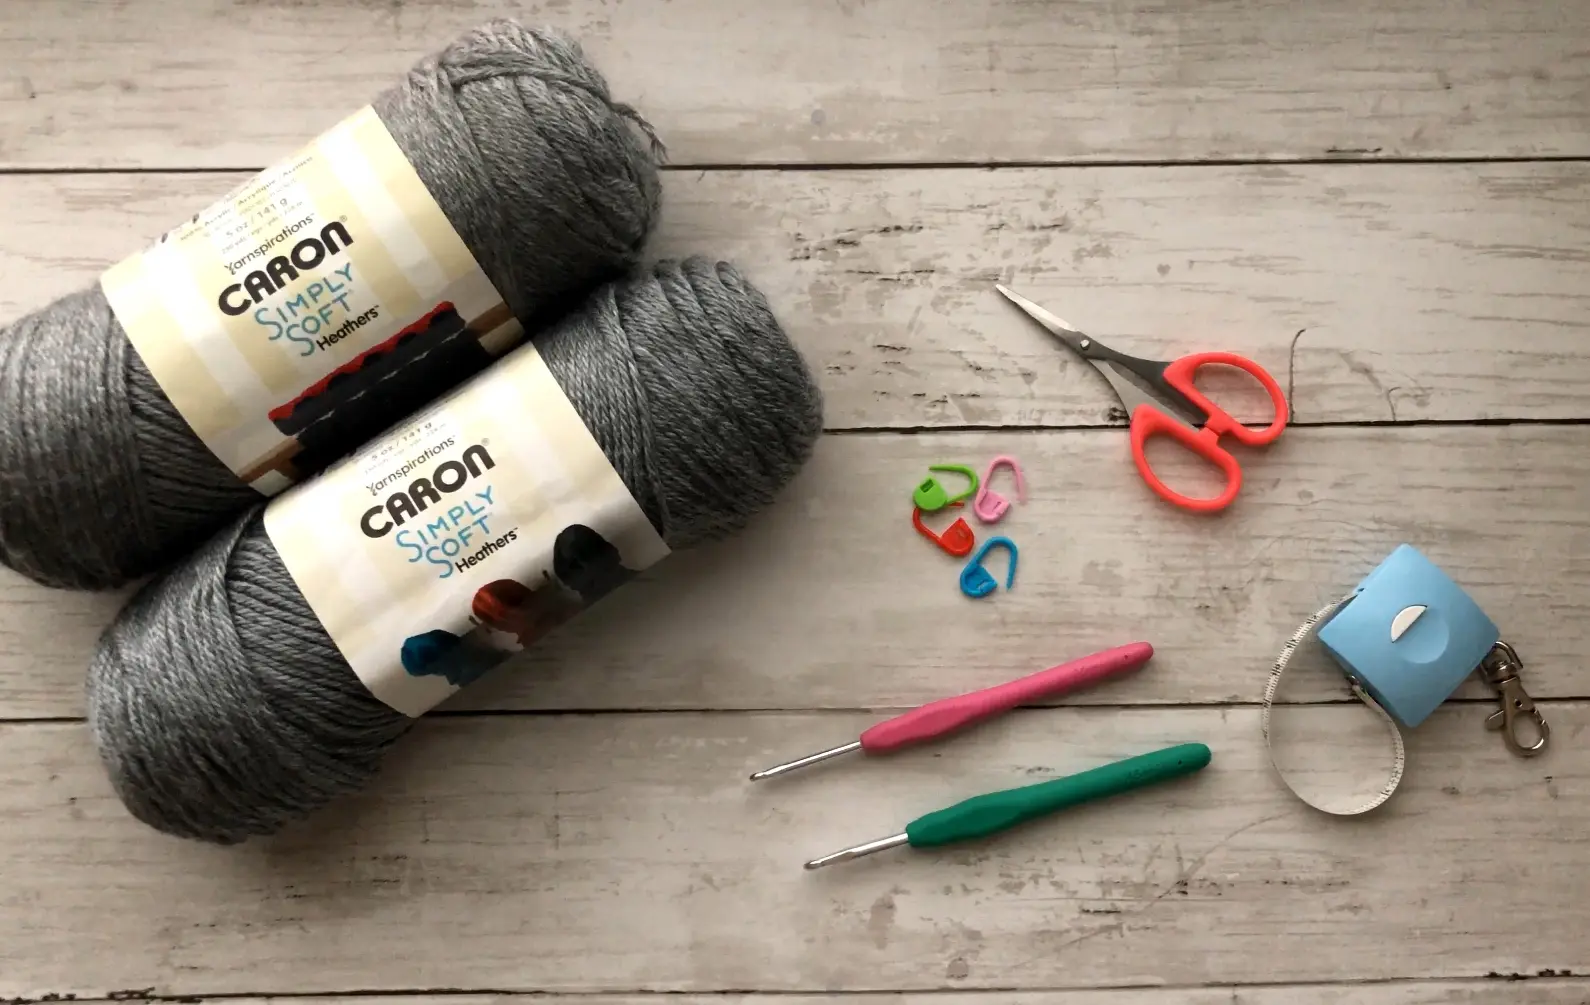
Let’s talk about the tools and materials needed for this delightful crochet project. The Caron Simply Soft Heathers yarn, specifically in the lovely Heather Gray shade is the yarn of choice for this pattern due to its warmth, shine and affordability.
This yarn falls into the Category 4 weight range, making it just right for our cozy creation. But any worsted-weight yarn will work just as well.
Ensuring you have enough yarn for your project is crucial, and for this, you’ll need roughly 6 to 9 skeins of the Caron Simply Soft Heathers yarn or 1900 – 2,900 yards depending on what size you’re making.

I decided to go with a 4.5 mm crochet hook for the entire project and a 3.5 mm just for the sleeve cuffs. And for the rest of the other necessities, you will need a basic yarn needle for weaving in those ends, a measuring tape, a pair of scissors, and some stitch markers to assist you in keeping track of your progress.
Before diving into your crochet project, it’s crucial to ensure that your finished piece will turn out just the right size. To achieve this, take a moment to check your gauge. This involves creating a small sample, known as a gauge swatch, using the same yarn and hook you’ll use for your project.
Begin by crocheting a square of stitches as specified in the pattern. Once complete, measure the swatch using a ruler or measuring tape. And when your stitch count matches the pattern’s recommendation, you’re good to go.
However, if the dimensions differ, you may need to adjust your hook size to achieve the correct gauge. Taking this step beforehand will save you from potential disappointments and ensure your final creation fits perfectly.
Watch The Video Tutorial Here:
If you would like to see more video tutorials like this you can check them out here on the blog or Subscribe to my Video Channel on YouTube.
This post contains affiliate links designed to provide a commission on purchases made at no cost to you. As an Amazon Associate, I earn from qualifying purchases which support my work in providing new content and information on this site.
Tools And Materials:
Yarn weight: Category 4
Brand: Caron Simply Soft Heathers
Color: Heather Gray
Hook: 3.5mm & 4.5mm hook
Gauge: 14 PSt x 8 rows = 4 x 4” / 10 x 10 cm
No. yarns (skeins): XS [S/ M /L/ XL] [2XL/ 3XL /4XL/ 5XL] = 6 [6/ 7/ 7/ 7] [8/ 8/ 8/ 9]
Tools: tapestry needle, measuring tape, scissors, stitch marker
Skill: Easy +
Things to Note:
- Prepare pattern gauge to get the right size. Ref to Part 1 No. 2- 4.
- Turning chain does not count as a stitch unless mentioned otherwise
- Special stitch – Paddle St (PSt) : Hdc, *Hdc (prev Sk St, Sk 1, next St) together, Rep(*) (Step by step tutorial here)
Your body measurement:
- Sizes: XS [S/ M/ L/ XL] [2XL/ 3XL/ 4XL/ 5XL]
- Bust: 30 [34 /38/ 42/ 46] [50/ 54/ 58/ 62] in or 76 [86/ 96.5 /106.5/ 117] [127/ 137/ 147/ 158] cm
- These measurements are only estimates and are best to measure your work and body along the way.
- If you are in-between sizes, size up or measure along
- Abbreviation page available in English US format
* I am wearing size Medium in these pictures here for reference
Stitches used in this Pattern include:
Ch – chain
Sl st – slip stitch
Sc – single crochet
Sc BLO – single crochet through the back loop
Hdc – half double crochet
PSt – Paddle Stitch
WS – wrong side
RS – right side
Fun Crochet Tunic Sweater Dress Free Written Pattern

INSTRUCTIONS
PART 1: Back Panel
Working from side to side, measure the length from your shoulder down to mid-thigh and multiply by 3.5 Chs
ie: 30in x 3.5 = 105 chains. Measurements below are only estimates.
For ref I am 5’3” (160cm) and this Sweater Dress reaches above mid-thigh in size M.
1. Foundation: Ch 91 [98/ 105/ 112/ 119] [126/ 133/ 140/ 147] + 1, turn
2. Row 1: Dc each St across, Ch 1 turn
3. Row 2 Paddle Stitch (PSt): Hdc, Hdc (1st St, Sk 1, 3rd St) together, *Hdc (prev sk St, Sk 1, next St) together, Rep(*) until the last St, Hdc on the last St, Ch 1 turn.
4. Row 3: Rep Row 2
5. Next Rows: Rep Row 1 – 3 for a total of 27 [31/ 35/ 39/ 43] [47/ 51/ 55/ 59] rows or until you have reached your pref width/size. Measurements above has a negative ease of -1in / -2.5cm
6. Bind off.
PART 2: Front Panel
Chain the same number of chains done for the back but less 10 Chains. The Front panel will be shorter than the Back panel
1. Foundation Row: Ch 81 [88/ 95/ 102/ 109] [116/ 123/ 130/ 137] + 1, turn
2. Row 1: Dc each St across, Ch 1 turn
3. Row 2: PSt across, Ch 1 turn
4. Row 3: Rep Row 2
5. Next Rows: Rep Row 1 – 3 for a total 6 [8/ 10/ 10/ 12] [12/ 14/ 16/ 18] rows or until you have reached your pref strap vs neck width.
6. Reduce Next Row: Place a SM on the 12 [14/ 14/ 14/ 14] [14/ 14/ 15/ 15]
St on the bottom of the prev row, Ch 1 turn and cont to PSt / DC until the SM.
(a) If you are on a DC row, DC2tog on the last 2 Sts
(b)If you are on a PSt row, omit the single Hdc St.
7. Next Rows: Ch 1 turn, reduce the next St ref to (a) or (b), and cont
to St across, Ch 1 turn,
8. Next Row: St across and reduce the last St ref to (a) or
(b), Ch 1 turn
9. Next Rows: Rep Steps 7 & 8 for a total of 7 [7/ 7/ 9/ 9] [11/ 11/
11/ 11] rows , Ch 1 turn
10. Next Row: Cont to St across (No reduce)
11. Increase Next Row: Cont to St across until the last St, then
ref to (c) or (d) below:
(c) If you are on a DC row, 2DC on the last St
(d) If you are on a PSt row, 2Hdc on the last worked St
12. Next Rows: Cont to increase each row at the top/ neckline for a total
of 7 [7/ 7/ 9/ 9] [11/ 11/ 11/ 11] rows.
13. Next Rows: On the last St, Ch 12 [14/ 14/ 14/ 14] [14/ 14/ 15/ 15],
Ch 1 turn
14. Next Rows: Depending on what stitch you were working on the prev
row, rep Row 2 – 4 in the correct order for a total of 6 [8/ 10/ 10/ 12] [12/
14/ 16/ 18] rows or the same number of rows as the other
strap.
15. Bind off.
PART 3: Sleeves
Using your 3.5mm hook
1. Foundation Row: Ch 81[81/ 81/ 81/ 78] [79/ 79/ 79/ 77], Ch 1 turn
2. Row 1: Sc 30, Place a SM on the last Sc St, Dc across, Ch 1 turn
3. Row 2: PSt across until SM, Sc BLO ,Ch 1 turn
4. Row 3: Sc BLO until SM, PSt across, Ch 1 turn,
5. Next Rows: Rep Row 1 – 3 for a total of 26 [28/ 30/ 32/ 34][36/ 38/ 40/ 42] rows.
6. Fold the sleeve in half lengthwise and Sc both sides together.
7. Bind off and make a second sleeve
PART 4: Seaming Sides
1. Place the front and back panel together and prepare your SMs
2. With your measuring tape, measure 6.5 [7 / 7.5/ 8 / 8.5] [9 / 9.5/ 10/ 10.5] in or 16.5 [17.8/ 19.1/ 20.3/ 21.6] [22.9/ 24.1/ 27.9/ 29.2] from the top strap down to mark your armhole. Place a SM, and rep on the other side.
3. Next measure 3in/ 7.6cm from the bottom front panel to mark the side slit. Place a SM, and rep on the other side.
4. With your 3.5mm hook, Sc both panels together starting with the straps, followed by the sides from SM to SM.
5. Bind off
PART 5: Attaching Sleeves
1. Turn sleeves RS out and place the sleeve
in between the front and back panel (WS), aligning the armhole together.
2. Place SM to secure all sides in place and Sc
both pieces together in the round. Slst to close.
3. Bind off and rep on the other side.
PART 6: Finishing Neckline
1. Place your 4.5mm hook along the neckline (RS), and Dc each St in the round.
2. For the row side, space out each St evenly.
3. Slst to close and bind off.
4. Weave in all loose ends.

END

And you’re done! If you have any questions about this pattern, do check out the video tutorial or get in touch with me by dropping a comment below.
And don’t forget to tag me on Instagram and Facebook @theknottylace, I would love to see your work!
If you are looking for the entire tools used to make this Heather Tunic Sweater Dress pattern, I’ve listed them all right here:
- 3.5 mm Clover Amour Crochet Hook
- 4.50 mm Clover Amour Crochet Hook
- Caron Simply Soft Heathers (Heather Gray)
- Heather Tunic Sweater Printable PDF (Loaded with images)
By the way, If you would like to receive free written patterns and video tutorials straight into your inbox, you can join our mailing list now.
Happy hooking,
Shaz 🌺