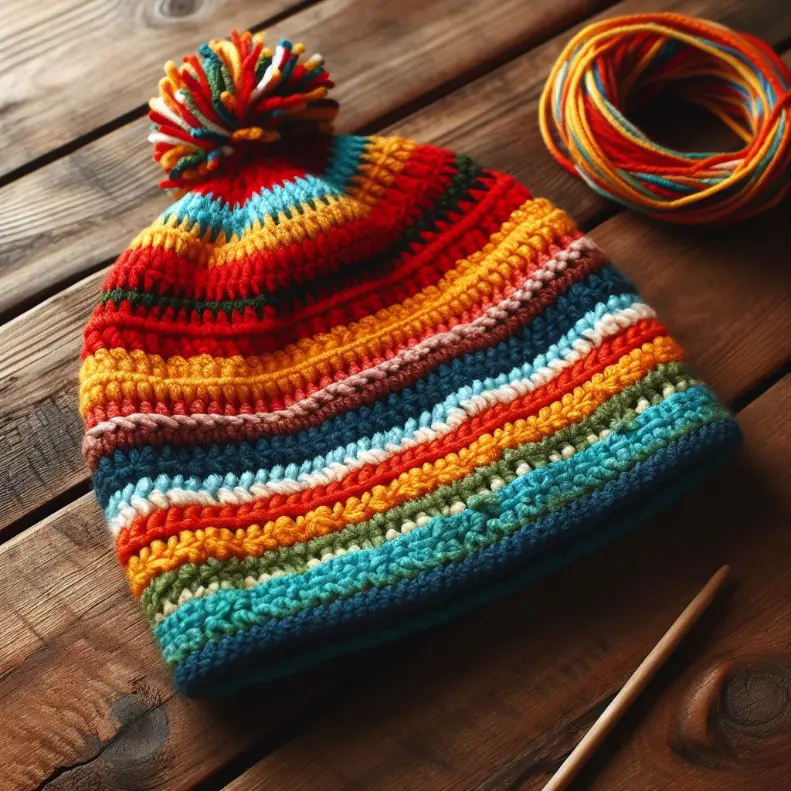
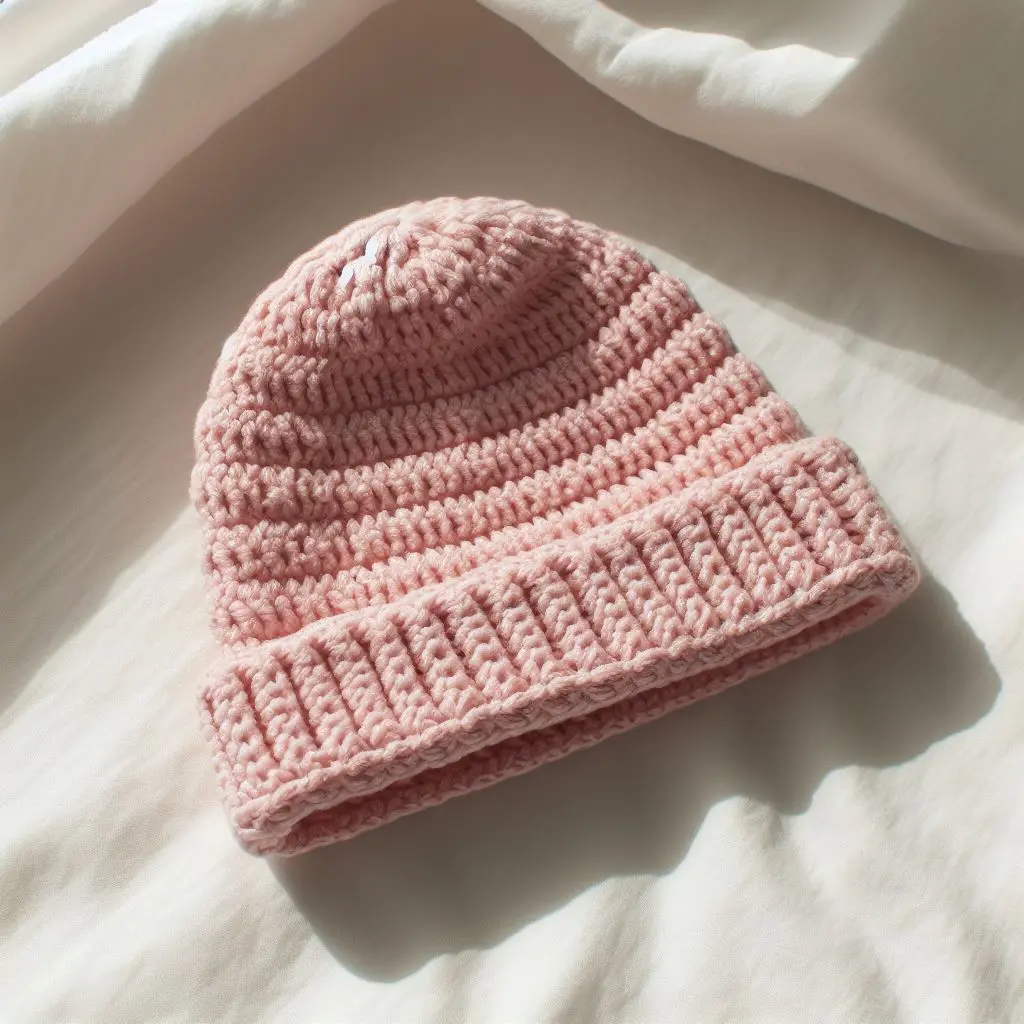
What Yarn to use for Crochet Beanies?
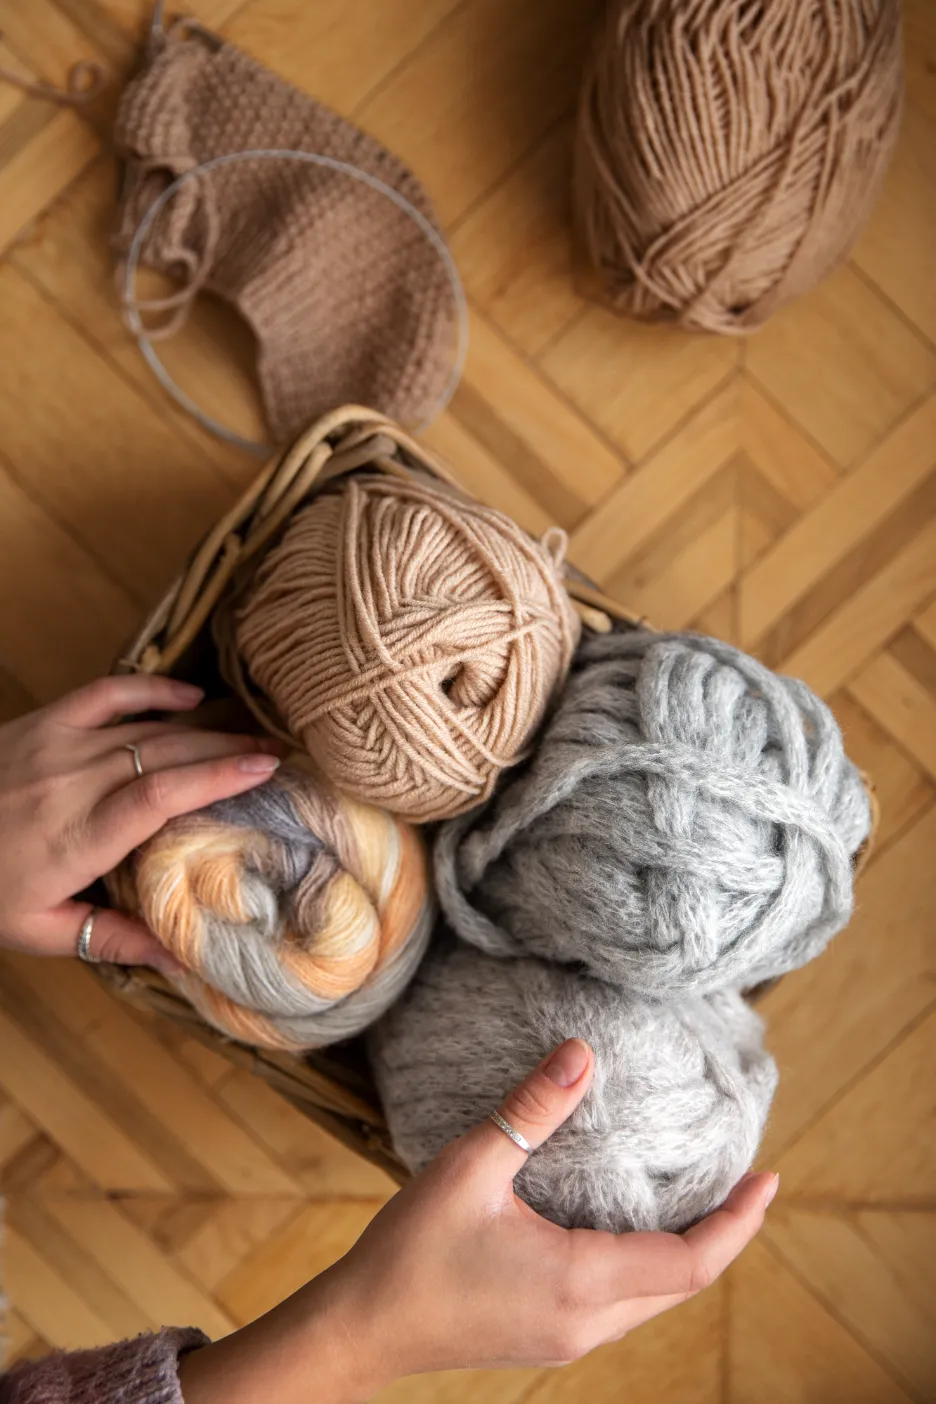
Selecting the perfect yarn for your beanie can be a daunting task with the array of options available. The weight and fiber content both play a crucial role in determining the final drape, comfort and feel.
First, let’s talk about yarn weight. Think Goldilocks, but instead of porridge, imagine the perfect fit for your beanie. The worsted weight yarn / medium (category 4), is the perfect balance in the yarn family. Not too bulky, and not too thin and it offers the perfect balance of structure and drape.
Picture a beanie that hugs your head without smothering it, offering warmth without weight, and holding its shape all day long. Worsted-weight wool yarn is the Goldilocks-approved choice for a versatile and polished beanie.
Now, onto the understanding of fiber content. Wool whispers luxury with its unmatched softness and warmth, but sometimes you need something on a budget.
Acrylic yarn is the vibrant and affordable friend. It offers a rainbow of colors and warmth. But what if you could have both? Combining a blend of acrylic and wool creates the ultimate beanie yarn duo.
Imagine the softness of a cashmere cloud, bright colors, and the budget-friendly charm, that’s the power of a wool-acrylic blend.
If acrylic yarn is not your ideal choice, opt for a cotton blend medium-weight yarn and double up the strand for a thicker choice!
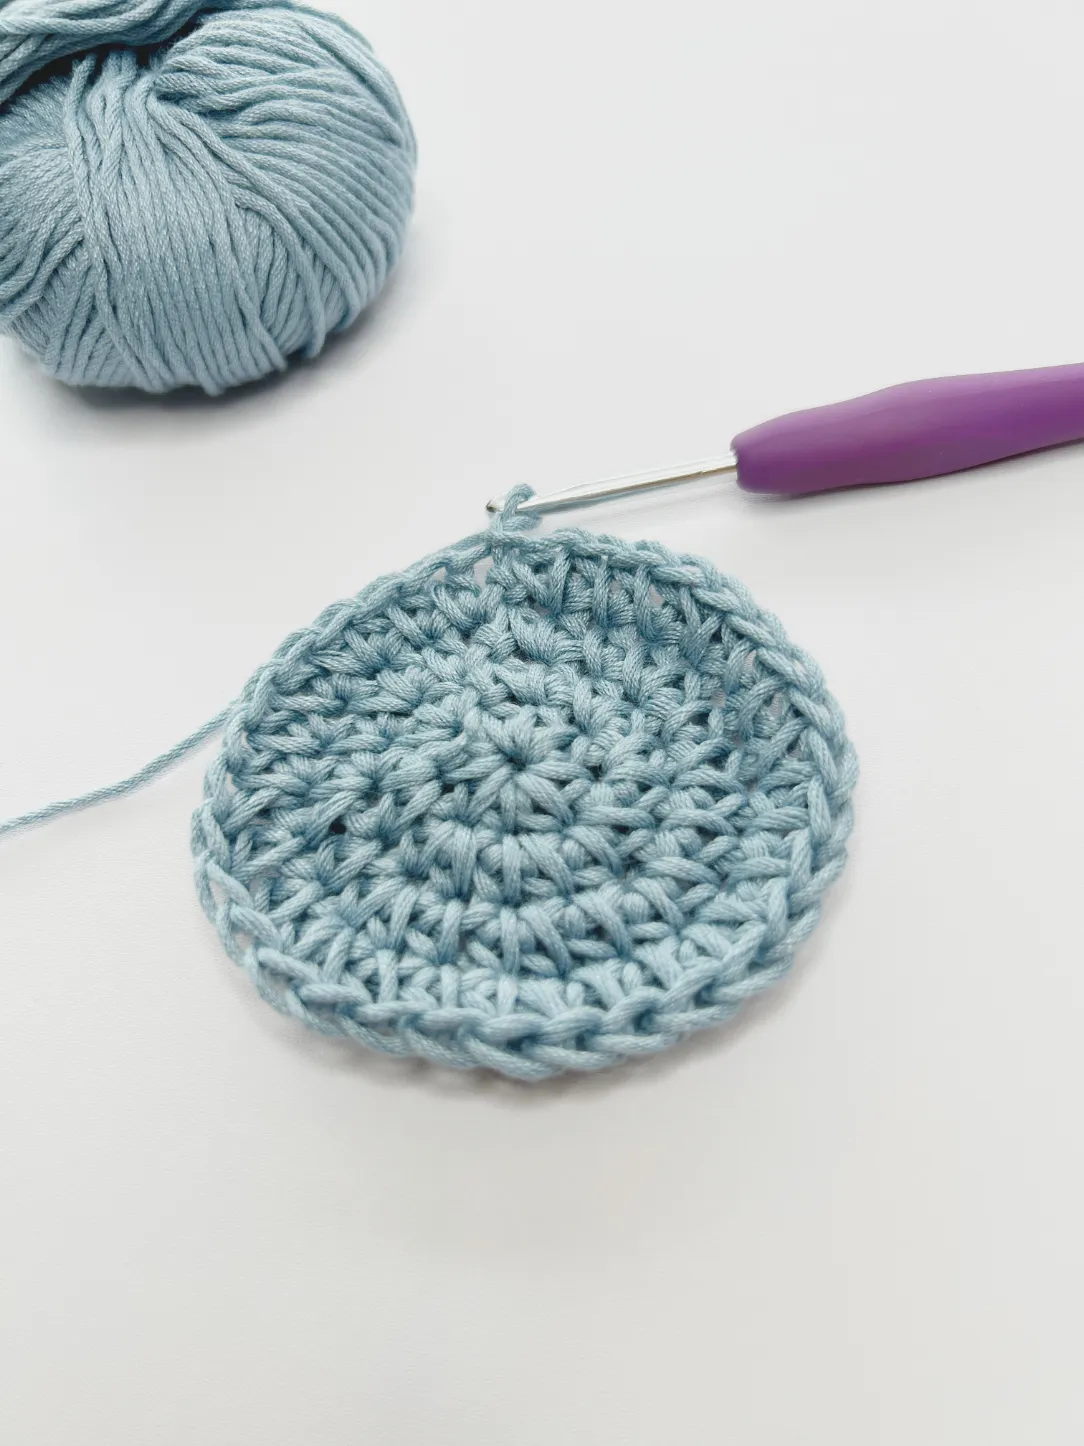
Magic Circle Made Easy
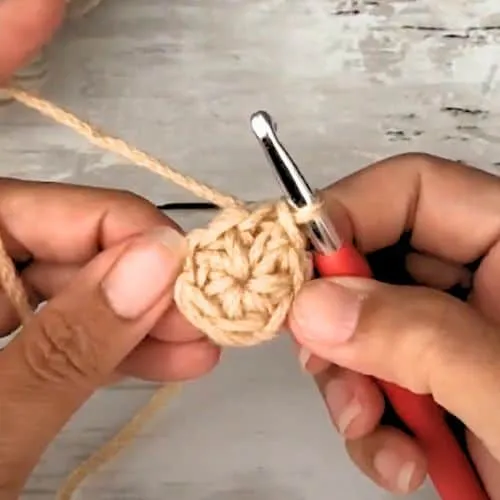
The magic circle, also known as the magic ring, is a crochet technique with a distinct purpose—to create a seamless starting point from the top of the beanie that is then worked in the round. This will leave you with a smooth and round finish.
The primary purpose of the magic circle is to eliminate that weird bumpy top or hole that typically forms at the crown of the beanie when not using the magic ring.
Crafters can control the tightness of the center ring by pulling the yarn tail, allowing for a customized fit that suits the specific requirements of the project. This technique also ensures a starting point that seamlessly integrates with the circular nature of these projects, maintaining a uniform appearance.

This nifty technique isn’t just about aesthetics, though a smooth, professional-looking beanie is certainly a perk. The magic circle’s true power lies in its functionality. Instead of starting with a chain that creates a hole in the center, the magic circle forms a snug, adjustable ring.
Learn more through this beginner-friendly picture tutorial here or watch the full step-by-step video tutorial on how to quickly whip up a magic ring done in two ways.
Getting the Right Measurements
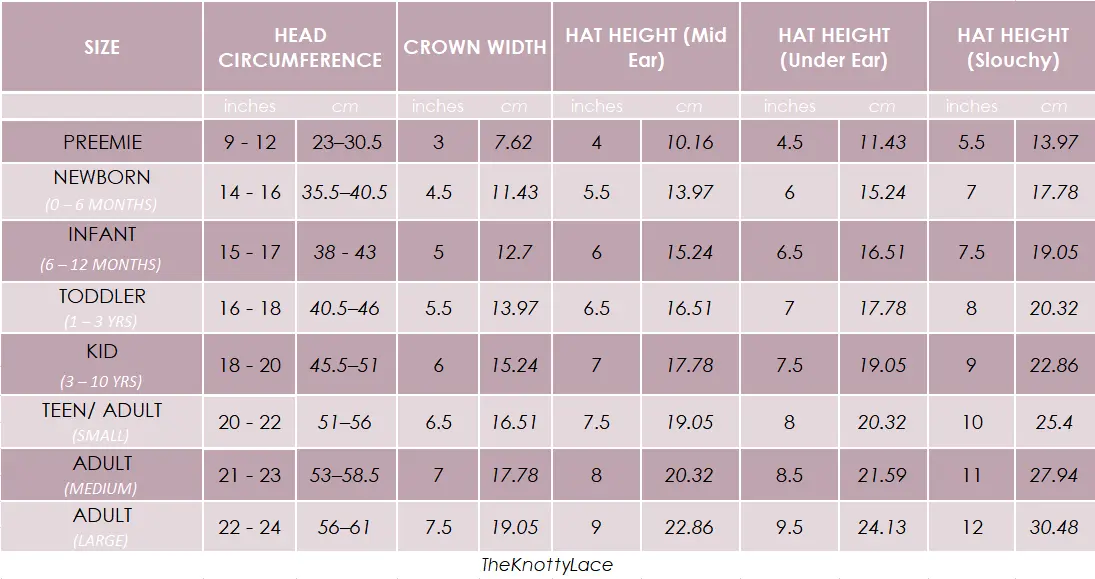
Any basic adult size crochet beanies can easily be adjustable to any size if you’re thinking about making one for each family member. The key is to know your gauge and to refer to the measurement chart above.
Ensuring the right fit for your crochet beanie can be a challenge, but by focusing on a few key strategies, you can transform fit challenges into a thing of the past and confidently create beanies that hug comfortably and stylishly.
Most written patterns would include all the number of foundation chains for each size to start with, but if it doesn’t or you’re making your own custom size, then I’ll show you exactly how to correctly measure the head circumference and the amount of length needed.

Consider the recipient (or your own preferences) when deciding on the overall fit. Begin by measuring the head circumference of the wearer with a soft tape measure. This baseline measurement is crucial for determining the appropriate width.
Different crochet stitches vary in stretchiness, so choose your stitch pattern with elasticity in mind. Adjust your measurements as you go to account for stitch patterns with limited stretch.
Next, consider the depth and length factor, by adjusting the length of the beanie based on the wearer’s style preference such as a slouchy or snug finish.
For a slouchy fit, add extra rows to the body and use a lightweight yarn. And for a snug fit, stick to the recommended number of rows or reduce them slightly.
Consistent tension is the cornerstone of a well-fitting beanie. Practice on a gauge swatch before beginning any crochet project, honing your control and ensuring a predictable outcome.
The size of your crochet hook and yarn weight will significantly influence the beanie’s fit. Switch to a larger hook if it’s too tight or a smaller one if it’s too loose. Experiment with different sizes to achieve your ideal tension.
Keep in mind that, when using a different hook size and yarn weight from the recommended pattern will result in a different amount of yarn yardage required.
Here is a table with approximate yardage requirements for crochet hats in different sizes and yarn weights:
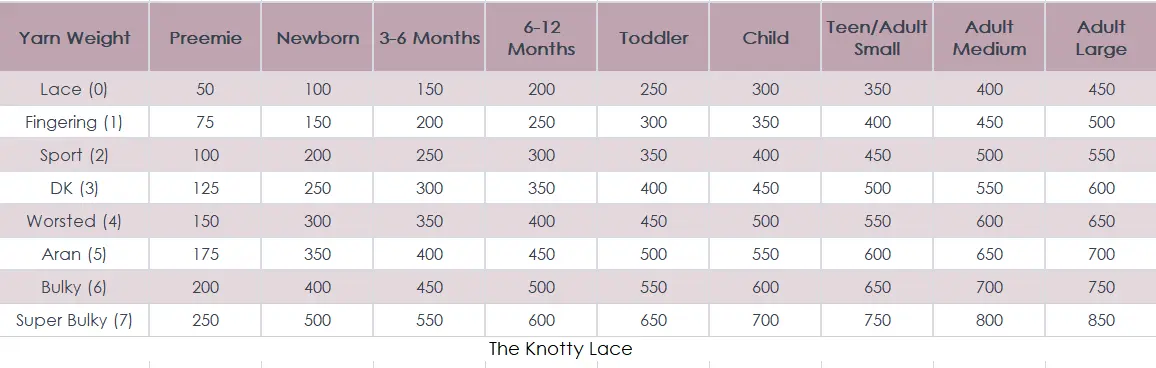
Note: Values are in yards. These are general estimates, and actual requirements may vary based on the specific pattern, stitch, and individual tension. Always check your pattern for the most accurate information.
Regularly checking your stitch count is crucial. This simple routine ensures you’re not accidentally adding or subtracting stitches, leading to unexpected surprises at the crown.
Always use a stitch marker to mark any increases or decreases, at the beginning of the first stitch or at the end of the row.
As you crochet your beanie, tweaking details, constantly measuring (trying it on), and seeking feedback ensures your creation goes smoothly Don’t shy away from revisions, as this will only bring you much closer to the perfect handmade beanie made by you.
If you would like to see more video tutorials like this you can check them out here on the blog or Subscribe to my Videos on my YouTube Channel.
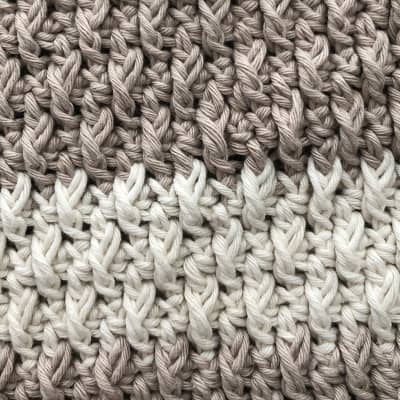
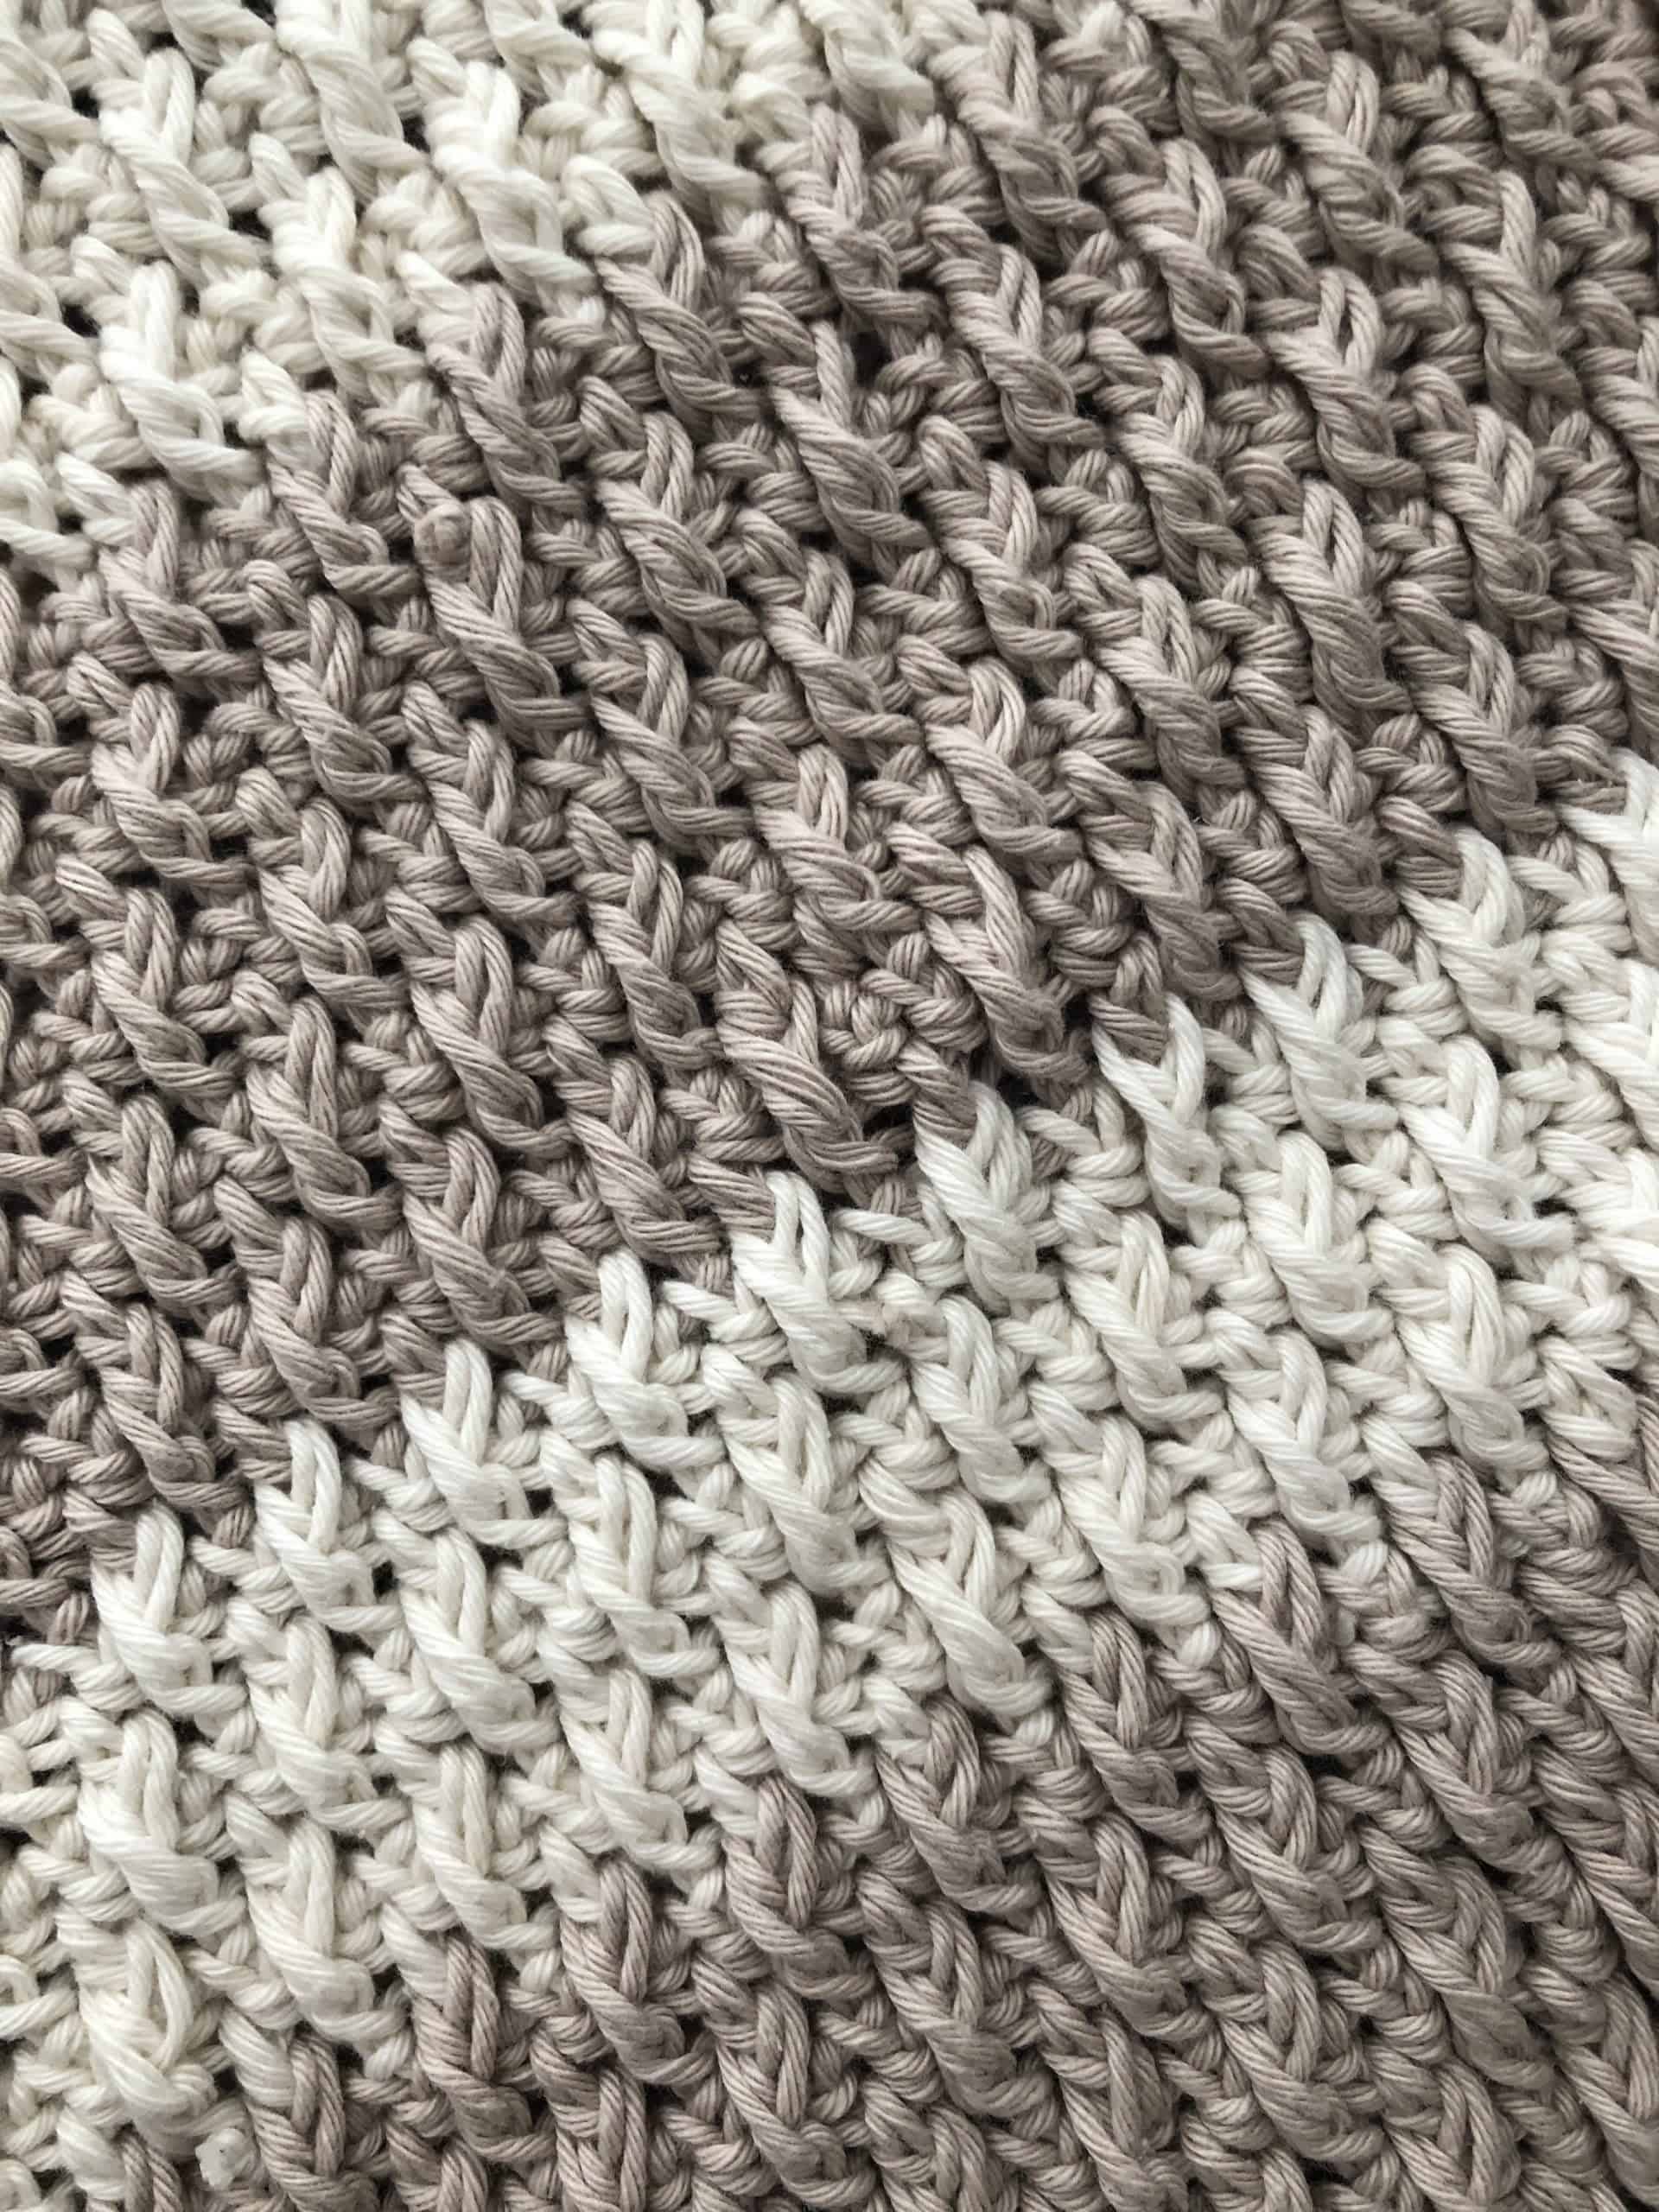
Basic Crochet Stitches
Choosing stitches for your first beanie doesn’t have to be a head-scratcher! Forget the fancy footwork – simple friends like the double crochet, half double crochet, and single crochet stitch are all you need for a cozy beanie. These basic stitches work up quickly, are easy to learn, and will create a smooth finish fabric that’s perfect for a beginner beanie.
Find an easy stitch pattern like this beginner-friendly Easy Beanie Hat which is also a free pattern that uses simple stitches and even throws in the “back loop stitch” for good measure. Don’t let the fancy name fool you. The back loop stitch is just a quick work at the back of a stitch, adding that subtle texture and stretch to your project – think ribbing!
So keep it simple, pick your favorite stitch, and remember, less is often more, and with these basic stitches as your foundation.
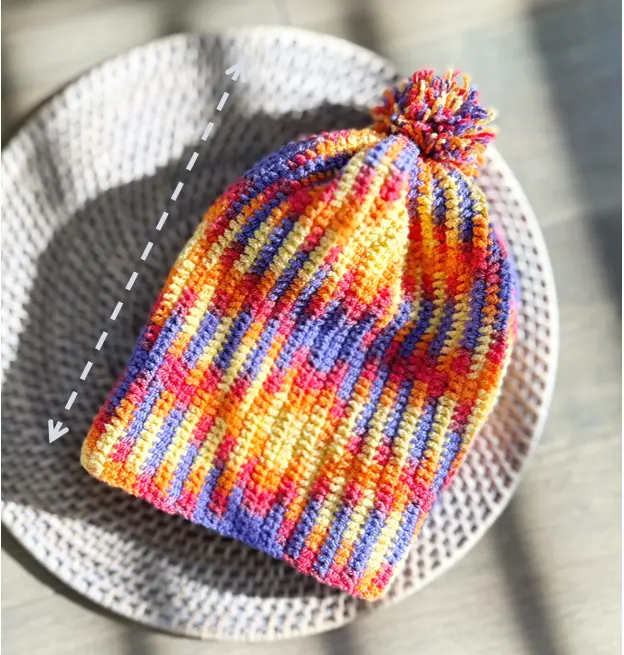
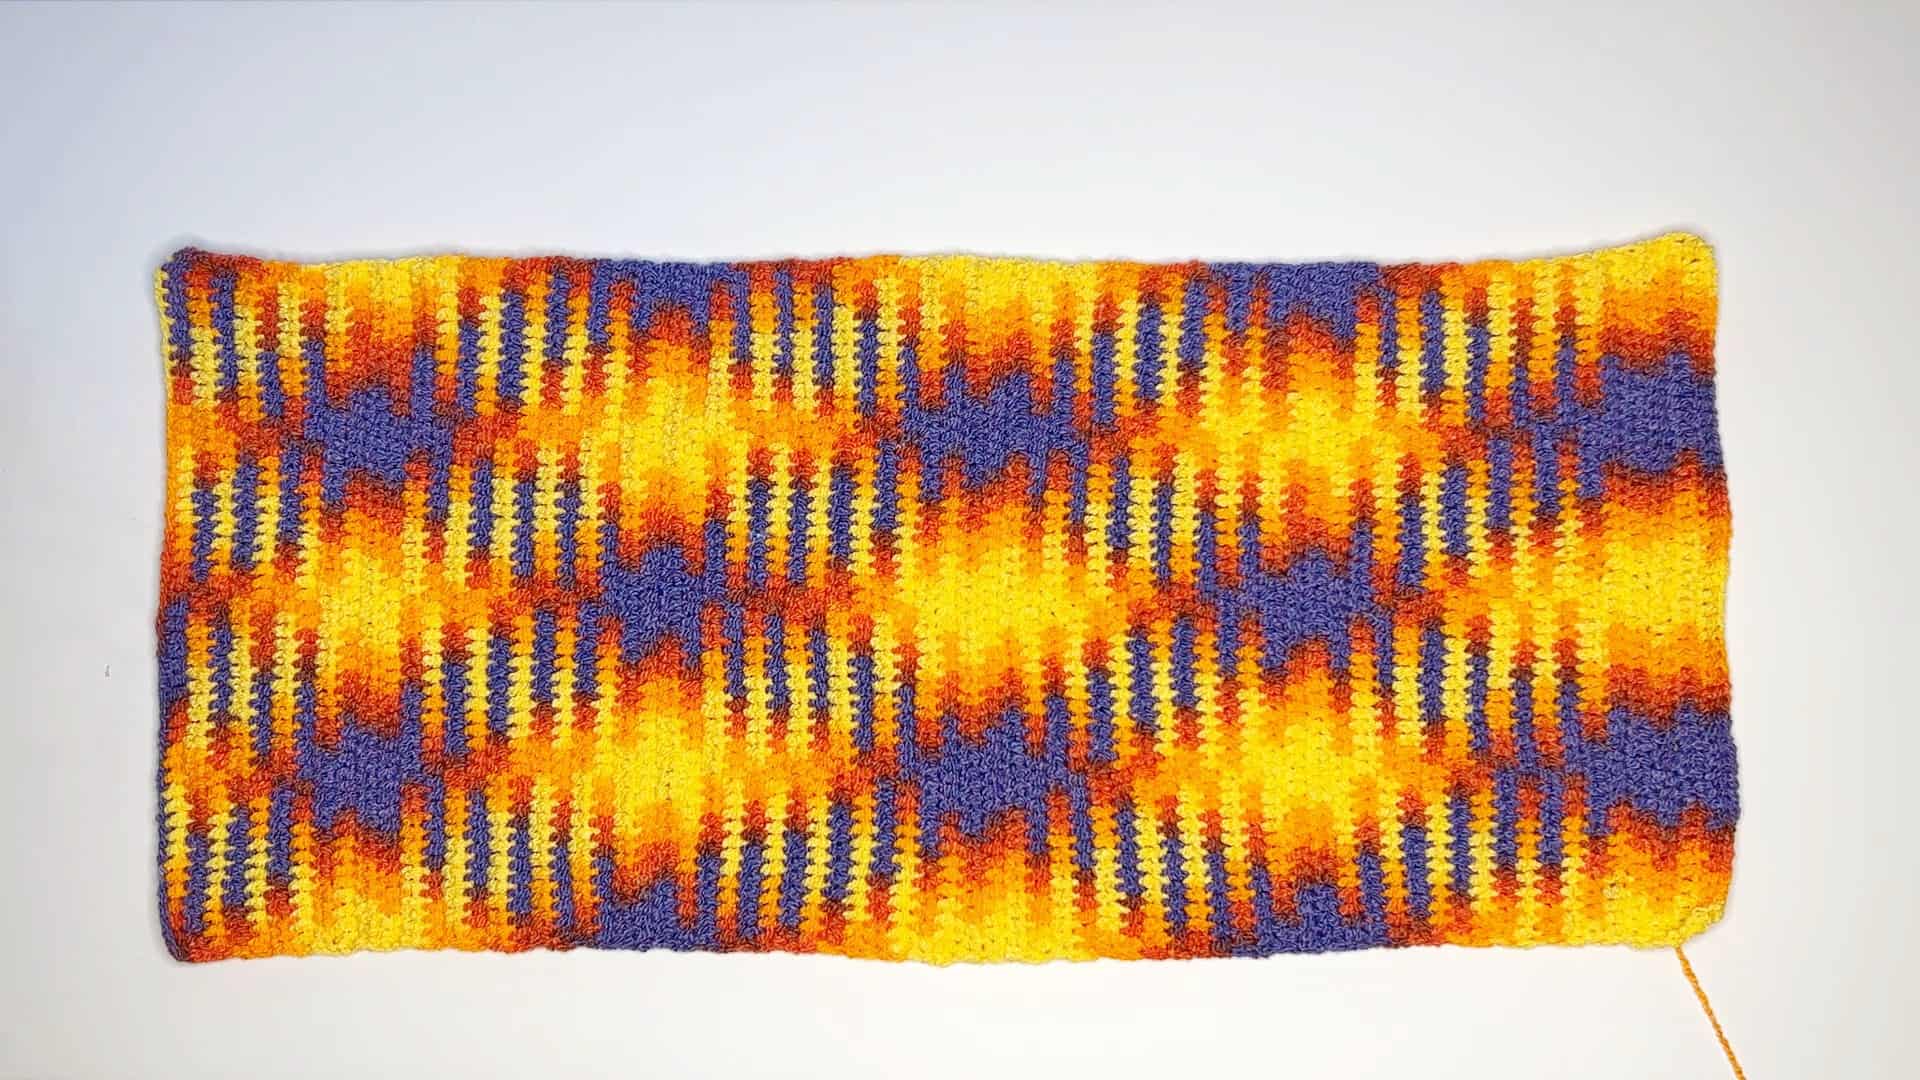
Seamless Color Changes without any tails
Changing colors in a crochet beanie adds vibrancy and personality to your project, but the transition can be a source of concern for many crafters. The fear of creating a messy or jagged switch from one color to another often lingers.
Let’s explore color-changing techniques to ensure your color changes are not only seamless but also add a professional touch to your beanie.
Before starting a new project with multiple color changes, you will first lay out your yarn and plan the sequence of colors. Visualize how they’ll interact to create a harmonious design. Next, create a color swatch to ensure your colors go well together.
To change colors seamlessly, just before your last stitch, you will pick up your next color and draw up that new color to close up that last stitch ( refer to image 2 – 3 below).
Make sure to do this before and not after. Next, you will drop the old color and continue with your new color change.
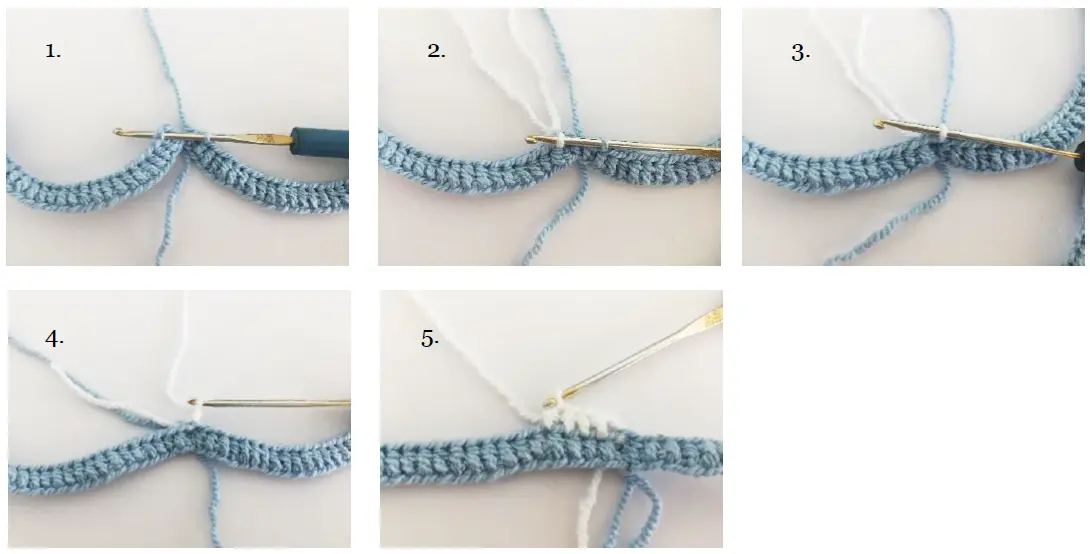
But before going straight to your next stitch, let’s tidy up those loose ends.
After making that first color change, you will continue with the next stitch while picking up the yarn tail and working around it. Snip off any access tail after making no less than 5 stitches over them.
This will eliminate the need for weaving them in later with a yarn needle or a tapestry needle. Remember, consistent tension is your key to avoiding gaps and distortions across color changes.
With numerous color changes, that might seem like a nightmare for most, but if done correctly this technique will save you hours of your time!
For better visualization, you can watch How to Color Change without Leaving any Ends video tutorial here.
Troubleshooting Beanie Fitting
First, tension is super important. Having a consistent tension that is not too tight or loose is the key to creating the perfect hat. Try switching to another yarn or crochet hook size to get the right flow and consistency on your hands. Practice on a small swatch before embarking on your beanie crochet piece.
And speaking of hooks, having a few sizes at hand is crucial. If your beanie feels like a vice grip, a larger hook will loosen things up for a comfy drape. On the flip side, a floppy hat can be tamed with a smaller hook for a tighter fit. Find the hook that strikes the perfect balance between snug and slouch.
Also, keep a watchful eye on each stitch count to avoid accidental expansions or shrinkage. Using stitch markers is always super helpful in marking your work.
And to further cozy up your winter collection here are some free crochet patterns ready to inspire, all paired with its own video tutorial to guide you stitch by stitch. Find the perfect pattern to match your personality and keep you warm.
Ways to Start a Beanie
Crafting the perfect beanie offers a blank canvas for both warmth and creativity. But where do you begin? While countless options exist, three fundamental approaches provide distinct journeys to your cozy masterpiece.
Top Down Approach
For those seeking ultimate control over shape and fit, this technique starts at the crown. Using the magic circle foundation which starts at the very top of the hat, and slowly increases on every row to form the crown.
Here is a great tutorial on how to increase every row seamlessly.
Once the circumference is achieved, the increase will stop and the length of the beanie will be worked all the way down. This method offers seamless integration and precise shaping.
The Rectangle Approach
If the magic ring seems too daunting, then the perfect solution for beginners would be to make a large rectangle based on your measurements. Then the sides are seamed together and the top is weaved close.
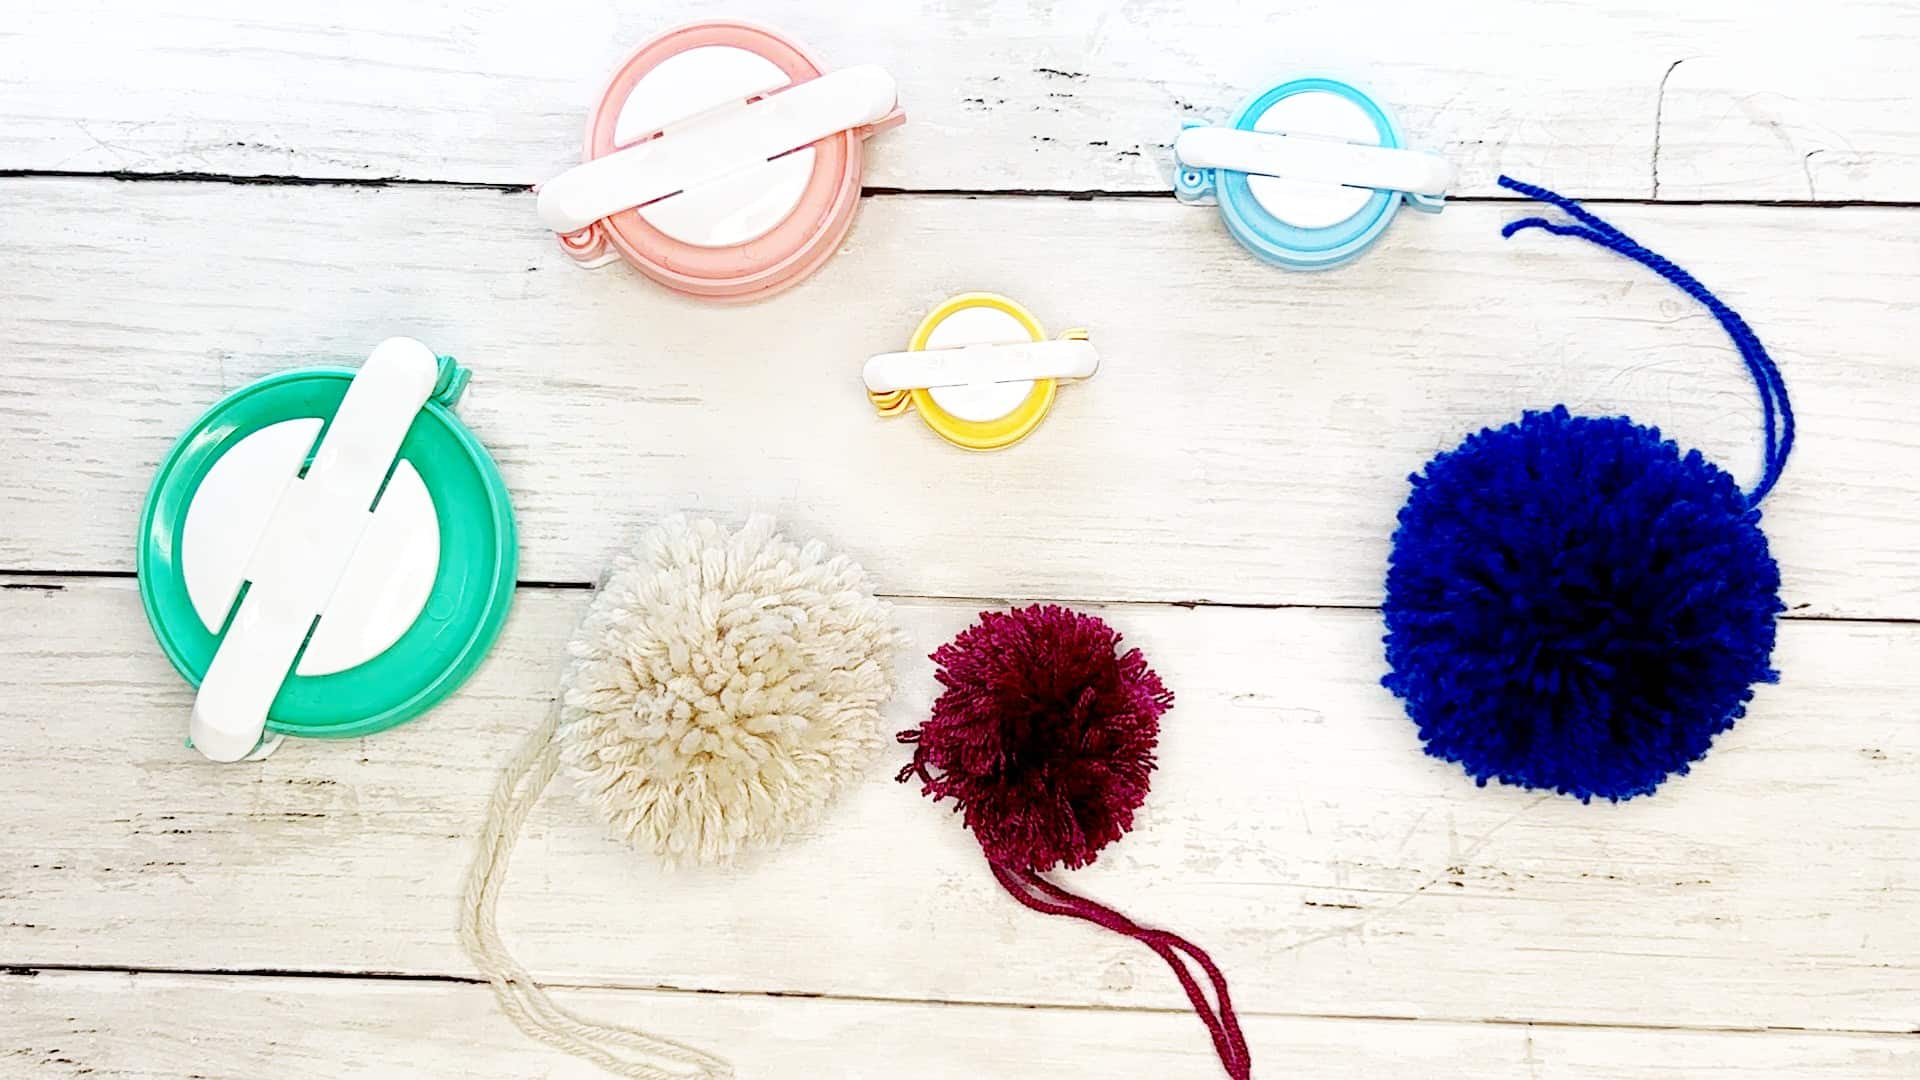
By adding a pom pom is always ideal for covering up the bumpy top. This method is great when showcasing bold patterns and is perfect for beginners seeking a simple foundation.
Related Post:
How to use a Pom Pom Maker
The Bottom Up Approach
If you prefer to work from the bottom up, then the ribbed bottom-up approach is the way to go. Starting with the ribbed band, you’ll spiral upwards, adding rows and shaping as you go.
This technique lets simple stitches and textured yarns shine, resulting in a polished, timeless piece. It’s ideal for those who enjoy working in the round from the outset. this will also guarantee a perfect fit by ensuring the width circumference fits first.
Once you’ve achieved the perfect fitting, you will then continue to work your way up and close in either the weave-closed method or by decreasing the number of stitches for a smoother top finish.
Here are a couple of Free Crochet Beanie Hat Patterns you might enjoy: